
McKinsey’s findings have shown that companies prioritizing personalizations garner 40% more revenue, indicating the hidden potential of custom or composite products.
Composite products are a great way to increase customer interest and boost sales. When you allow customers to choose products in their orders, it gives them a sense of exclusivity and makes shopping fun.
If you wish to set up composite products in your store, here is a complete guide. In this article, we will explore how to set up WooCommerce composite products from scratch and what are the benefits of doing so.
But first, let’s understand what composite products are.
What are Composite Products?
Picture assembling a gift hamper or configuring a computer with specific components—this is the essence of composite products.
Known as kit-builders or custom product builders, these products empower users to create unique end products by combining multiple sub-products.
Whether it’s customizing a car’s color, interior, and engine or curating a unique outfit, composite products greatly enhance the shopping experience.
Let’s say you offer computer parts (motherboards, RAM, graphics cards, and processors), you might create a composite product that lets buyers assemble their own PC.
They can have the option to add RAM, motherboard, monitor, and more items of their choice, and you can control which items they can shop for and which are restricted.
7 Steps to Build Composite Products
To build a Composite product in WooCommerce, you need to install a plugin, as this feature is not available by default. We recommend using the Composite Products in WooCommerce.
To get started, you can follow these steps:
- Install and Activate Composite Products Builder
- Choose Components for Composite Products
- Select a Pricing Mode
- Make Components Dependent
- Adjust Component Visibility and Hide Prices
- Set Limits on Orders
- Repeat the Process to Create More Composite Products
Now, we will explore all of the above steps in detail to get you started on composite products.
1. Install and Activate Composite Products Builder
Firstly, after you purchase the Configurable Products Builder plugin, you need to download its .zip file from your WooCommerce account and then install and activate it. Follow these steps to get started:
- Go to your WordPress Admin panel
- Select “Plugins”
- Choose “Add New”
- Click “Upload Plugin” to upload the .zip file
- Click “Install Now” and select “Activate”
As you activate the WooCommerce Configurable Products Builder, you will be able to add and customize composite/configurable products and make them dependent on each other.
2. Choose Components for Composite Products
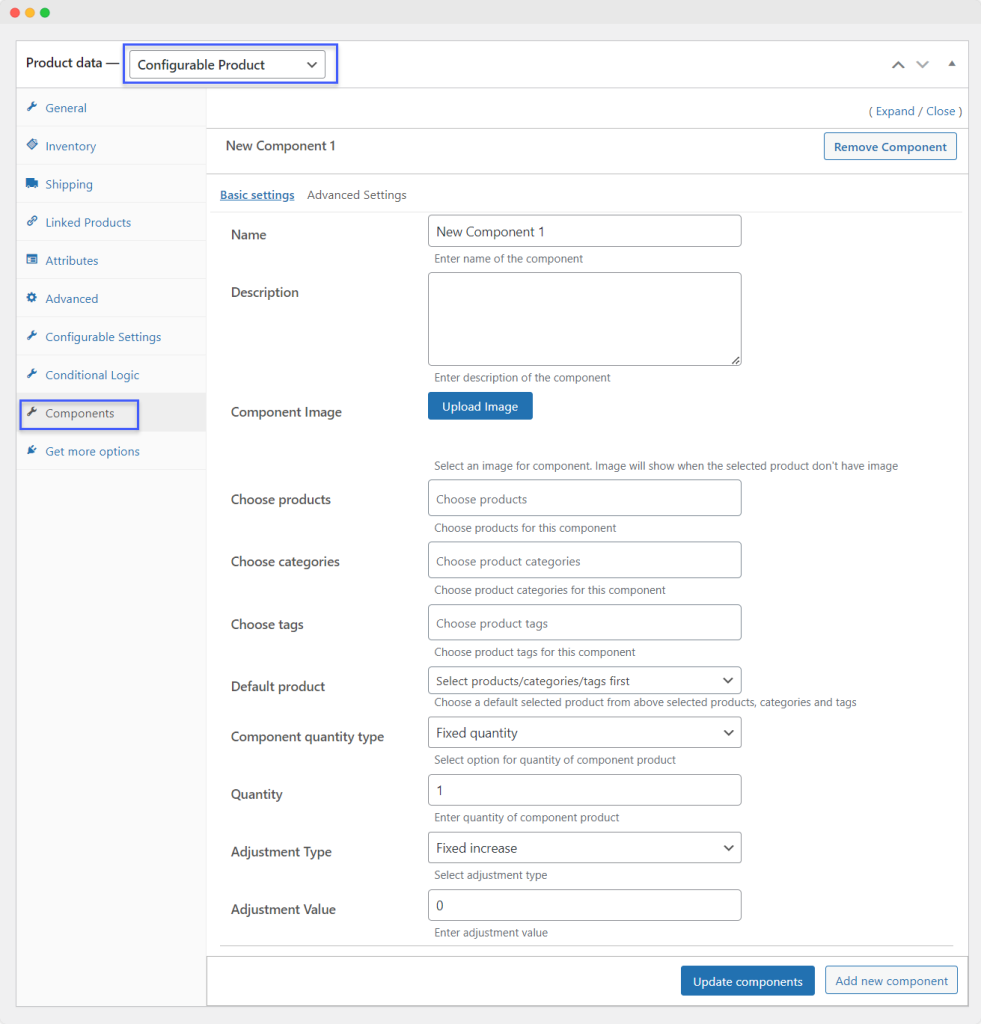
The 2nd step involves picking a product, adding multiple component options to it, and setting conditions for each component. You can add conditions to ensure each component is compatible with the other and allow users to pick and add the components they like.
Once a user views the list of components available and the high degree of customizability, it will encourage him to buy products in bundles, improving your store sales.
You can add multiple components and add a custom name, description, and image for each. Once a component is created, you are free to edit, update, or delete components as required.
3. Select a Pricing Mode
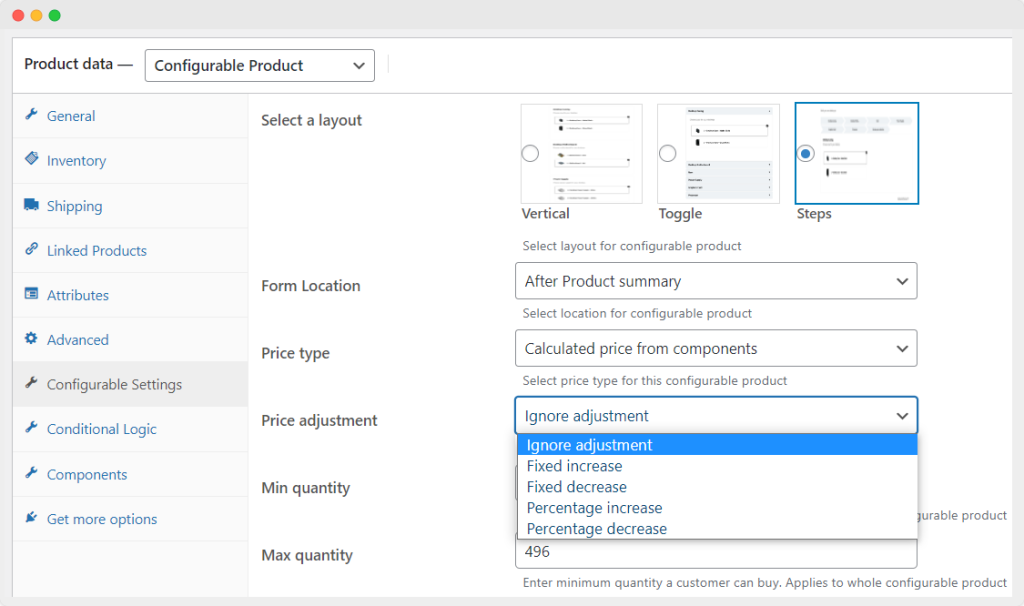
Now for the 3rd step, setting the prices for the components. The plugin gives you the option to set price types and price adjustments for the components. You can either set fixed prices for components or base + components prices for each component. After adding a base price, your customers will pay extra for each component added.
4. Make Components Dependent With Conditional Logic

Taking the PC example again, as you add components to it and make it a composite product, you can hide certain components in case the user chooses to add incompatible component options.
E.g., if he chooses 32GB RAM, you can choose to display only the compatible motherboard options for the customer to choose from.
5. Adjust Component Visibility and Hide Prices
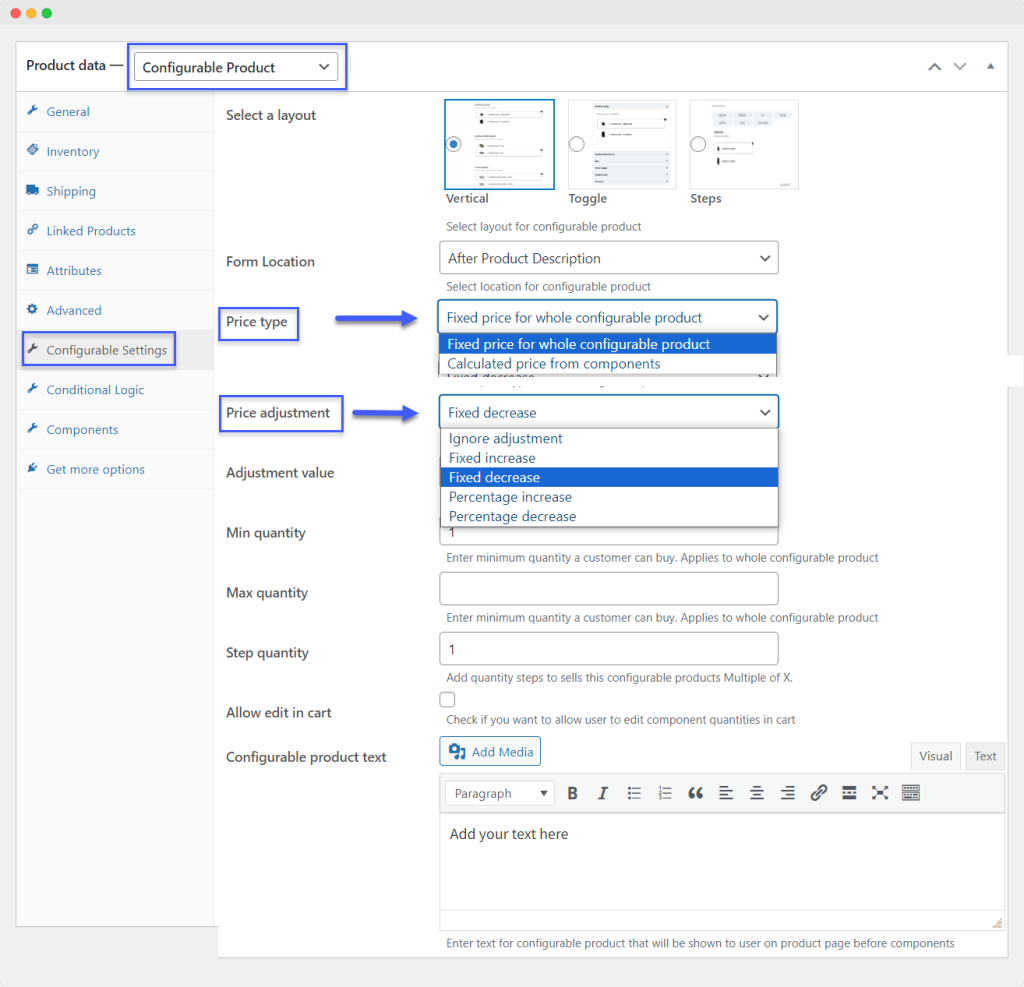
Manage how components appear to users with advanced component settings. Choose the listing style, select price types, and manage component visibility.
You can opt to show the stock availability of components to trigger FOMO. You can also hide or show stock messages on the dropdown, mark certain components as required/unrequired, and make components exclusive.
6. Set Limits on Order Quantity
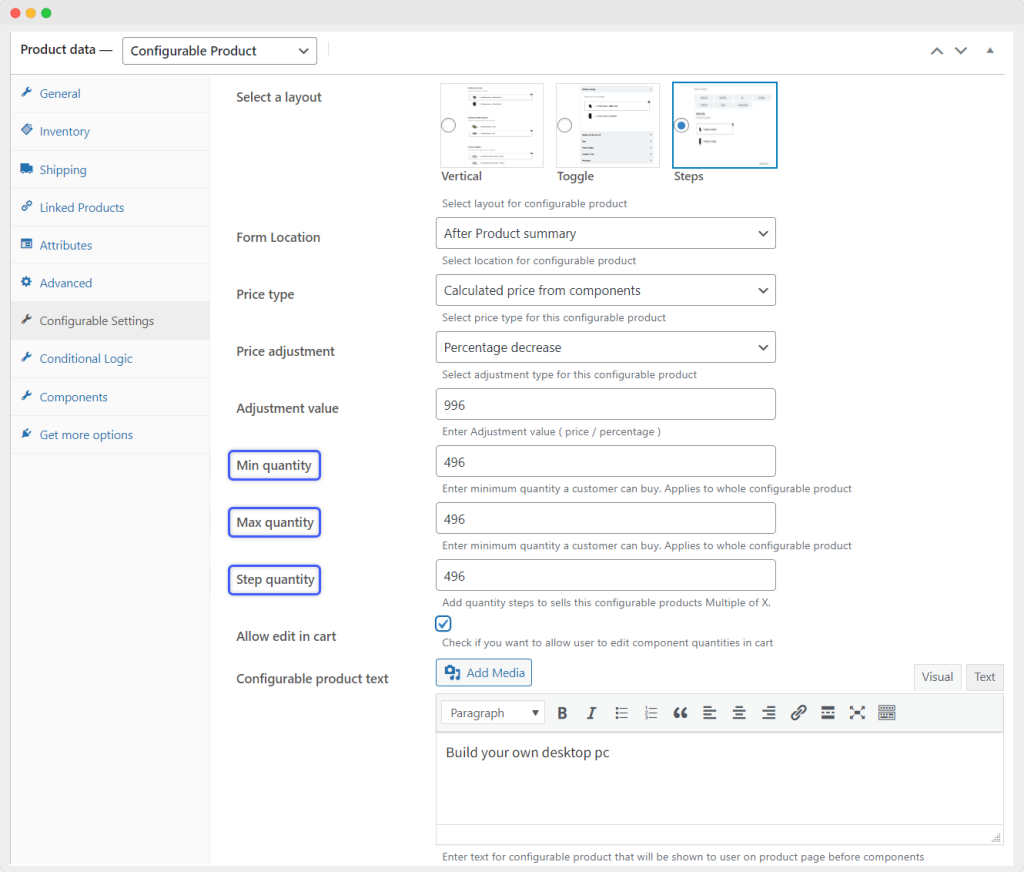
The last step is to set a range or step quantity to limit the amount of components a customer can order. You can restrict order quantity by adding min and maximum limits or allow customers to add quantity in multiples of X (X can be any chosen value).
7. Repeat the Process to Create More Composite Products
After going through the above process, you will have a successful composite product on your store. To create more composite products, you can go through the above process again and again.
Create as many composite products as you like, and make existing products more attractive to customers through personalization.
Benefits of Using Composite Products
Integrating composite products into your WooCommerce store unlocks a multitude of benefits for both you and your customers. The ability to create customizable product kits by combining multiple items empowers customers to tailor their product packages, enhancing the shopping experience and fostering satisfaction.
The advantages extend beyond personalization, streamlining inventory management by tracking each component separately, ensuring accurate pricing, and facilitating precise shipping calculations.
Key Benefits:
- Allow customers to build tailored products
- Increase customer satisfaction
- Efficiently manage inventory for each component
- Leverage support for various product types: Simple, bundled, downloadable/virtual, etc.
Notably, 79% of consumers express a willingness to pay more for personalized products, highlighting the potential for boosted sales and customer retention through the implementation of composite products.
Conclusion
So, that was our detailed guide on building composite products in WooCommerce. While you will need to install a plugin, once you have it in place, building a composite product will become a piece of cake.
With composite products, customers will have the freedom to customize their orders while you will experience a massive increase in sales.
Improve customer experience, make shopping fun, and grow your store with composite products.


