
Creating Order Approval Status Rules
To create order approval status rules in WooCommerce, follow these steps:
Log in to your WordPress admin panel.
Go to WP Admin Panel > Order Approval.
Click on “Add New” to create a new order approval rule.
Fill in Rule Details:
Title: Enter a descriptive title for your rule for future reference.
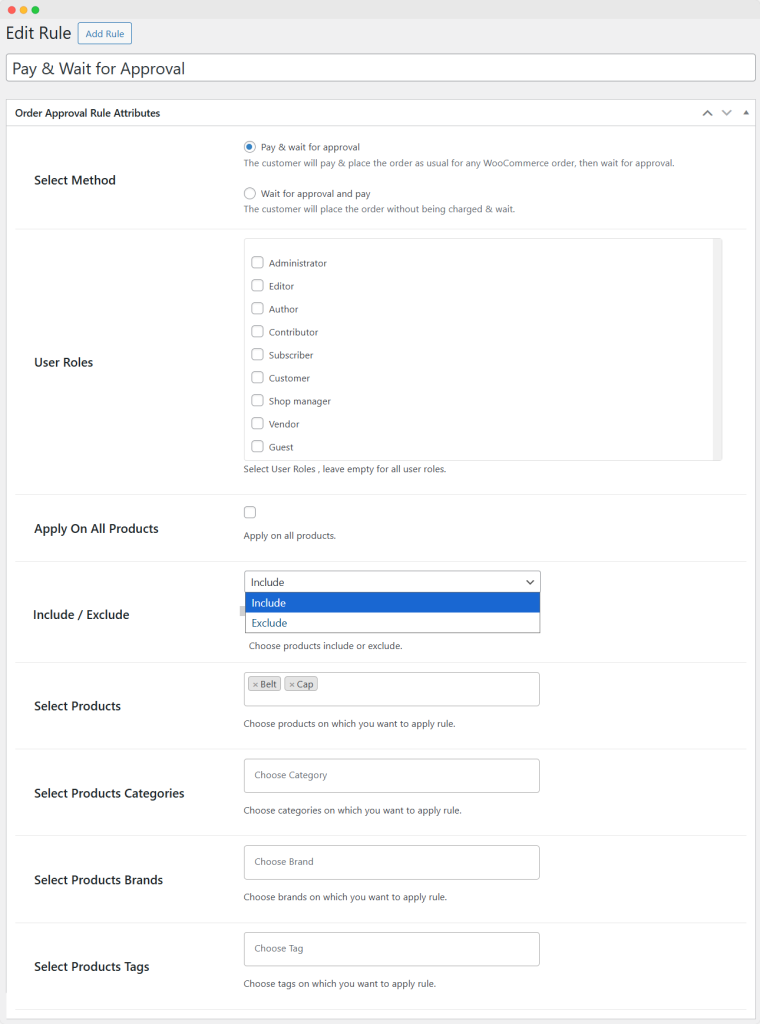
Order Approval Rule Attributes:
Select Method: Choose between “Pay & wait for approval” or “Wait for approval and pay” based on your preference.
- Pay & wait for approval: Customers pay for the order first, and then the order waits for approval.
- Wait for approval and pay: Customers place an order without immediate charges; payment is required later.
User Roles: Specify which user roles are affected by your rule. Leave empty for all users or select specific roles such as:
- Administrator
- Editor
- Author
- Contributor
- Subscriber
- Customer
- Shop Manager
- Vendor
- Guest
Apply on all Products: Enable this option if you want the rule to apply to all products in your store.
Select Products: Use this option to specify individual products to which the rule should apply.
Select Products Categories: Choose the categories on which you want to apply the rule.
Select Products Brands: Choose the brands on which you want to apply the rule.
Select Products Tags: Choose the tags on which you want to apply the rule.
Rule Priority: Assign a priority to your rule. Note that 0 will be the highest priority.
Order: Enter a numerical value for the order in which this rule should be applied.
Publish the Rule:
Click on the “Publish” button to save the rule settings.

By following these steps, you can create order approval rules with the specified attributes, defining how order approval will be handled for different user roles, products, categories, and tags. These rules provide flexibility in managing order approval status in your WooCommerce store.