
Managing All Product Quantity Rules in a Log
Go to PrestaShop > Addify Advanced Product Quantity and tap on the Rules option.
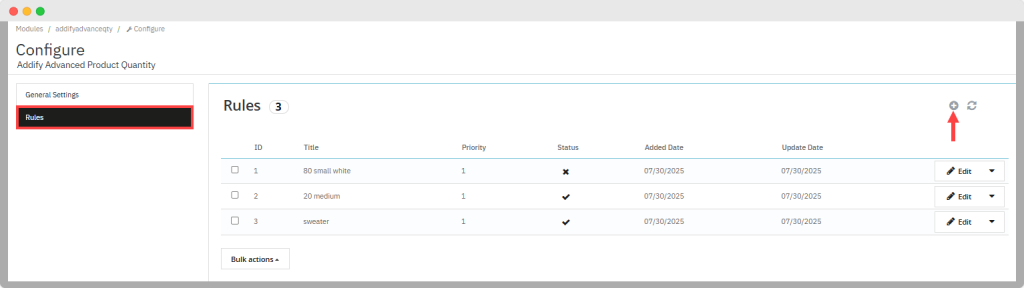
After clicking on the Rules option, you can view the
- List of rules that have already been created
- Option to refresh the list
- Option to add new rules to the list
- Add and update the Data to the list

Creating Multiple Rules to Limit Product Quantities
Create a new rule by clicking on the (+) icon. When you click on the Add New Rule icon, you can redirect to the Rule screen, where you can add the following details:
- Title: Add the customized name or title of the rule.
- Priority: Add the rule priority to handle multiple rules.
- Active: Enable or disable the rule.
- Rule Activation logic: You can enable or disable this logic. In case of enabling, you can:
- Apply rules through these conditions
- Apply the rule when all conditions are met (AND): Choose this radio button if you want to apply this condition.
- Apply the rule when any condition is met (OR): Choose this radio button if you want to apply this rule.
- Apply rules through these conditions
- Customer Group Access: You can enable or disable this option based on your needs. If you enable this option, the customer group will be open, and you can give access to:
- Visitor: Choose this option along with ID to give access.
- Guest: Choose this option along with ID to give this access.
- Customer: Choose this option if you want to give access to this user.
- You can also select all options simultaneously.
- Quantity type: You can select the quantity type, such as fixed, dropdown, default, or fixed custom value, from the dropdown.
- If you select the fixed option, you can:
- Fixed Quantity: Add the fixed quantity of product.
- If you select the dropdown option:
- Maximum Quantity: Add the maximum limit of product quantity.
- Minimum Quantity: Add the minimum limit of product quantity.
- Interval: Set the interval.
- If you select the fixed custom value option:
- Custom Quantity: Add the custom quantity value with a comma-separated list.
- If you select the fixed option, you can:

- All products: You can enable or disable this option. If this option is disabled, you can:
- Products: Enable this option and search for the products.
- Specific product combination: Enable this and search for the specific product combination.
- Categories: Enable this option and select the categories by using the category table.
- Supplier: Enable the supplier option and choose the supplier in the list.
- Manufacturer: Choose the manufacturer in the list after enabling this option.
- Product Price: You can enable or disable this option. In the case of enabling, you can add the:
- Minimum price: Add the minimum price of the product.
- Maximum price: Add the maximum price of the product.
- Stock value: Enable the stock value and add the:
- Minimum stock: Add the minimum stock of the product.
- Maximum stock: Add the maximum stock of the product.
- Product Weight: Enable the product weight and add the:
- Minimum weight: Add the minimum weight of the product.
- Maximum weight: Add the maximum weight of the product.
- First-time users: Enable this option to apply the rule for the new user.
- Order History: Enable the order history and add:
- Number of orders purchased: Enter the total number of past orders for the user to apply the rule.
- Rule Scheduling: Enable the rule scheduling option and schedule the rule by adding:
- Rule Validity from: Set the start date of rule validity.
- Rule Validity to: Set the end date of rule validity.
- Save: After applying all modifications, click on the Save button to apply them.


