
General Settings
From the top menu bar, click on General Settings > Trial Settings and fill in the following details:
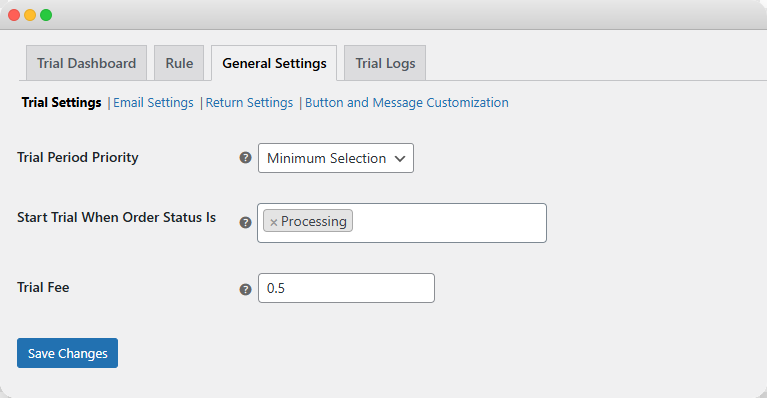
Trial Settings
- Apply Trial Period On: From the dropdown, you can select whether to apply trial period on:
- Minimum Selection: When multiple trial products are added to the cart, the shortest trial period will be applied to all items.
- Maximum Selection: When multiple trial products are added ot the cart, the longest trial period will be applied to all items.
- Start Trial when Order Status is: From the following, choose the order status that will activate the trial period:
- Processing
- Completeed
- On hold
- Pending Payment
- Trial Period
- Trial Fee: Enter trial product service fee charges
Email Settings
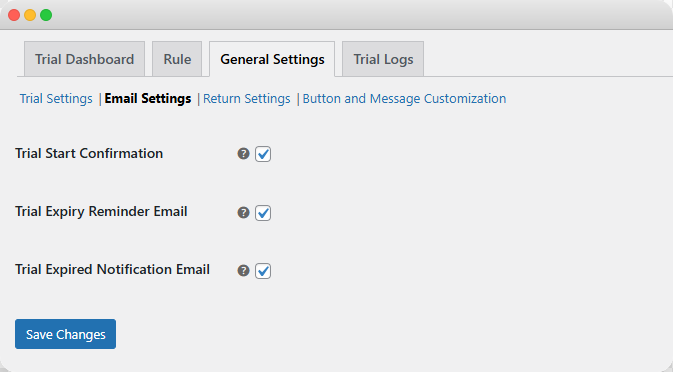
Remain on the same page and click on Email Settings:
- Trial Start Confirmation: Send an email to the customer when they request a product for the trial
- Trial Expiry Email Alerts: Send an email reminder before the trial period ends
- Send Email Trial Expired Alerts: Send an email to the customer when their trial has fully expired.
Return Settings
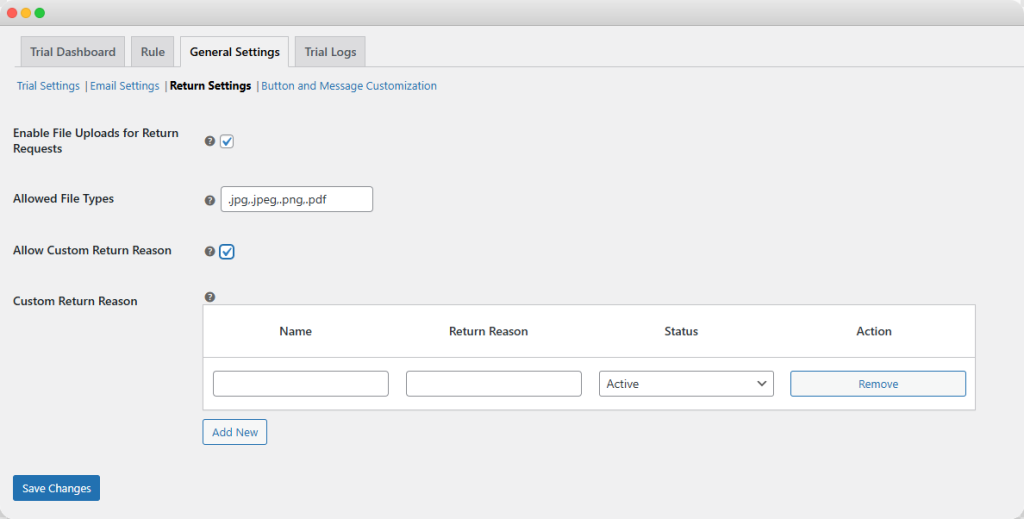
Remain on the same page and click on Return Settings:
- Enable File Uploads for Return Requests: Activate the option to allow customers to add files while submitting a return request
- Allowed File Types: Specify which file formats customers can upload
- Allow Custom Return Reason: Enable it to let customer provide their own reason for return in addition to pre-defined options
- Custom Return Reason: Here you can add customers:
- Name
- Return reason
- Status:
- Active
- Inactive
- Admins can review return requests and choose to approve or reject them
Button and Message Customization
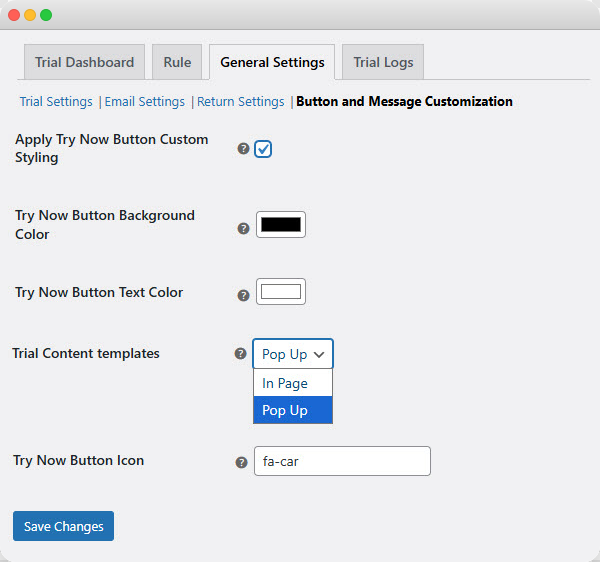
Remain on the same page and click on Button and Message Customization:
- Apply Try Now Button Custom Styling: Enable to add custom styling to your new try now button
- Add custom background and text color
- Trial Content templates: choose to show trial content template as:
- Pop-up
- In-page text
- Try Now Button Icon: Add a custom icon before try now text
Track Trial Orders from a Centralized Dashboard
Once you have configured the general settings, go to the main menu, click on “Trial Dashboard”. Here, admins can view the following details:
- Total active trials: Number of trials active till now
- Total trials ending this week: Number of trials that will end in the current week
- Total kept products: Number of products that are kept by the customers
- Total amount of kept products: Total value of the products that have been kept by customers
- Total shipping cost: Overall shipping cost for trial products
- Total returns: Number of products returned after the trial period
- Average return rate: Percentage of trial products that were returned
Admins can view an interactive graph for active trials.

Recent Trial Activity
From this section, you can view:
- Customer name: Name of the customer who has a trial
- Product name: Name of the product they selected for trial
- Trial status: Current status of the trial:
- Kept
- Returned
- Start date: Date when the trial begins
- Expiry date: Date when the trial period ends.

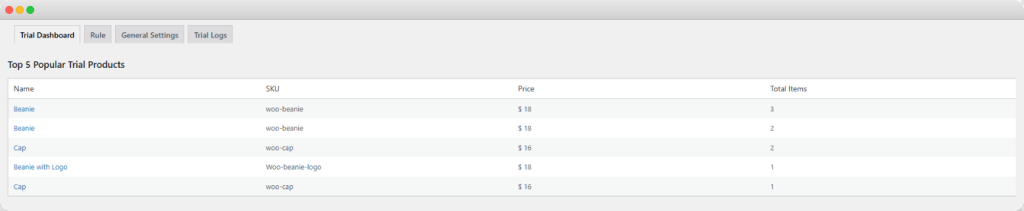
Top 5 Popular Trial Products
From this section, you can view:
- Product name
- Product SKU
- Product Price
- Total Items
Track and Manage Trial Logs
Go to the main menu and click Trial Logs. Here you can view the following details:
- Product Name: Name of the trial product
- Order ID: Unique ID of the trial order
- Customer name: Name of the customer using the trial
- Email: Customer’s email address
- Trial Start: Date when the trial began
- Trial End: Date when the trial period ends
- Trial Status: current status of the trial:
- Kept
- Purchased
- Return Reason: Reason provided by the customer for returning the product
- Return Status: Status of the returned product:
- Approved
- Rejected


