General Feature Setting
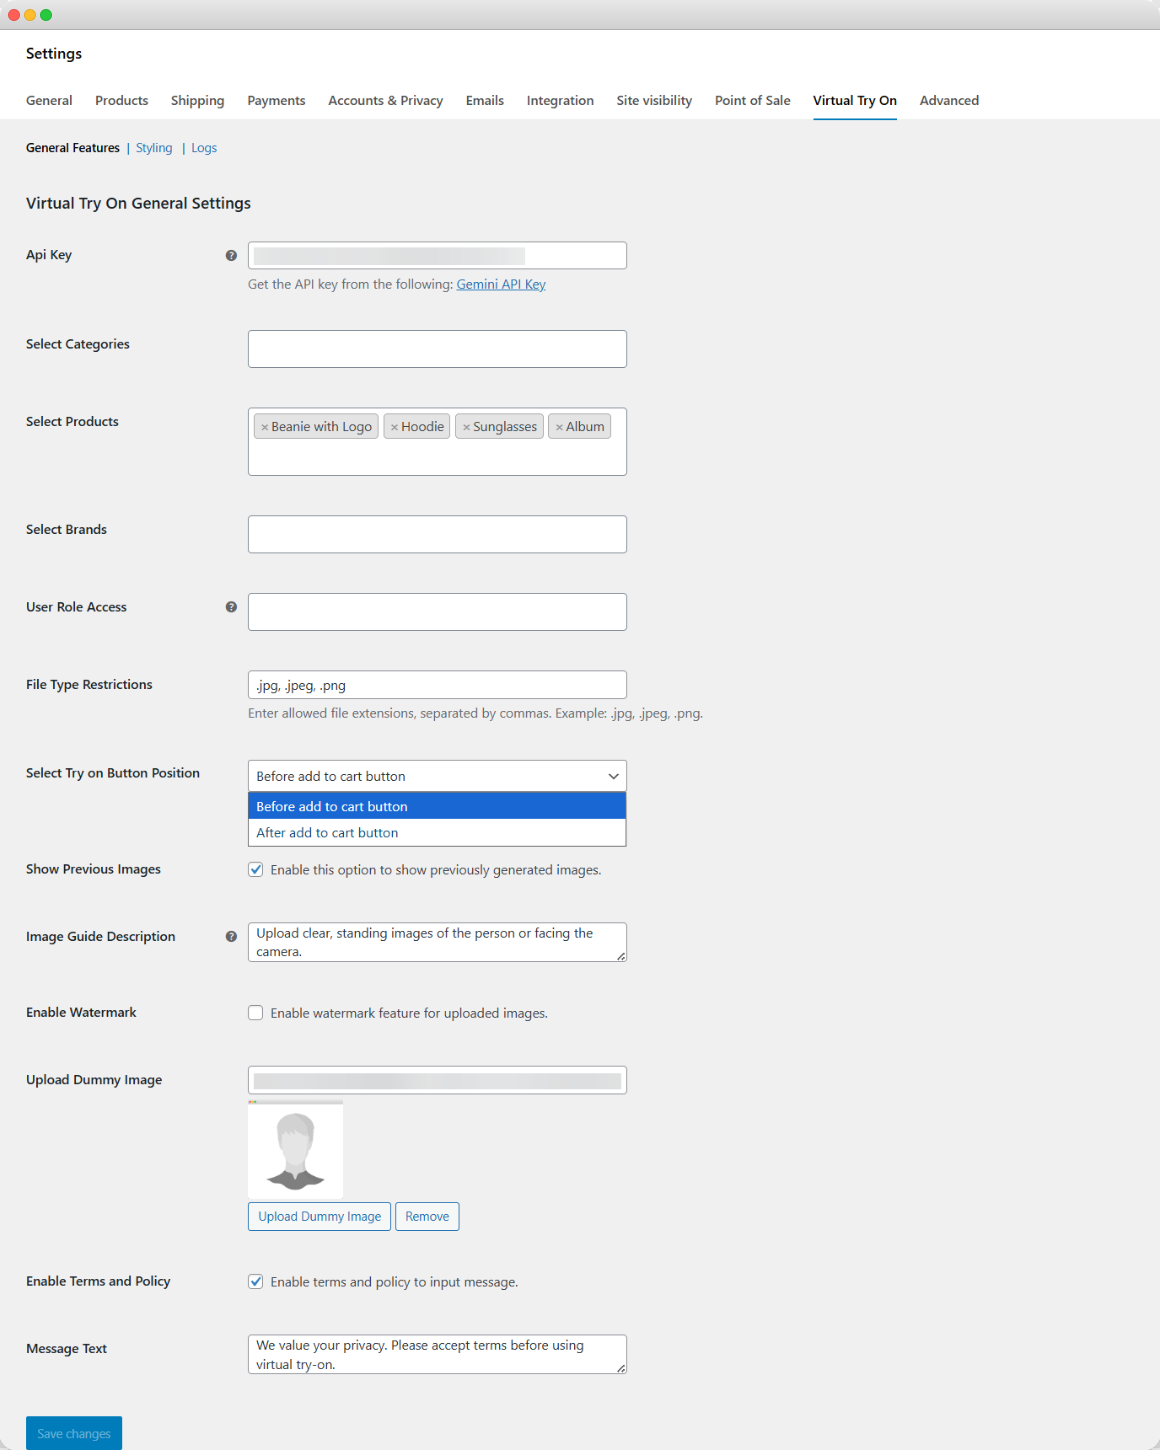
To access the general settings Go to WP Admin Panel > WooCommerce > Settings and select Virtual Try On. Now you’re able to add the following details:
- API Key: Add the API key to generate the virtual try-on image. You can select the “Gemini API Key” and follow the setup instructions.
- Select Categories: Select specific categories where you want to enable the Try On feature.
- Select Products: Select specific products where you want to display the Try On feature.
- Select Brands: Select specific brands where you want to display the Try On feature.
- User Role Access: You can select the specific user role to restrict the Try On feature as needed.
- File Type Restrictions: Define a specific file format for customer images, such as JPG, JPEG, or PNG.
- Select Try-On Button Position: Set the display position of the button, such as
- Before Add to cart
- After Add to cart
- Show the Preview Image: Easily enable or disable the previously generated image.
- Image Guide Description: Add specific information or a description that helps the customer to upload a suitable image.
- Enable Watermark: Enable this option to add the watermark to the generated image.
- Upload watermark image: Upload a custom watermark from the media library.
- Upload Dummy Image: Add the product dummy image to preview the try-on feature.
- Enable Terms and Policy: Enable the terms that require the customer to accept before using this feature. If enabled:
- Message Text: Add the custom message, such as “accept the terms & conditions” or “accept privacy.”
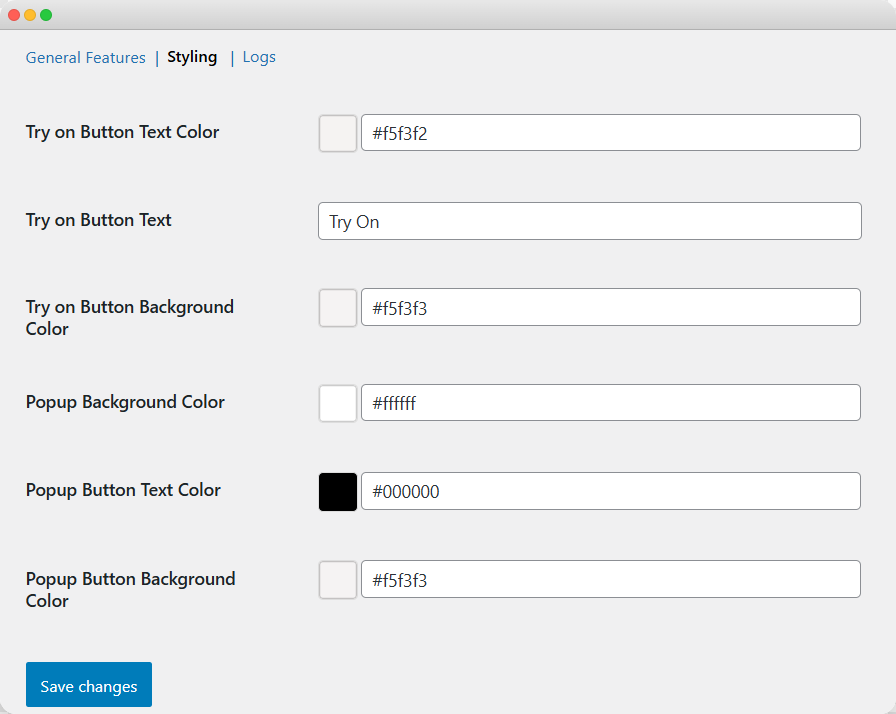
Button & Popup Styling Setting
Select the styling option to apply custom styling using the following settings:
- Try On Button Text Color: Add the custom color for the try-on button text.
- Try On Button Text: Add custom text for the try-on button.
- Try On Button Background Color: Add the custom color for the button background.
- Popup Background Color: Add the custom background color to style the popup.
- Popup Button Text Color: Add the custom button text color for the popup.
- Popup Button Background Color: Select the custom background color to style the button on the popup.
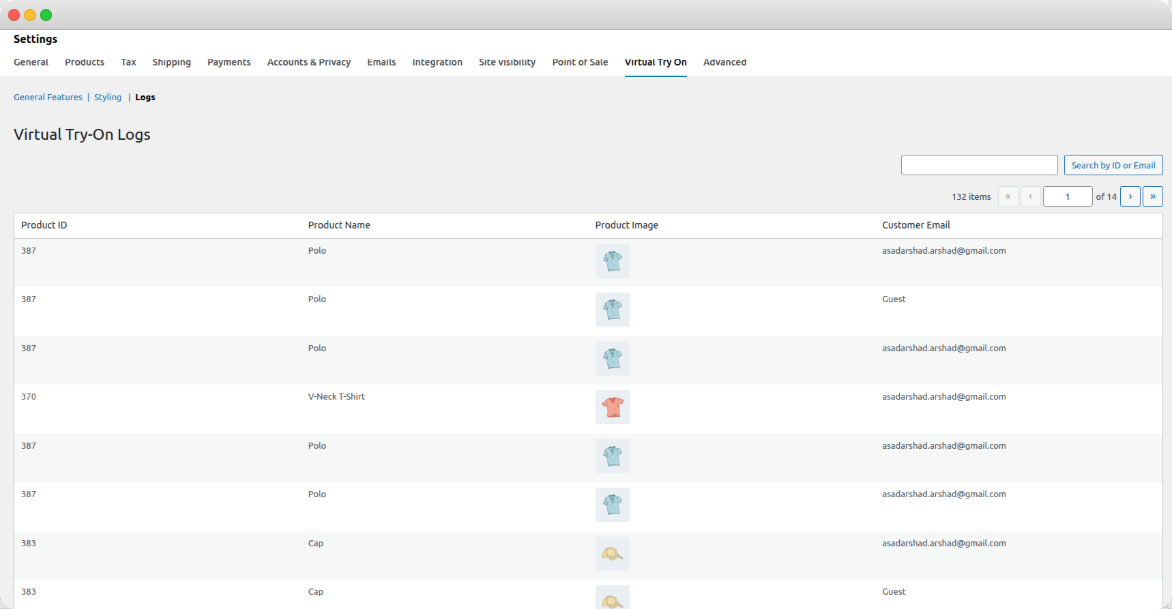
Virtual Try-On Activity Logs
You can easily track and manage logs of all try-on activities. To monitor these activities, click on the Logs option and view the details in a grid view.
Grid Details:
- Product ID: Display the ID of products.
- Product Name: Display the name of the product.
- Product Image: Display the image of the product.
- Customer Email: Display the customer email address.
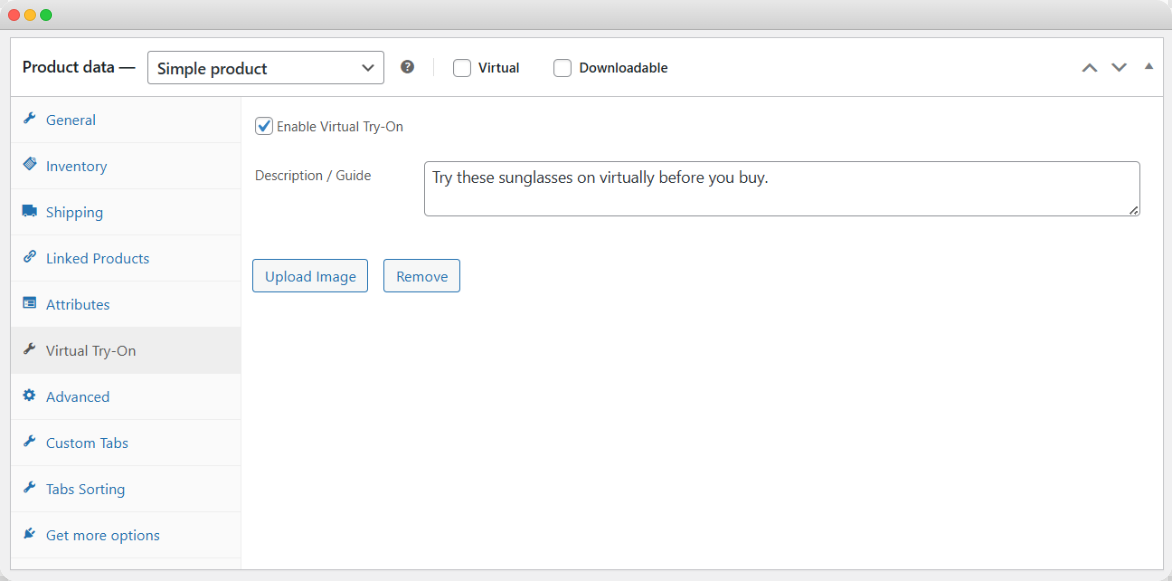
Product Specific Try-On Setting:
With this extension you can easily enable the “Try-On” option on specific products. It allows the owners/merchants to assign a unique dummy image and customer description for each product. To access this setting, you can:
Go to WP Admin Panel > Products and select any product from the list of products where you want to add a virtual try-on option. Now you can add the following details:
- Enable Virtual Try-On: Enable this option to add a try-on button on this product
- Description/Guide: Add a custom description that helps users to understand how to use the try-on feature for this product
- Upload Image: Select to upload a dummy image according to the item.
- Remove Button: Click on the Remove button to delete an uploaded image.