Allowing Manual and Auto Approval of New User Registrations
Enabling Manual and Auto Approval
General Settings:
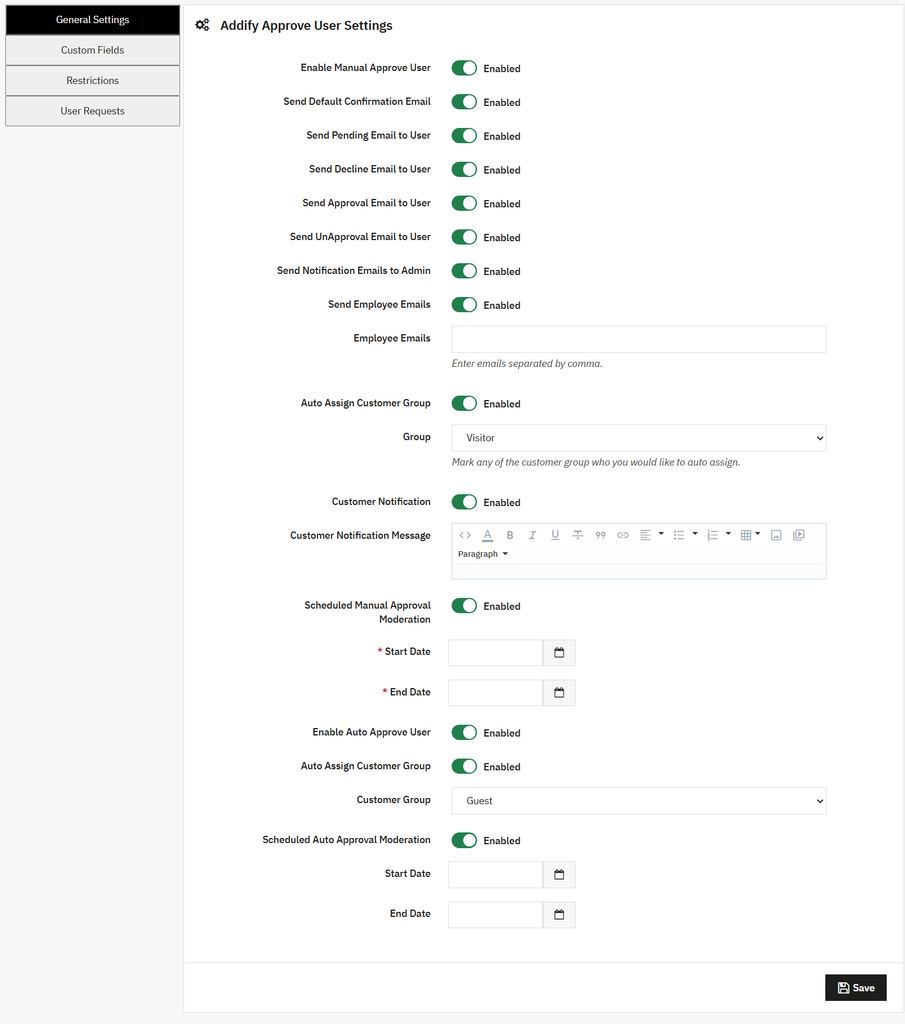
Click to open the addify approve user settings screen, where you can easily configure the following settings for all modules based on your requirements.
- Enable Manual Approve User: Enable this option to approve user registration requests manually. If enabled, you can configure the following options:
- Send Default Confirmation Email: Enable this option to send the default confirmation email to the customer.
- Send Pending Email to User: Enable this option if you want to notify the customer that their registration request is pending.
- Send Decline Email to User: Enable this option to send an email to the customer when their request is declined.
- Send Approval Email to User: Enable this option to send an email to the customer when their request is approved.
- Send Unapproved Email to User: Enable this option if you want to notify the customer that their request is unapproved.
- Send Notification Email to Admin: Enable this option to notify the admin at every step.
- Send Employee Email: Enable this option to send an email to the employee.
- Employee: Enter the employee’s email address.
- Auto Assign Customer Group: Enable this option to automatically assign the customer to a group when their registration request is approved. If you enable this, you can:
- Group: Select a customer group from the list. The approved customer will automatically be assigned to the selected group.
- Custom Notification: Enable or disable this option as needed. If you enable this, you can easily send a custom message to the customer:
- Custom Notification Message: Enter the custom message.
- Scheduled Manual Approval Moderation: Enable this option to schedule manual approval. If enabled, you can:
- Start Date: Select the start date for the schedule.
- End Date: Select the end date for the schedule.
- Enable Auto Approval User: Enable/disable this module at any time. If enabled, the registration request can be approved automatically without any manual review.
- Auto Assign Customer Group: Enable this to automatically assign the customer group to the new registered customer. Once you enable this, you can:
- Customer Group: Select the custom group from the list.
- Schedule Auto approval moderation: Enable this option to schedule the auto approval by:
- Strat Date: Selecting the start date of the schedule.
- End Date: Selecting the end date of the schedule.
- Save: After applying all modifications, click on the save button to apply them.
Custom Fields
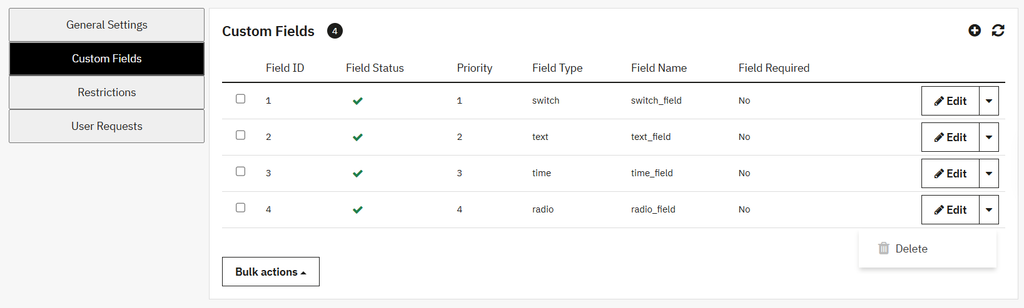
Select this option to open the Custom Fields section. By default, a grid view will open where you can easily view the details of all fields that have already been created. You can also edit or delete these fields as needed.
Grid Details
- Field ID: Display the field ID.
- Field Status: Display the status of fields.
- Priority: Display the field priority.
- Field Type: Display the type of fields such as text, radio, Numeric etc.
- Field Name: Display the field name.
- Field Required: Show whether the field is mandatory or optional.
- Action: Use this to edit or delete the fields at any time.
- Bulk Action: Use this option to select all fields in a bulk and edit or delete them accordingly.
In this view, you can also create new fields by clicking on the (+) icon and perform the following actions.
Add Custom Fields
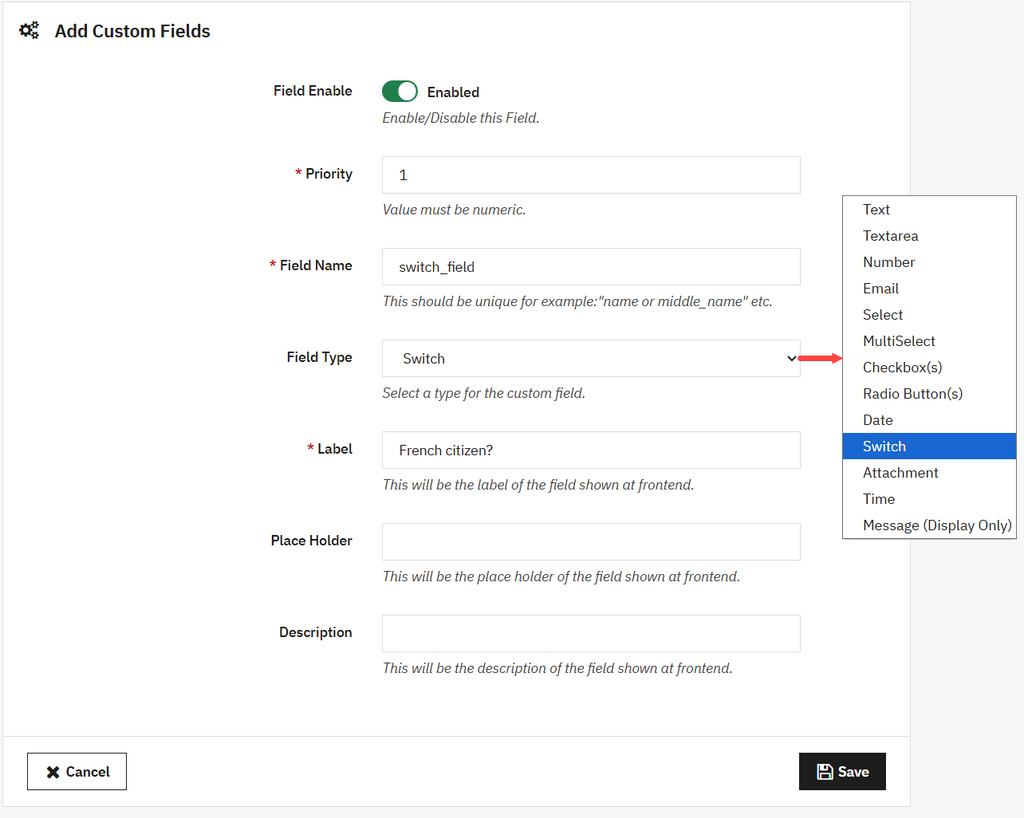
When you click on the Add (+) icon, the system redirects you to the Add custom fields screen, where you can follow the details that are mentioned below:
- Field Enable: Easily enable or disable this field at any time.
- Priority: Set the field priority.
- Field Name: Add the custom name for fields.
- Field Type: Set the field type.
- Label: Set your desired field label.
- Placeholder: Add custom placeholder text that will be displayed inside the field.
- Description: Add the custom field description.
- Value Required: Enable this option if you want to make the field required.
- Save: Click on the save button to implement all changes.
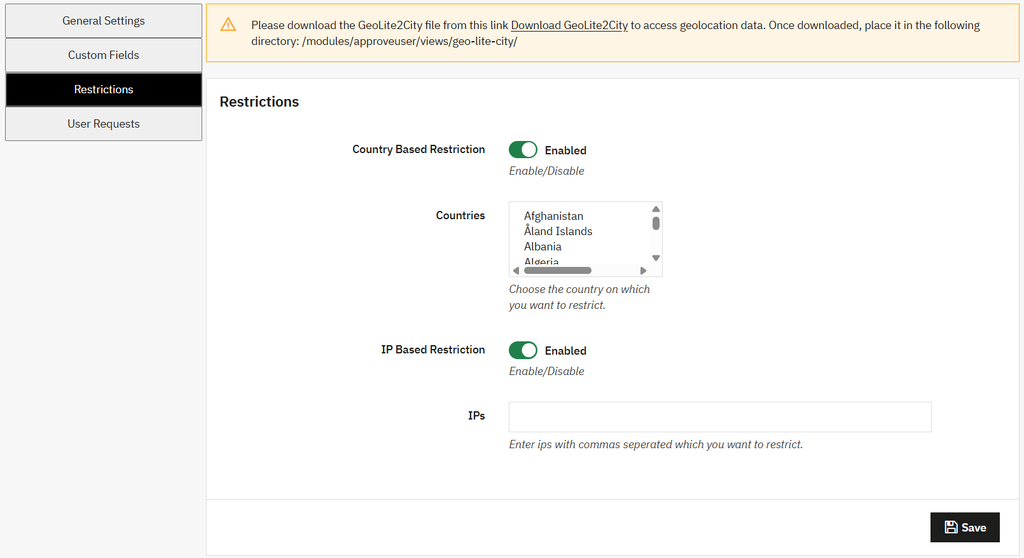
Restriction
Open the Restriction section to configure the following restrictions:
- Country-Based Restriction: Enable this option to apply restrictions to specific countries. If enabled:
- Countries: The Countries field will appear, allowing you to select one or more countries from the list.
- IP-Based Restriction: Enable this option to restrict specific IP addresses. If enabled:
- IPs: Enter the IP addresses you want to restrict, separated by commas.
- Save: Click on the save button to implement all changes.
User Request
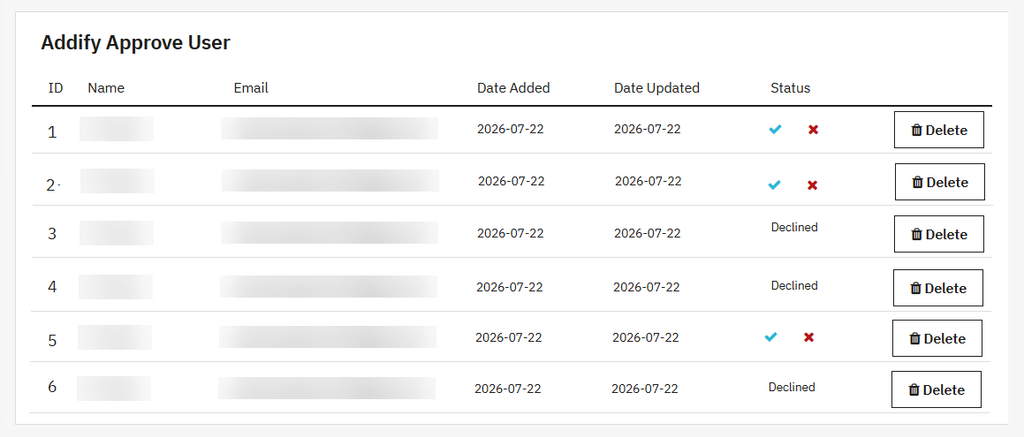
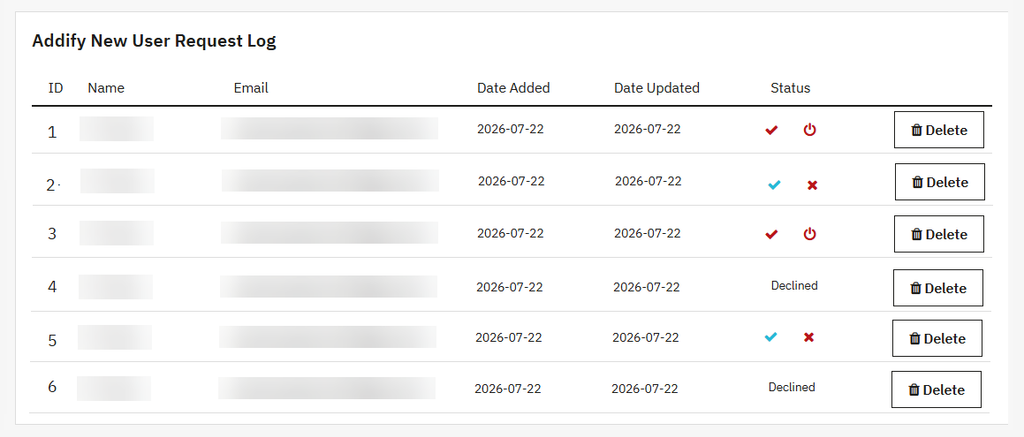
Click to open this section, where you can view the details of all approved users in a grid view.
Grid Details:
- ID: Displays the user’s request ID.
- Name: Displays the user’s name.
- Email: Displays the user’s email address.
- Date Added: Displays the date the request was submitted.
- Date Updated: Displays the date the request was last updated.
- Status: Displays the status of the requests.
Approved Request (By Admin)
Go to the Customers tab in the side menu and open the Customers option. From the drop-down menu, only the admin can view and access the Approved User section. Click Approved User to view the list of user requests in a grid view, where you can easily approve or reject user requests.
Grid Details
- ID: Displays the user’s request ID.
- Name: Displays the user’s name.
- Email: Displays the user’s email address.
- Date Added: Displays the date the request was submitted.
- Date Updated: Displays the date the request was last updated.
- Status: Use this option to approve or reject the user request.