
Allowing Customers to Upload Files During the Checkout Process
To allow customers to upload files during the checkout process using Checkout Files Upload for WooCommerce, follow these steps:
Go to WooCommerce > Checkout Files Upload > File Upload Rules.
Click on the “Add file upload rule” button.
Customize the following settings in the rule:
General Settings:
- Maximum File Size (MBs): Specify the maximum file size in megabytes (MB) for uploads. The default is often set to 10MB.
- Allow Multiple Files: Enable this option to allow customers to upload multiple files at once.
- Required: Use this option to make the file upload field required before placing an order.
- Allowed Extensions: Define permissible file extensions by separating them with commas (e.g., jpg, jpeg, pdf). Avoid using spaces. Default extensions include jpg, jpeg, and png.
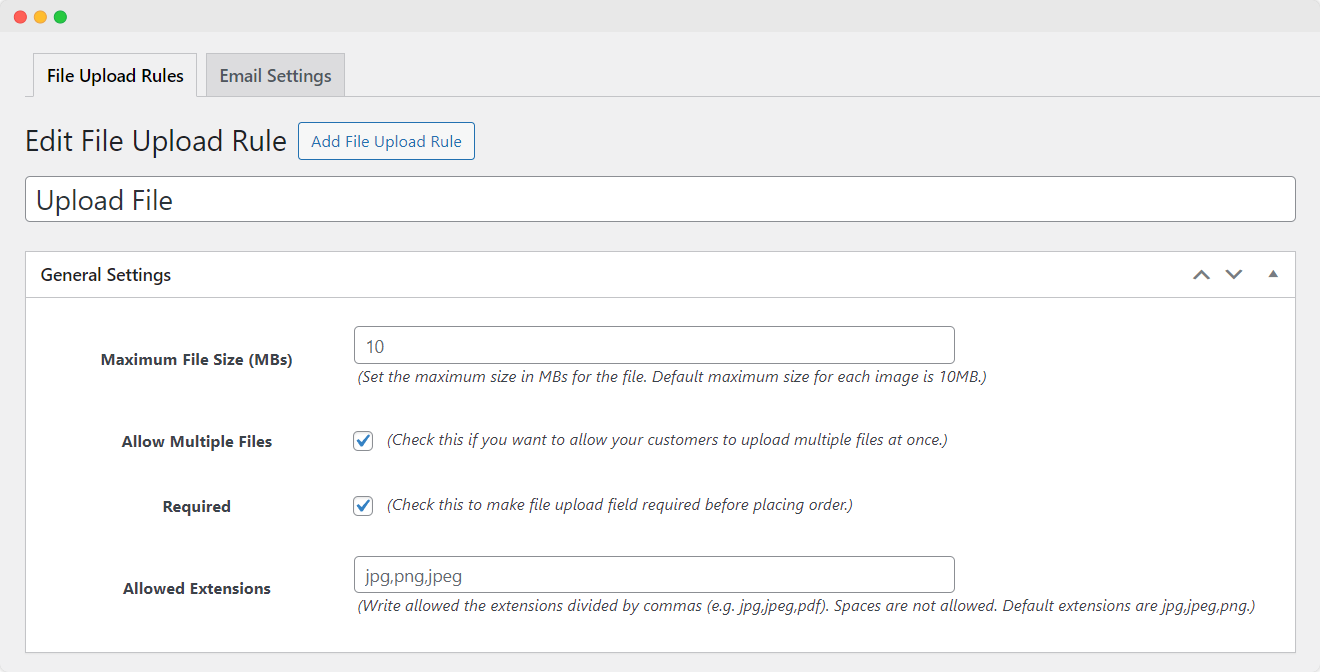
Image Dimensions:
- Validate Image Dimensions: Choose whether to validate the dimensions of images with specific extensions (jpg, jpeg, png, or gif). Options include:
- Do not validate
- Validate exact dimensions
- Validate against less than entered dimensions
- Validate against greater than entered dimensions

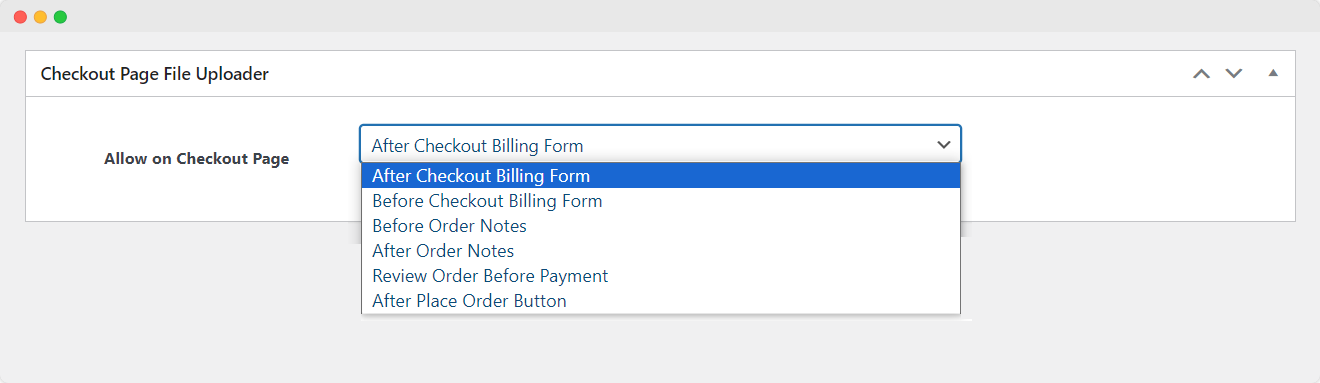
Checkout Page File Uploader:
- Allow on Checkout Page: Choose the specific location on the checkout page where customers can upload files. Options include:
- After checkout billing form
- Before checkout billing form
- Before order notes
- After order notes
- Review order before payment
- After place order button
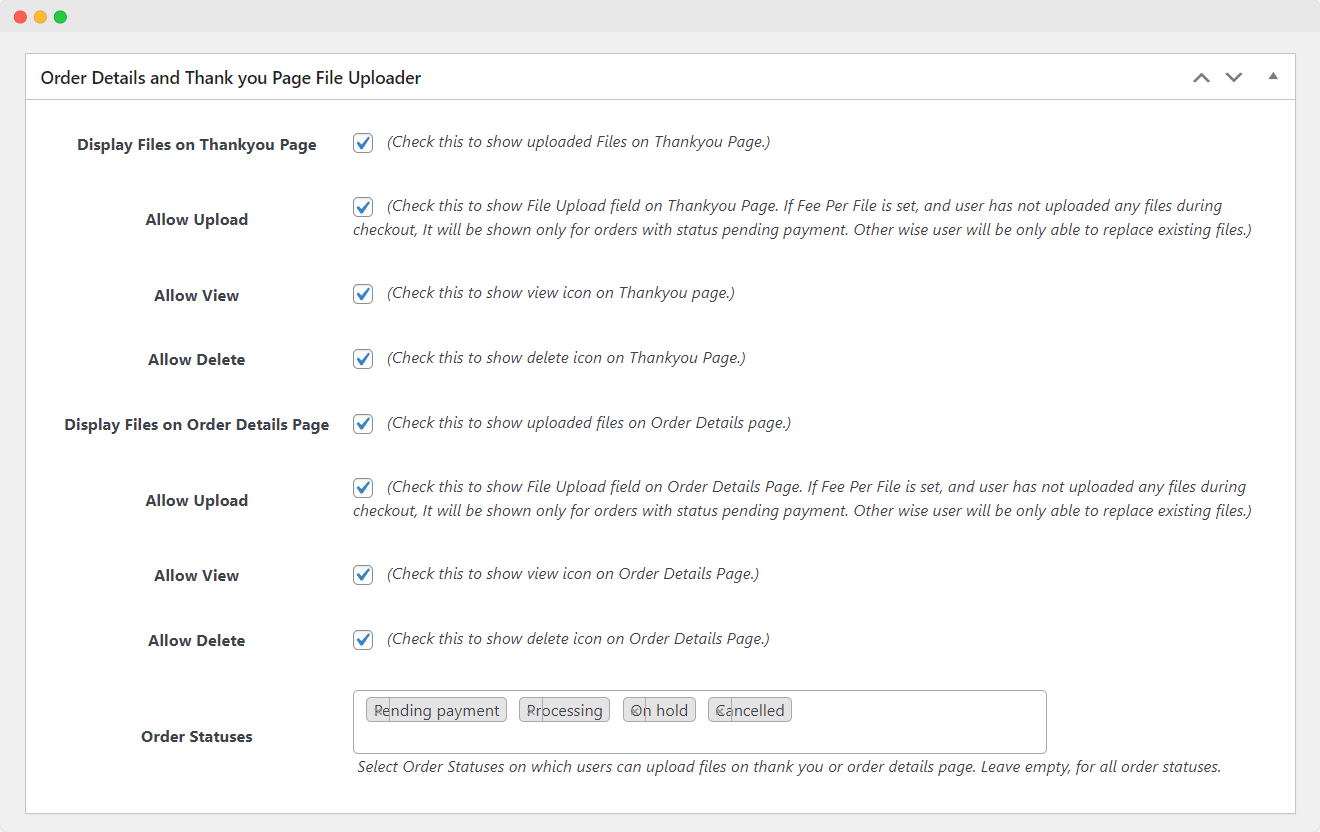
Order Details and Thankyou Page File Uploader:
- Display Files on Thank you Page: Check this box to display uploaded files on the Thank you Page.
- Display Files on Order Details Page: Check this box to show uploaded files on the Order Details page.
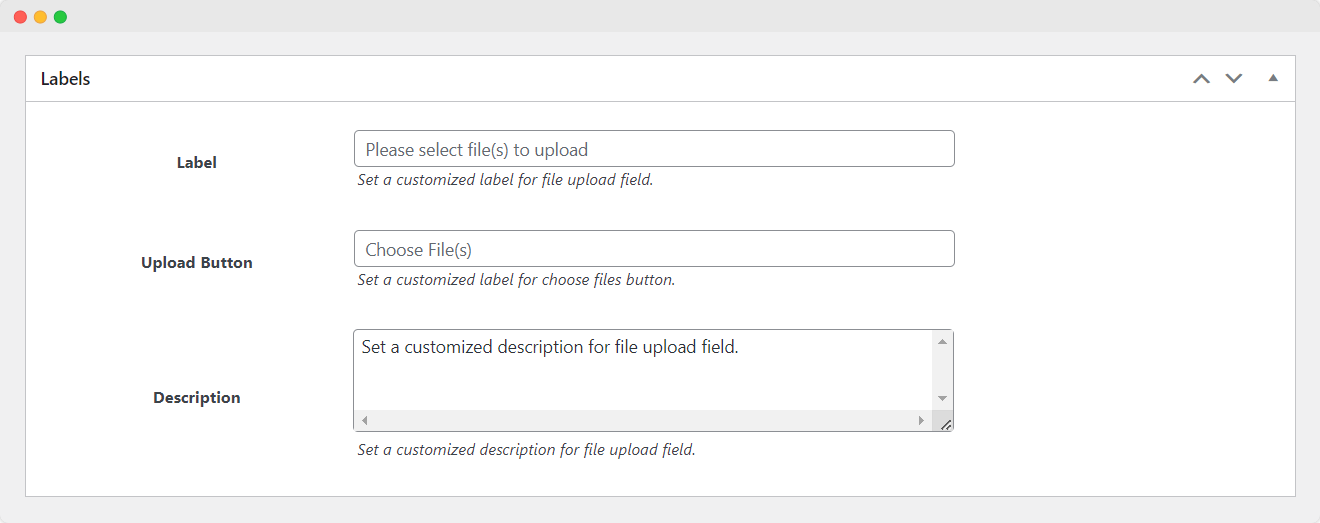
Labels:
- Label: Customize the label for the file upload field.
- Upload Button: Tailor the label for the “Choose Files” button.
- Description: Set a customized description for the file upload field.
Products, Categories & Tags:
- Required Products: Choose specific products to trigger the file upload field. Leave it empty to activate the field when any product is in the cart.
- Required Categories: Select categories to activate the file upload field. Leave it empty to enable the field when any category is in the cart.
- Required Tags: Choose tags to activate the file upload field. Leave it empty to enable the field when any tag is in the cart.

User Roles:
- User Roles: Select specific user roles for which you want to show the file upload field. Leave it empty for all user roles.

Upload Fee:
- Enter a fee for file uploads: Charge the fee either on a one-time basis or per uploaded file. Leave this field empty if you don’t want to charge a fee.

Rule Priority:
- Order: Specify the priority of the rule. By default, it is set to 0.

Click the “Publish” button to save the settings.
By configuring these settings, you can customize how the file upload field behaves during the checkout process. Make sure to test the checkout process to ensure that the file upload functionality is working as expected. Adjust the settings as needed and save the changes to implement them on your WooCommerce store.