
Customizing the File Upload Field
To customize the appearance and position of the file upload field in WooCommerce Checkout Files Upload, follow these steps:
Go to WooCommerce > Checkout Files Upload > File Upload Rules.
Click on the “Add file upload rule” button.
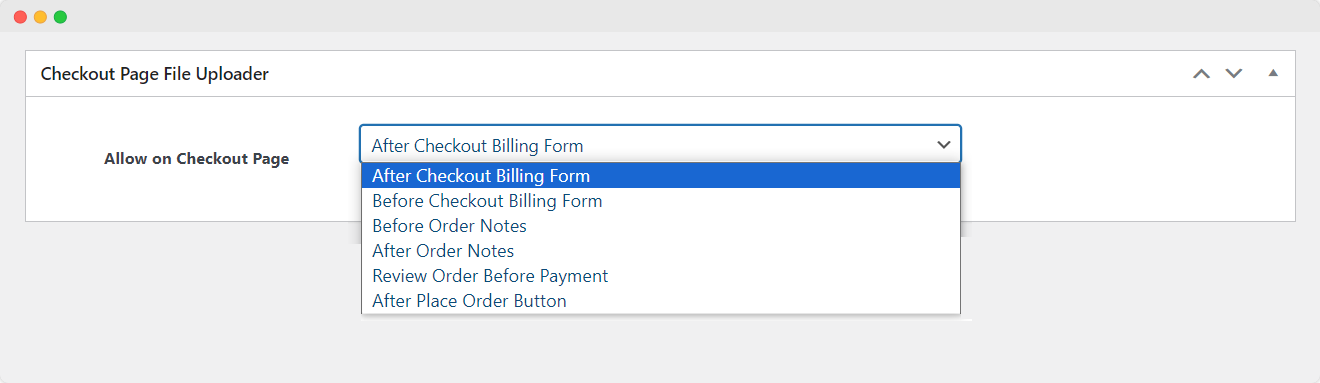
Under “Checkout Page File Uploader” settings:
Allow on Checkout Page: Choose the specific location on the checkout page where customers can upload files. Options include:
- After checkout billing form
- Before checkout billing form
- Before order notes
- After order notes
- Review order before payment
- After place order button
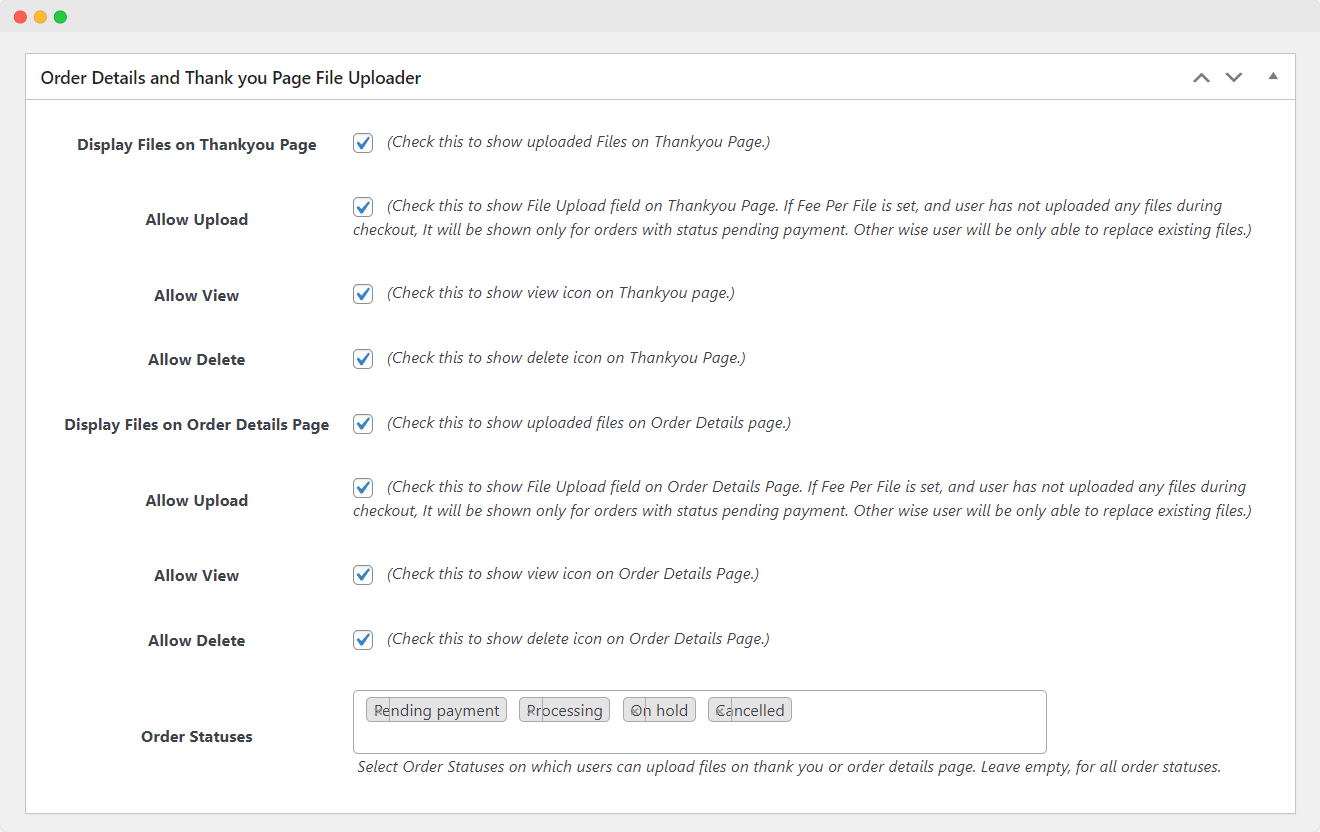
Under “Order Details and Thankyou Page File Uploader” settings:
Display Files on Thank you Page: Check this box if you want to display the uploaded files on the Thank you Page.
Display Files on Order Details Page: Check this box if you want to show the uploaded files on the Order Details page.
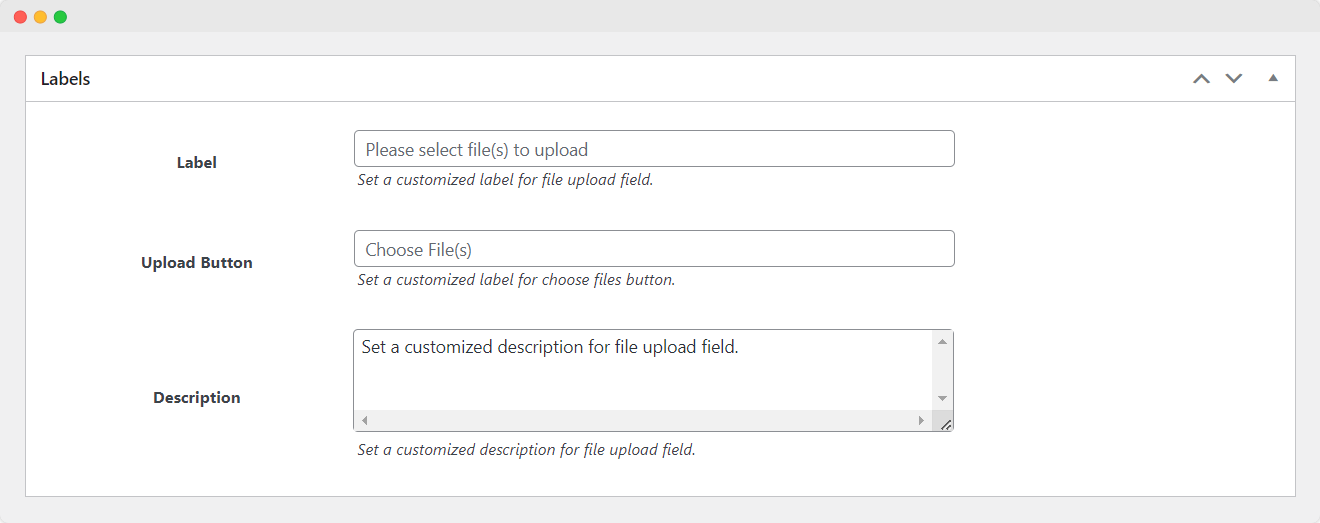
Under “Labels” settings:
Label: Customize the label for the file upload field.
Upload Button: Tailor the label for the “Choose Files” button.
Description: Set a customized description for the file upload field.
After making these customizations, click the “Publish” button to save the settings.
By following these steps, you can control the location of the file upload field on the checkout page, decide whether to display uploaded files on the Thank you Page and Order Details page, and customize labels and descriptions according to your preferences. Adjust the settings as needed and save your changes to apply them to your WooCommerce store.