Specifying Allowed File Formats
To specify allowed file formats for uploads during checkout using WooCommerce Files Upload for WooCommerce, follow these steps:
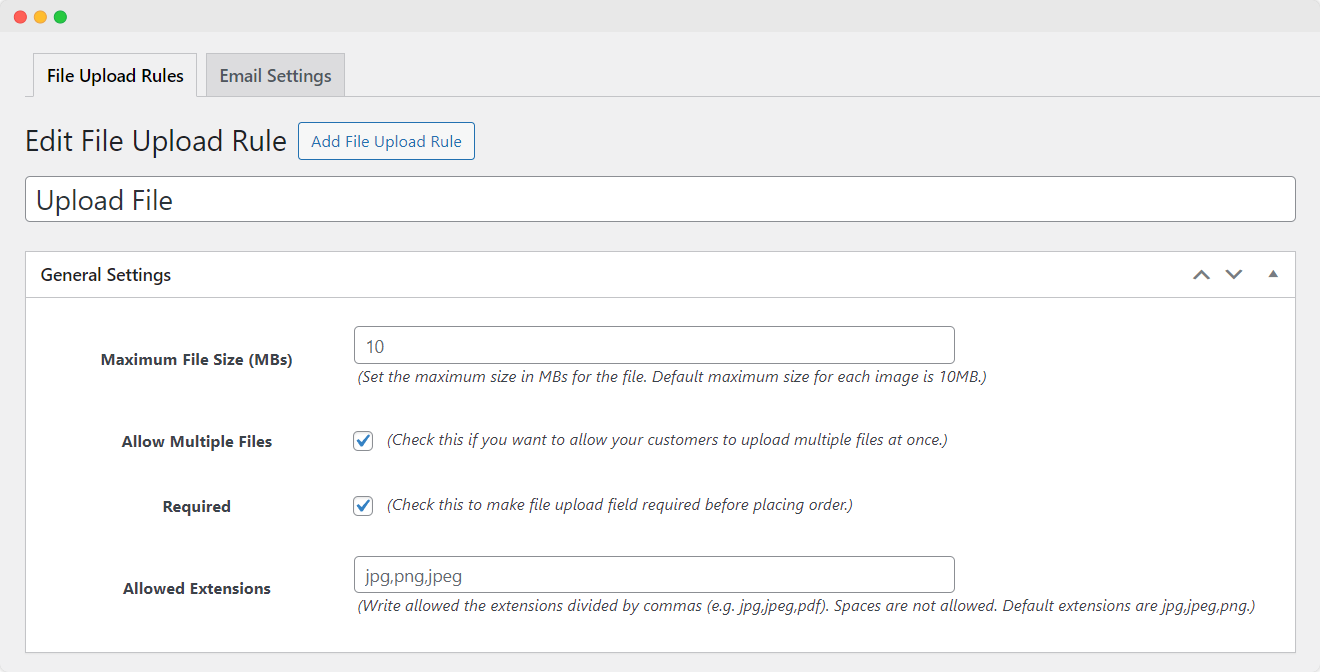
Go to WooCommerce > Checkout Files Upload > File Upload Rules.
Click on the “Add file upload rule” button.
While creating a new rule, customize the following settings under “General Settings”:
Maximum File Size (MBs): Specify the maximum file size in megabytes (MB) for uploads. The default is often set to 10MB.
Allow Multiple Files: Enable this option to allow customers to upload multiple files at once.
Required: Use this option to make the file upload field required before placing an order.
Allowed Extensions: Define the permissible file extensions by separating them with commas (e.g., jpg, jpeg, pdf). Ensure there are no spaces between the extensions. Default extensions might include jpg, jpeg, and png.
After configuring these settings, click the “Publish” button to save the rule.
By setting the “Allowed Extensions,” you specify the file formats that customers can upload during checkout. Make sure to enter the file extensions correctly and without spaces.
After saving the rule, test the checkout process to ensure that the file upload functionality and allowed file formats are working as expected. Adjust the settings as needed based on your requirements.