Creating an Unlimited Number of Daily Deals
Creating an unlimited number of daily deals with the Daily Deals for WooCommerce plugin offers a versatile way to promote your products and attract customers. Let’s delve into each step to elaborate further:
Step 1: Install and Activate the Plugin
Ensure you have the Daily Deals for WooCommerce plugin installed and activated on your WordPress site.
Step 2: Create a Deal by Adding a New Rule
Create a deal and control when and where it’s shown through custom rules. Simply go to WooCommerce > Daily Deals > Deal Rules > Add New. You will now see multiple settings to customize a deal as you like. You can create custom deals by adjusting the following:
- Add a unique rule title
- Add a description for a deal
- Choose rule priority order
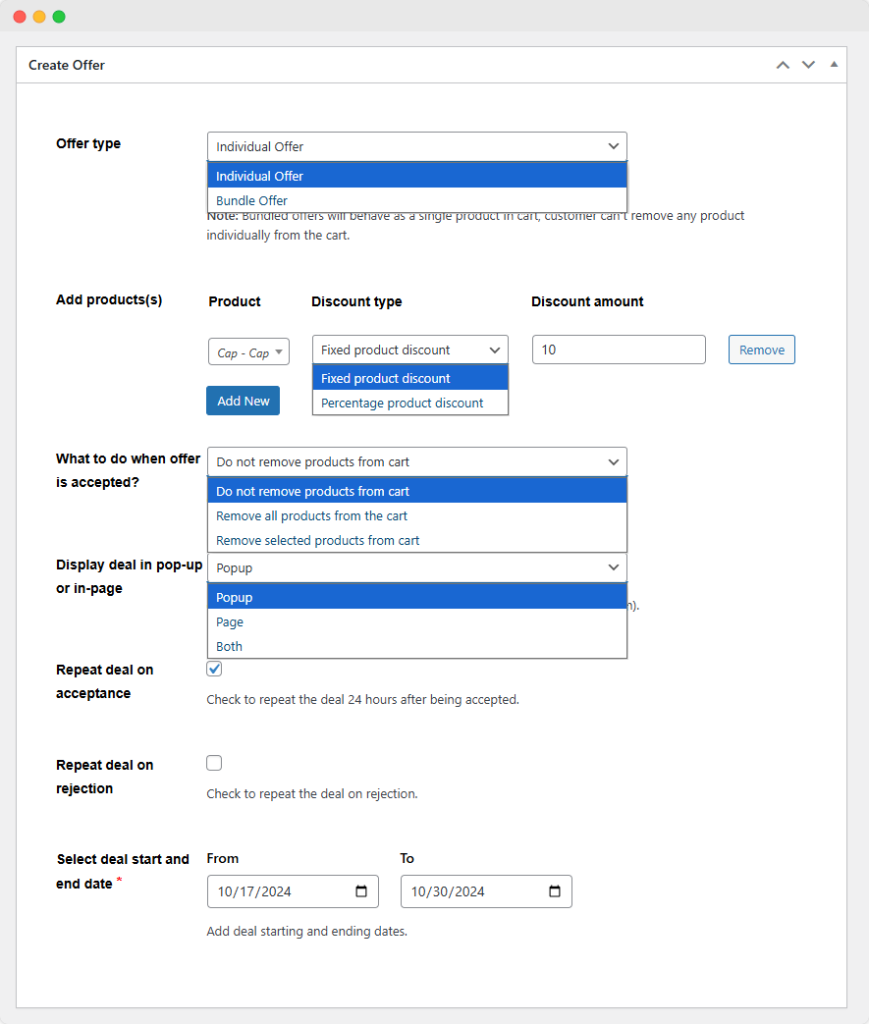
- Select the type of discount deal: Single or Bundle
Step 3: Choose Discount Products & Discount Type
- Add a single or multiple products to a deal
- Choose a discount type from the following:
- Fixed product discount: Add a fixed amount of discount for a product
- Percentage product discount: Reduce prices by a percentage of the original
- Add a desired discount amount on which the discount type will apply
Step 4: Choose Cart Settings After Deal is Applied
You can choose an action once a customer chooses to avail a deal:
- Leave the cart as it is and add discount items to it
- Empty the existing items and add discount products
- Remove desired items from the cart while keeping the rest
Step 5: Show Deals in Popups or In-Page
Choose to display the deal in the following formats:
- Popup
- In-Page
- Both
If you choose the in-page deals or both popup and in-page format, you can use the shortcode [addify_daily_offer id=”833″]. Simply paste the code on any page to showcase your deals
Step 6: Enable Repeat Deals & Schedule Deals
You can control when a deal is repeated by enabling the following options:
- Choose to repeat a deal 24 hours after being accepted
- Choose to repeat a deal if the user rejects it and specify the number of hours after which it will be repeated
- Add deal starting and ending dates to schedule it
Based on the option you choose in step 5, you can customize the popups and the in-page deals through the settings below.
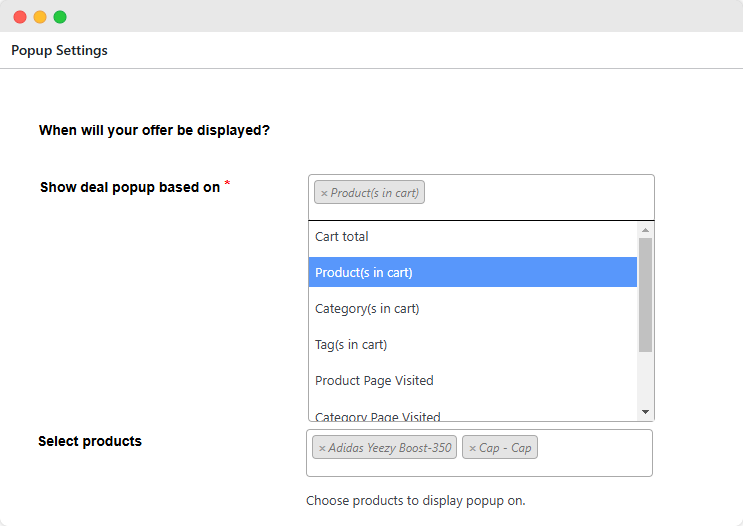
Step 7: Limit Discount Popups
If you choose to display deals in a popup, you can restrict the popup by choosing from the following restriction options:
- Restrict by user’s cart amount
- Restrict based on the product chosen
- Restrict based on the product category
- Restrict the deal based on the product tag
- Restrict the deal based on the product page visited by the user
- Restrict the deal based on the category page
- Restrict the deal based on the tag page
- Show deals to customers for any page they visit
Step 8: Inform Users of Deal Validity
As you create a rule, if you choose the in-page format you can show a deal expiry message with it to inform users of deal validity.
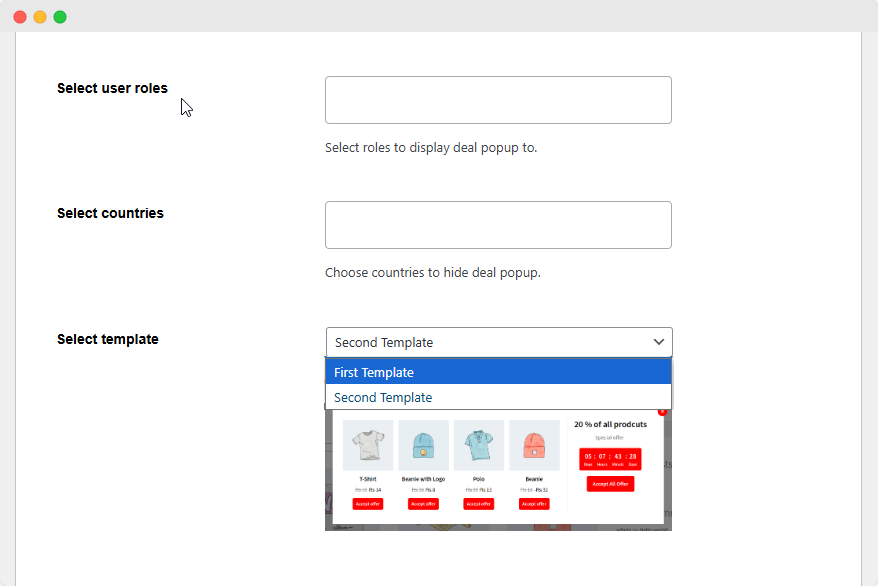
Step 9: Choose Which Customers Can View the Deals
- Show popups and in-page deals to your desired customers
- Show popups and in-page deals to users in specific countries
- Choose from the given template options for popups and in-page deals