Adding Custom Form Fields
In WooCommerce, you can add custom form fields to the Google Sheet Connector for the WooCommerce plugin to collect specific data and organize it in your Google Sheets. Here’s how to add custom form fields:
Log in to your WordPress dashboard. Go to the “WooCommerce” menu in your WordPress admin panel. Click on “Google Sheets.”
In the Google Sheets Connector, click the “Add New Post” button. This will allow you to create a new Google Sheet for your WooCommerce data.
Fill in the necessary details for your Google Sheet, such as the title and any specific settings you require.
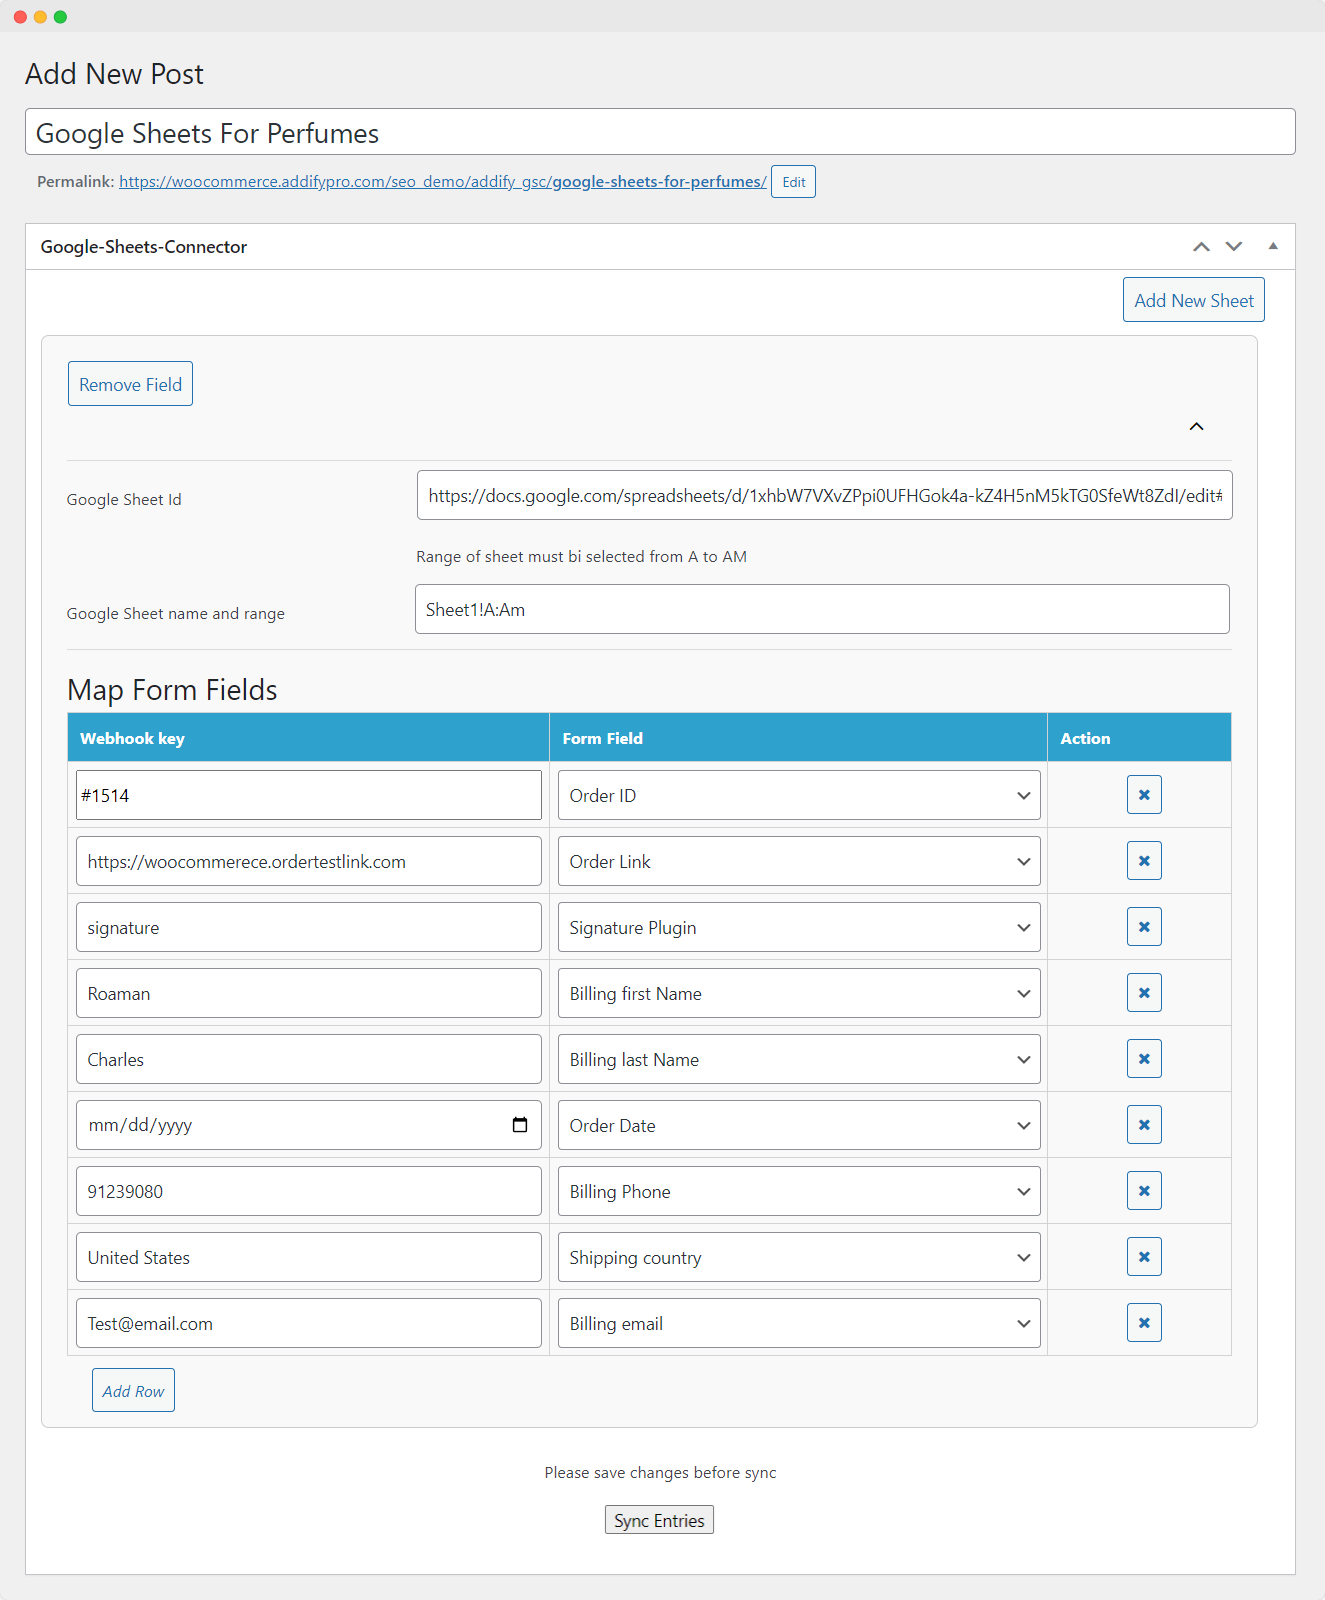
In the “Add New Sheet” section, you will need to specify the following:
- Google Sheet ID: Enter the Google Sheet ID where you want to store your WooCommerce data.
- Google Sheet Name and Range: Define the specific range within the sheet where the data should be placed. This range typically involves selecting columns from A to AM.
To collect data from your WooCommerce store, you can map form fields. Here’s how to do it:
- Webhook Key: Provide a webhook key. This is a unique identifier that allows data to be sent to your Google Sheet.
- Form Field: Select the desired field from the dropdown menu. This dropdown menu typically includes options related to the data you want to collect, such as order details, customer information, or product data.
You can add multiple rows for additional form fields or take action to delete any form fields as needed. This allows you to customize the data collection process according to your specific requirements.
After setting up your custom form fields and mapping the necessary data, click “Publish” to save the configuration. This will ensure that your Google Sheet Connector is configured to collect the specified data from your WooCommerce store.
By following these steps, you can customize the data collection process and add custom form fields to the Google Sheet Connector for WooCommerce plugin, which will help you organize and manage your store data in Google Sheets.