Enabling Conditions-Based Order Approvals
Creating Order Approval Rules
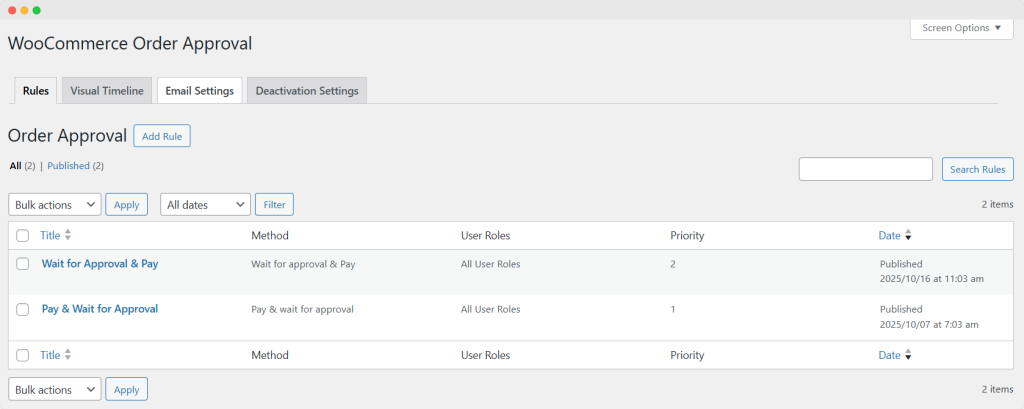
Go to WP admin Panel > Order Approval to create multiple order approval rules. To create a new rule, click on “Add New”.
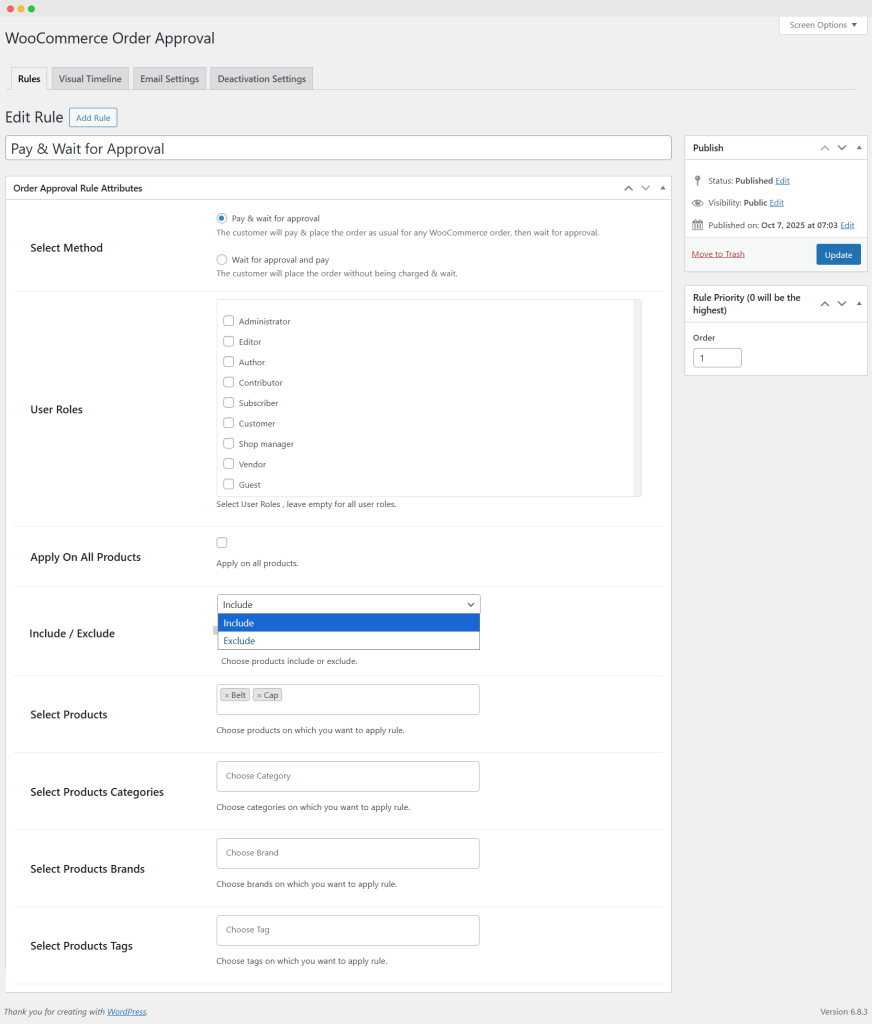
- Title: Enter a descriptive title for your rule for future reference
Order Approval Rule Attributes:
- Select Method: This option allows you to define the behavior of your order approval rule. You can choose from two distinct methods:
- Pay & wait for approval: With this method, the customer pays for the order as they would for any standard WooCommerce order. After payment, the order is placed, and the customer waits for approval.
- Wait for approval and pay: This method allows the customer to place an order without incurring any charges. The order is created but needs to be paid for immediately.
- User Roles: Specify which user roles are affected by your rule (Leave empty for all users)
- Administrator
- Editor
- Author
- Contributor
- Subscriber
- Customer
- Shop Manager
- Vendor
- Guest
- Apply On All Products: Enable this option if you want the rule to apply to all products in your store.
- Include/Exclude: You can select the include/exclude option from the dropdown to include or exclude the product from the approval list based on your preference.
- Select Products: Use this option to specify individual products to which the rule should apply.
- Select Product Categories: Choose the Categories on which you want to apply the rule.
- Select Product Brand: Choose the brands that you want to apply the rule.
- Select Products Tags: Choose the tags on which you want to apply the rule
Enabling A Visual Timeline on My Account Page
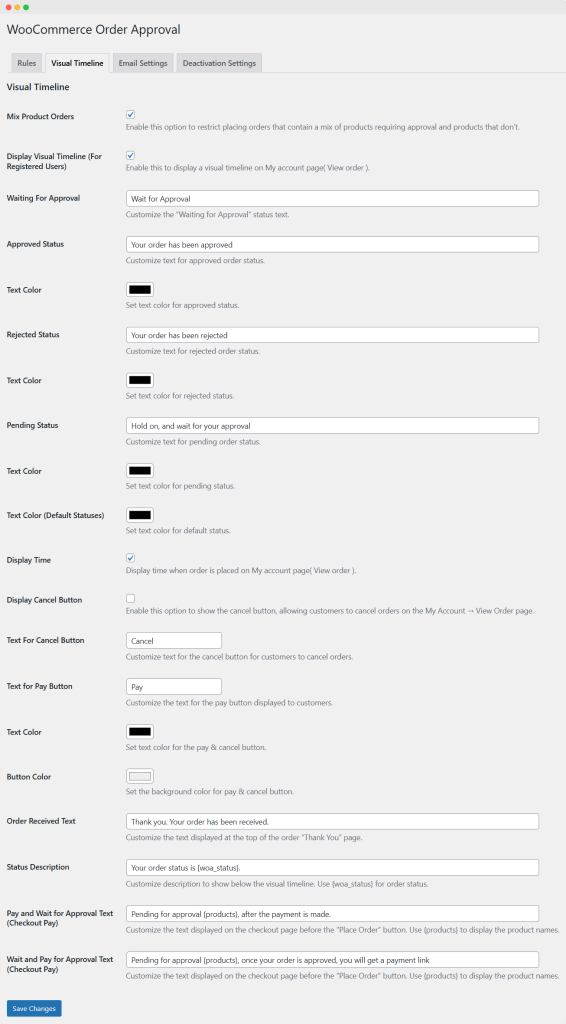
- Mix product order: Enable this option to restrict the placement of orders that contain a mix of products that require approval and non-approval.
- Display Visual Timeline (For Registered Users): Enable this option to display a visual timeline on the My Account page
- Waiting for Approval: Customize text to be displayed when an order is in the “Waiting For Approval” status
- Approved Status: Customize text for the “Approved Status” message
- Text Color: Set the text color for the “Approved Status” message
- Rejected Status: Customize text for the “Rejected Status” message
- Text Color: Set the text color for the “Rejected Status” message
- Pending Status: Customize text for the “Pending Status” message
- Text Color: Set the text color for the “Pending Status” message
- Text Color (Default Statuses): Set the default text color for other order statuses that are not specifically customized
- Display Time: Enable this option to display the time when the order was placed on the My Account page
- Display Cancel Button: Enable this option to display a cancel button on the My Account page
- Text for Cancel Button: Customize the text displayed on the cancel button
- Text for Pay Button: Customize the text displayed on the pay button for customers who need to make a payment after their order is approved
- Text Color: Set the text color for both the “Pay” and “Cancel” buttons
- Button Color: Set the background color for the “Pay” and “Cancel” buttons
- Order Received Text: Customize the text that appears at the top of the order thank you page
- Status Description: Customize the description that appears below the visual timeline on the My Account page. (Note: You can use the placeholder {woa_status} to dynamically display the current order status)
- Pay and wait for approval text (Checkout Pay): Customize the text displayed on the checkout page just before the “Place Order” button when the order is in a “Pending for approval” status. (Note: use the placeholder {products} to include the product names in the message)
- Wait and pay for approval text (Checkout Pay): Customize the text shown on the checkout page just before the “Place Order” button when the order is in a “Pending for approval” status. (Note: use the placeholder {products} to include the product names in the message)
- Click “Save Changes” to apply the new settings.
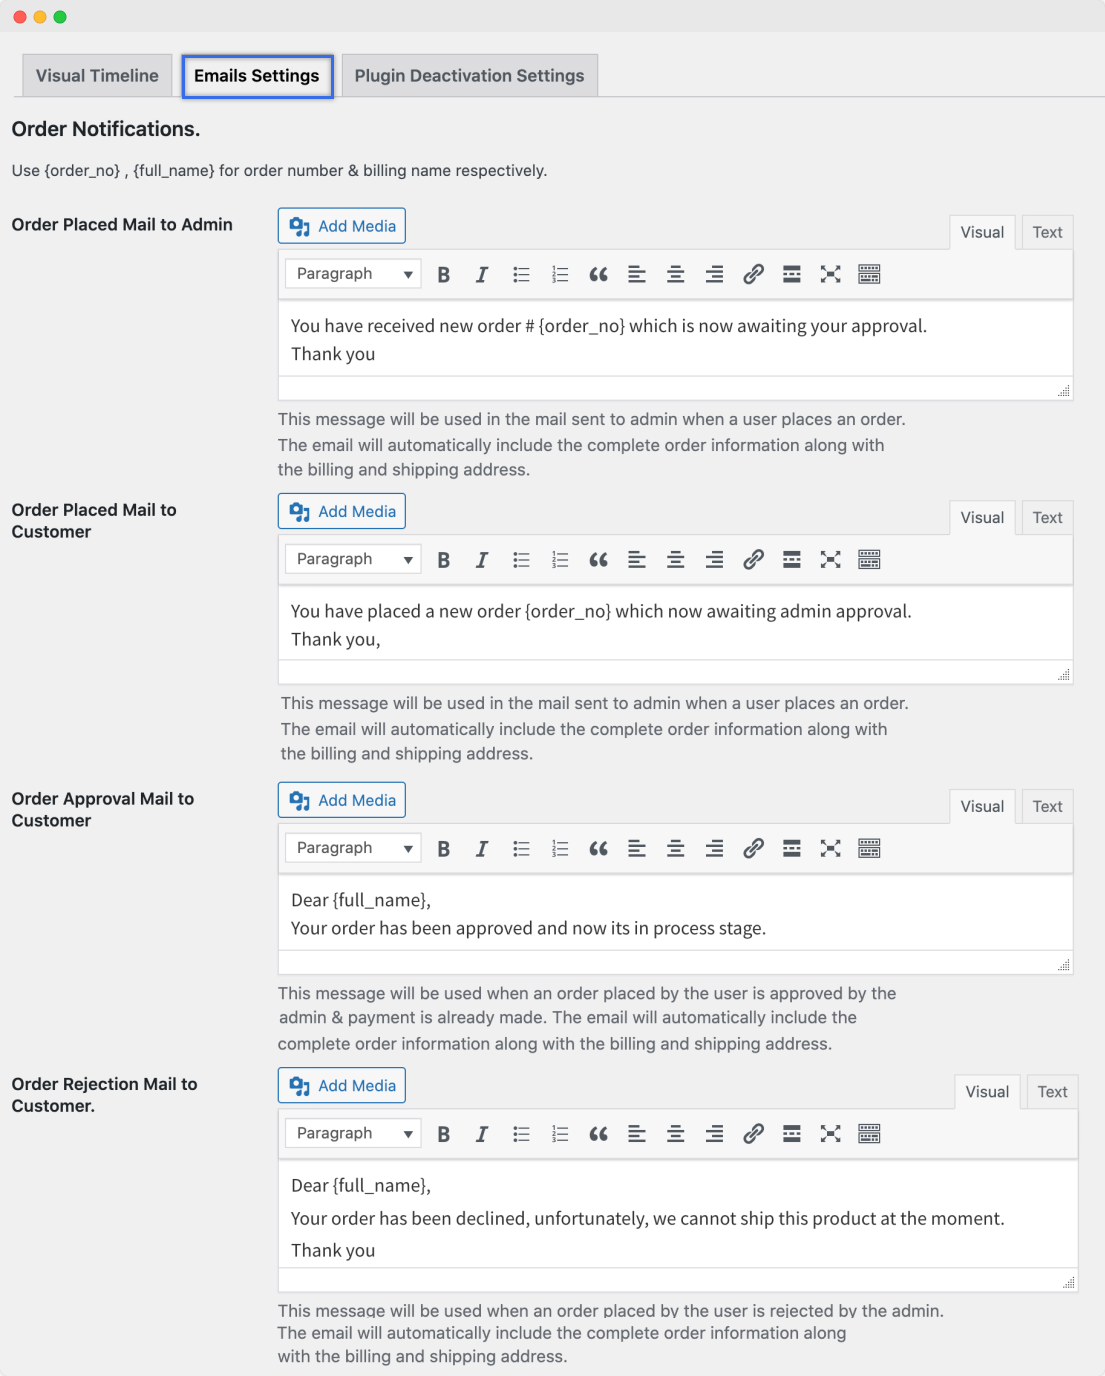
Email Settings
With this plugin, you can customize the email notifications sent to both administrators and customers. Use the placeholders {order_no} and {full_name} to dynamically include the order number and billing name in your messages
Order Placed Mail to Admin: This message is sent to the admin when a user places an order. The email will automatically include the complete order information, including the billing and shipping addresses
Order Placed Mail to Customer: This message is sent to customers when they place an order. The email will automatically include the complete order information, along with the billing and shipping addresses.
Order Approved Mail to Customer: This message is used when an order placed by the user is approved by the admin, and payment has already been made. The email will include the entire order information and billing and shipping addresses.
Order Rejection Mail to Customer: This message is used when an order placed by the user is rejected by the admin. The email will contain the complete order information, billing details, and shipping information.
Note: To modify the subject lines and headings of your email notifications, navigate to WooCommerce > Settings > Emails.
Plugin Deactivation Settings
Go to the “Plugin Deactivation Settings” tab to configure how your plugins should behave when deactivated
Revert to Default Order Status: Mark this checkbox to assign standard order statuses instead of custom ones
Note: This action is irreversible. Changing the order status back to the custom status (i.e., “pending” and “approved”) is not possible even if you reinstall the plugin
Click “Save Changes” to save the changes.

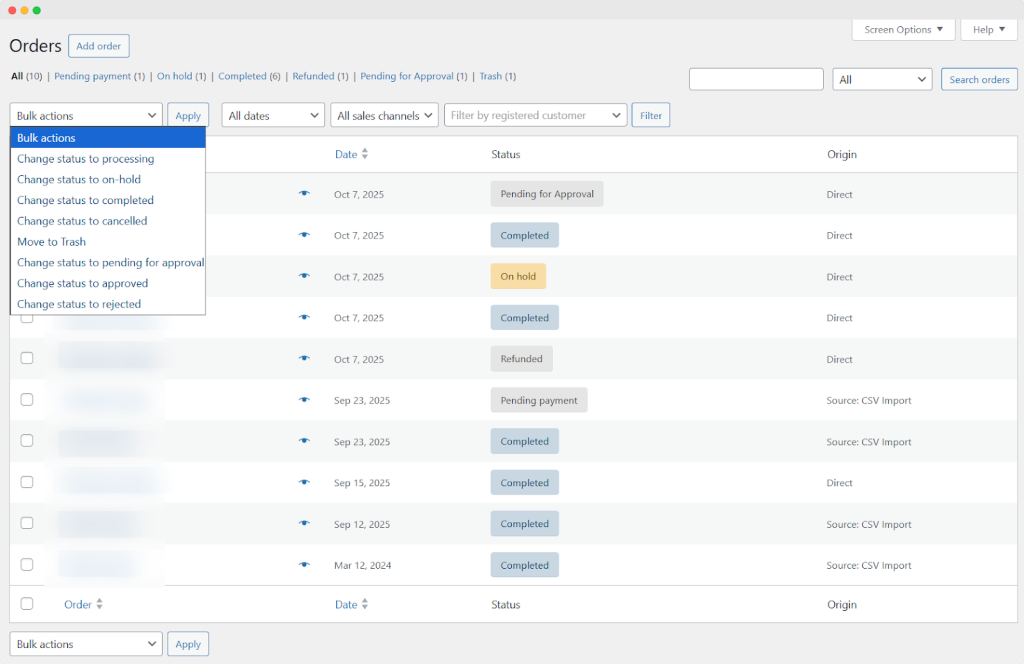
Bulk actions for order
Go to the WooCommerce → Order option, find the bulk action dropdown at the top of the order list.
- Click on the Bulk action dropdown and choose the following option to the dropdown:
- Change status to pending for approval: You can change the status of all pending orders and mark them as approved. Only admins are allowed to perform this action.
- Change status to approved: Use to mark the orders as approved.
- Change status to rejected: Use to mark the orders as rejected.
- Apply: After selecting the option, click on the “Apply” button to update the status of all orders.
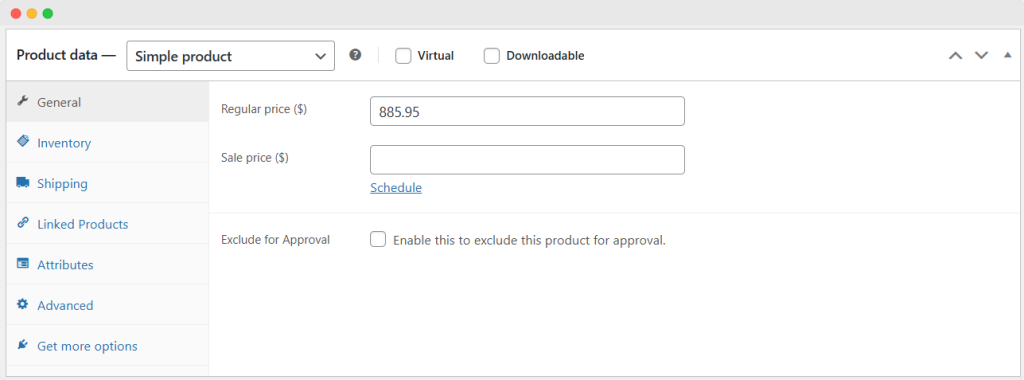
Exclude order from Approval
Go to Products → Product List, and edit any/specific product. Once the edit product view opens, scroll down to the Product Data → General section, where you can:
- Exclude for approval: Enable this option to exclude this specific product from approval.