
Displaying Top Bar at Products, Category, or Any Other Pages
To display the top bar at desired products, categories, or any other pages using the “Top Bar for WooCommerce” plugin, follow these steps:
Create a New Top Bar:
Go to your WordPress Admin Panel.
Navigate to “Top Bar” in the plugin’s settings.
Click on “Add New Top Bar” to create a new notification bar.
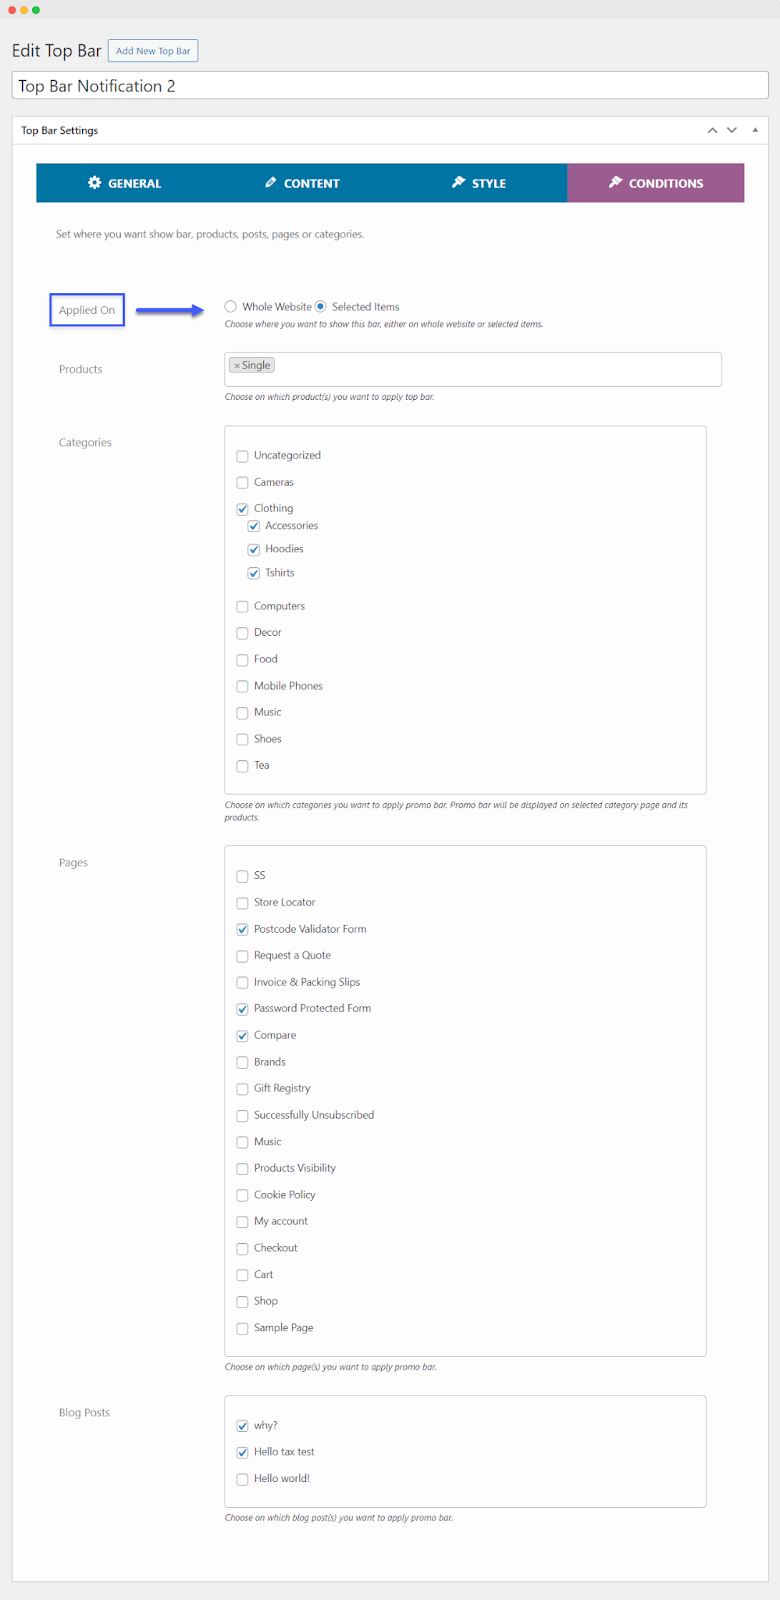
Applying Conditions on Top Bar:
In this step, you’ll specify where you want the top bar to be displayed. You have two options:
- Whole Website: Choose this option if you want the top bar to be displayed on the entire website. This means the notification bar will appear consistently across all pages and posts on your site.
- Selected Items: Select this option if you want to configure the top bar to appear only on specific items such as products, posts, pages, or categories. Follow these steps to apply the conditions:
- Products: Choose which product(s) you want to apply top bar
- Categories: Choose which categories you want to apply the promo bar. The Promo bar will be displayed on the selected category page, and its products
- Pages: Choose on which page(s) you want to apply promo bar
- Blog Posts: Choose which blog post(s) you want to apply the promo bar
Save and Activate:
After configuring the conditions for your top bar, save your changes. You can also preview the top bar to ensure it appears as expected.
Monitor Performance:
Once your top bar is live with the specified conditions, keep track of its performance. Ensure it’s displaying on the desired products, categories, or pages as intended.
By applying conditions to the top bar, you can control where it appears on your website, making it more relevant and effective in promoting products, categories, or events to your target audience.