Configuration of User Roles Editor for WooCommerce
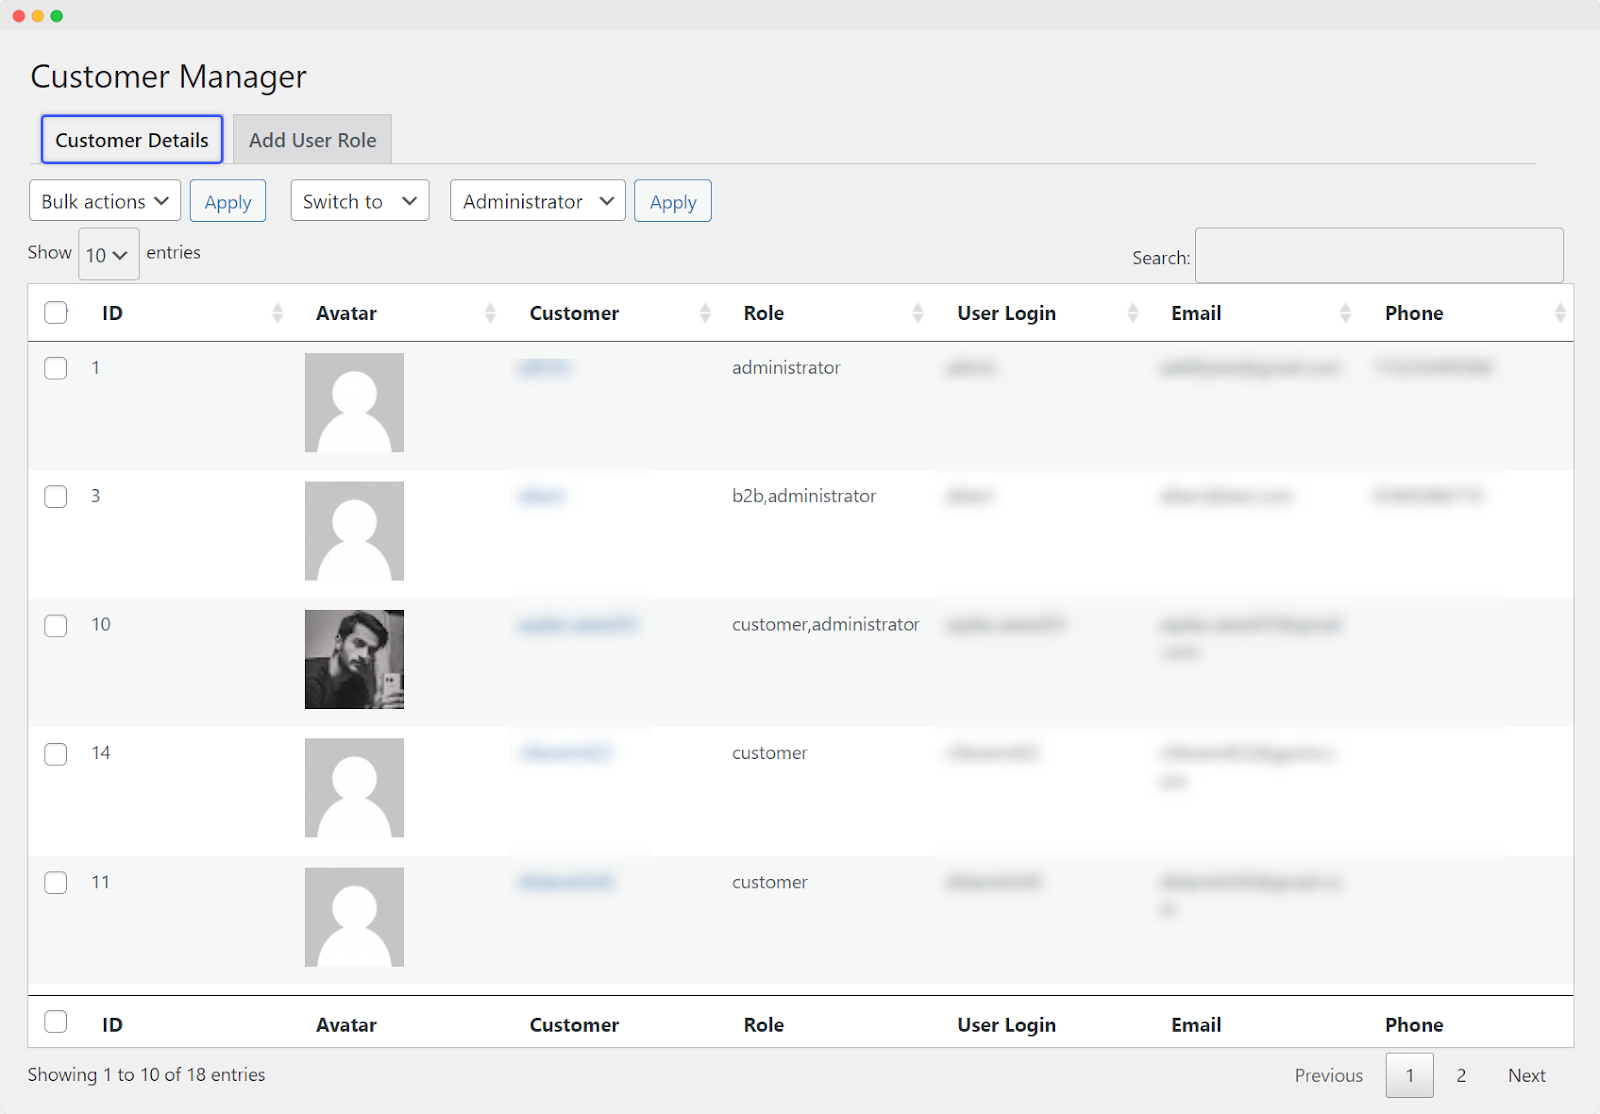
Managing Customer Information in a Log
Go to WP Admin Panel > Users > User Role Editor > Customer Details.
Here, you can view comprehensive customer information in a structured table format, including:
- Roles
- Contact Information
- Avatars
- Customer IDs
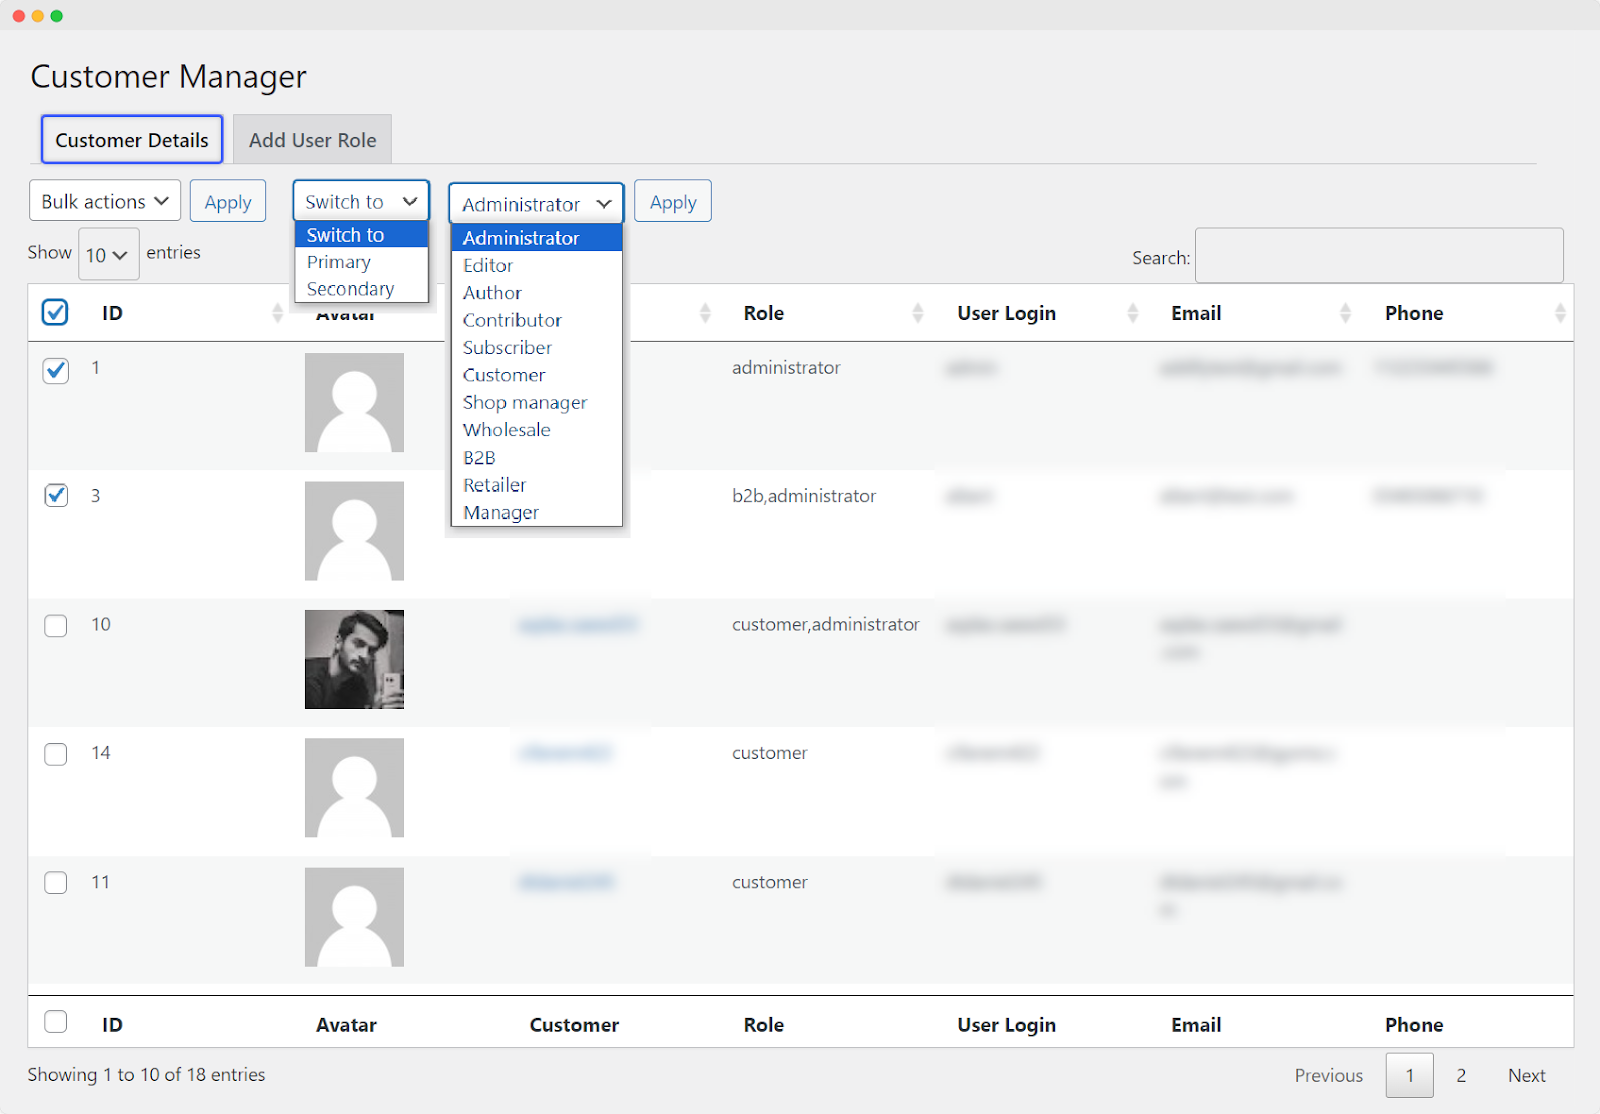
Role Management:
- Assign primary or secondary roles to users.
Seamless Role Switching:
- Easily switch between roles as needed.
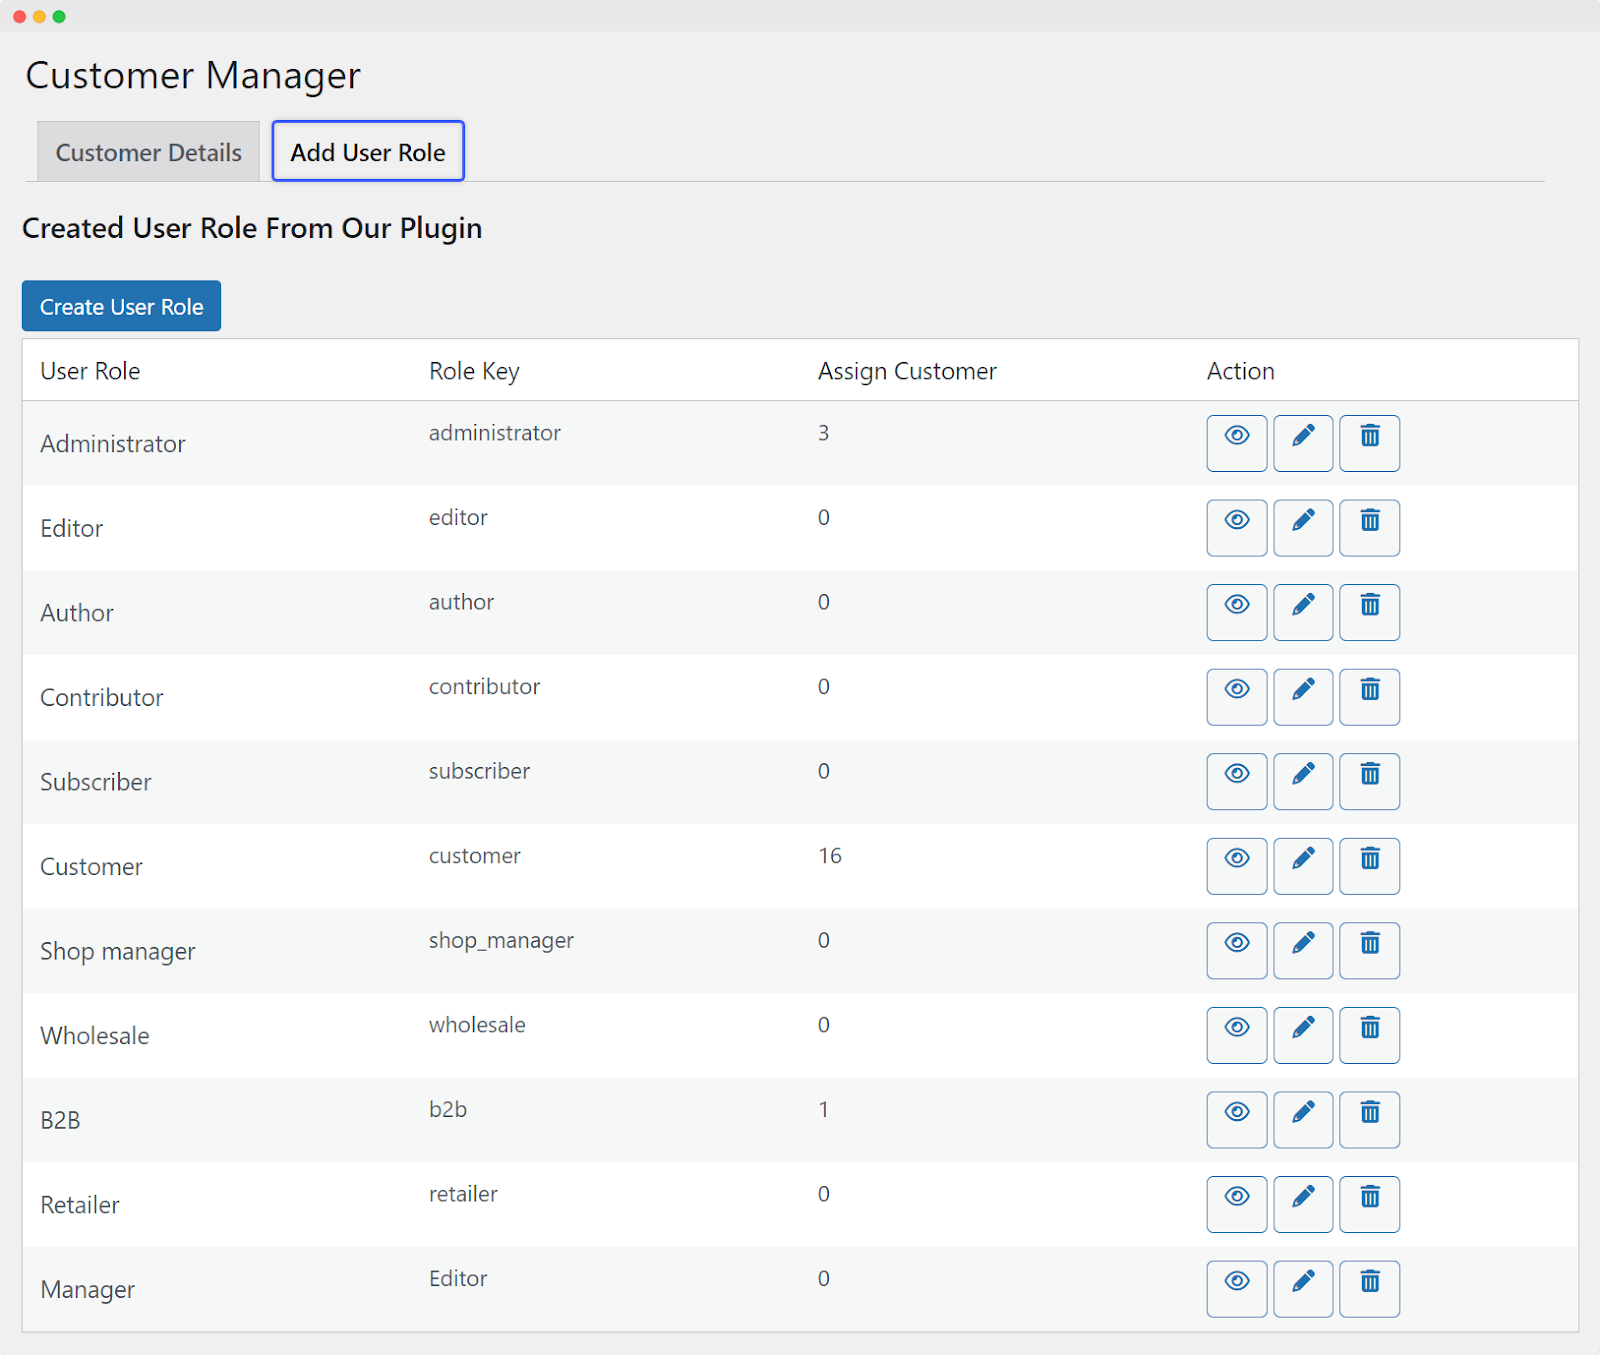
Creating New User Roles
Go to WP Admin Panel > Users > User Role Editor > Add User Role.
Upon accessing the Add User Role section, you’ll typically see a log displaying all existing user roles.
Creating a New User Role:
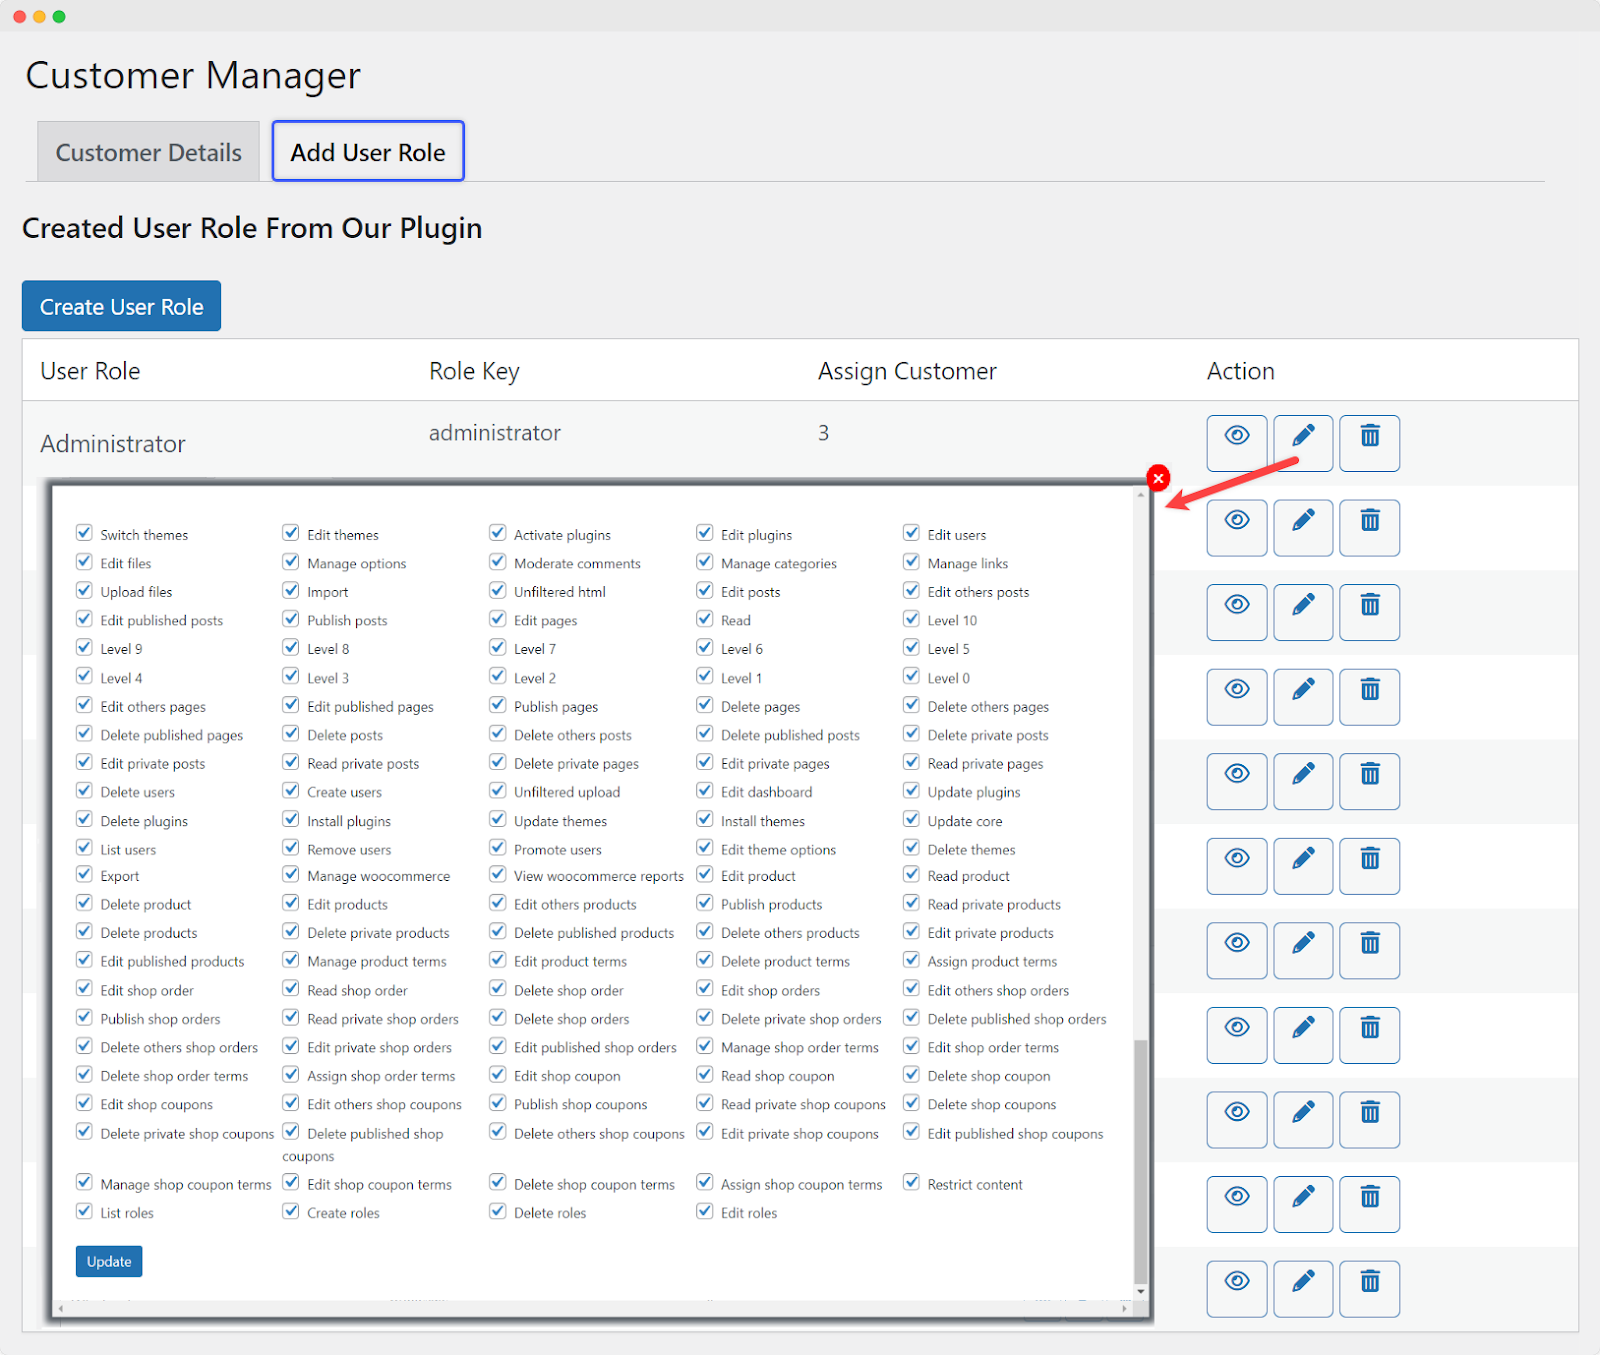
To create a new user role, click on the “Create User Role” button.
A new popup window will appear, prompting you to provide the following details:
- Select User Role Name: Enter a name for the new user role. This name should be descriptive and indicative of the role’s purpose.
- Select User Role Key: Enter a unique key for the user role. This key is used internally by WordPress to identify the user role.
- Capabilities Type Dropdown: Choose the type of capabilities for the user role. You’ll typically have two options:
- Copy User Role Capabilities: Select an existing user role from the dropdown to copy its capabilities. This option is useful if you want the new role to have similar permissions to an existing role.
- Add Custom Capabilities: If you prefer to define custom capabilities for the new role, choose this option.
- Select Custom Capabilities: Specify the custom capabilities you want to assign to the new user role. This allows you to tailor the permissions of the role according to your specific requirements.