
Configuring Cart Settings
Enabling/Disabling the Menu Cart
Go to WP Admin Panel > Woo Cart > General Settings. Choose to enable/disable the menu cart for your store. Additionally, allow/disallow the update variations in the cart.
Enable Addify Menu Cart: This option allows you to enable or disable the Menu Cart for your site
Enable Addify Update Variation in Cart: Choose to enable or disable the Update Variation in Cart feature

Customizing the Menu Cart
Go to WP Admin Panel > Woo Cart > Menu Cart > General Settings.
Enable Addify Menu Cart: Decide whether to enable or disable the Menu Cart
Disable Theme Menu Cart: Hide the Theme default mini Cart Widget
Show Menu Cart For: Select specific menus where you want to display the menu cart

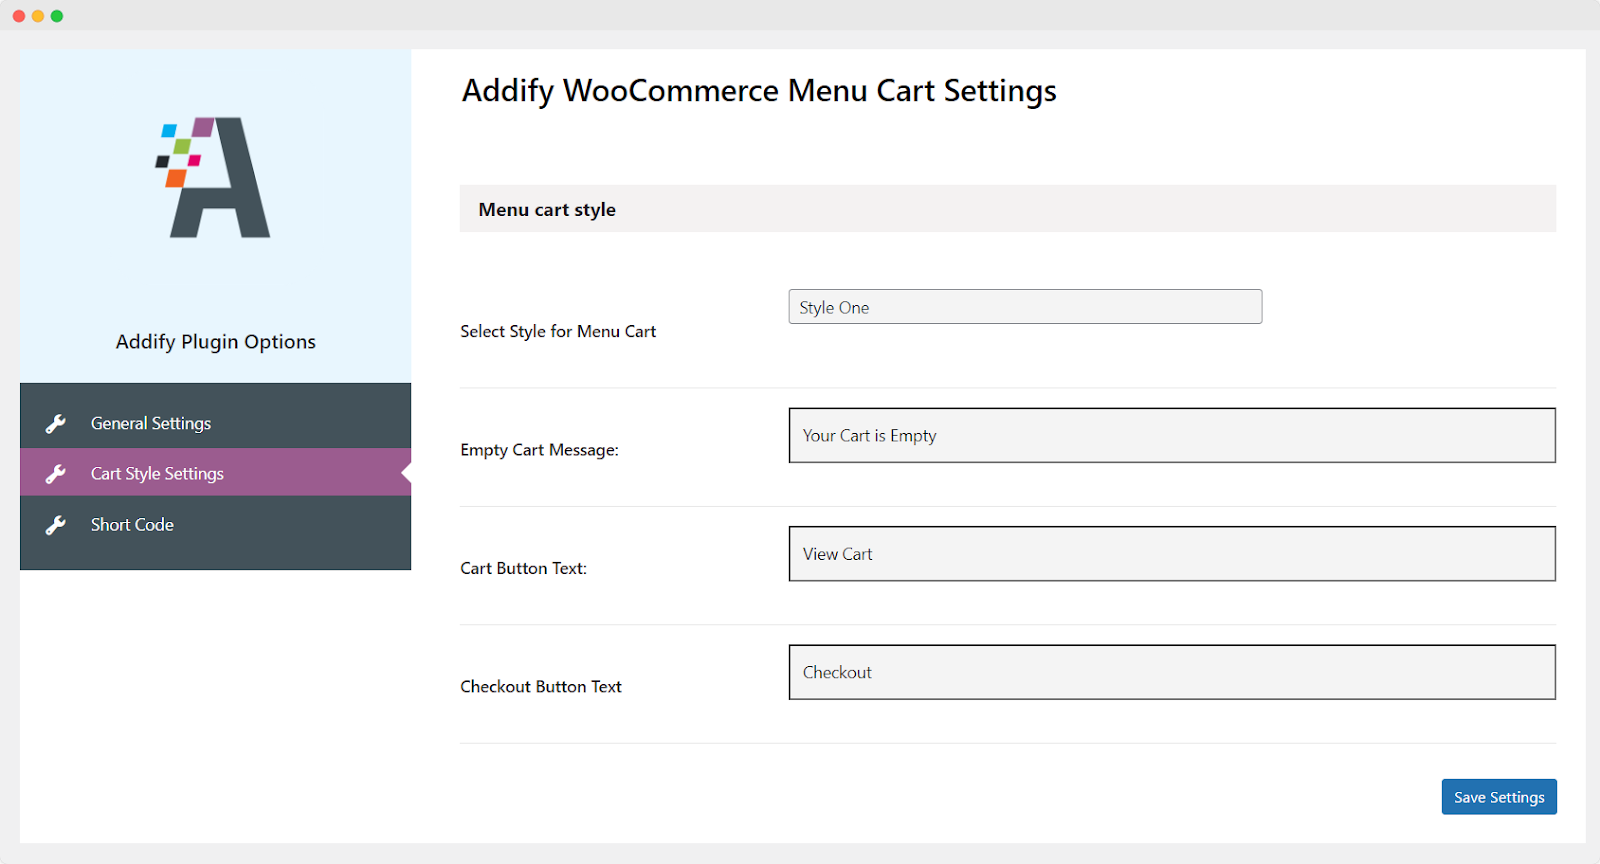
Styling the Menu Cart
Go to WP Admin Panel > Woo Cart > Menu Cart > Cart Style Settings.
Select Style for Menu Cart: Choose from three different styles:
- Style One
- Style Two
- Style Three
Empty Cart Message: Customize the text displayed when the cart is empty
Cart Button Text: Define a custom text for the cart button
Checkout Button Text: Set a custom text for the checkout button
Utilizing Shortcode to Display Menu Cart
Go to WP Admin Panel > Woo Cart > Menu Cart > Shortcode. You can use the following shortcode to display the Menu Cart with a dropdown list of Cart Items anywhere on your page
Menu Cart Button with Drop Down List of Cart Items: [addify_mini_cart_button]

Updating Variations in Cart
Go to WP Admin Panel > Woo Cart > Update Variation > General Settings.
Enable: Select the page to which the Quick Buy button should redirect after being pressed
Edit Link Text: Specify the text for the Edit link
Css Class For Edit Link: Add a CSS class name for the Edit link
Update Button Text: Define the text for the Update Button
Css Class For Update Button: Add a CSS class name for the Update Button
Cancel Button Text: Set the text for the Cancel Button
Css Class For Cancel Button: Add a CSS class name for the Cancel Button


