
Styling the Custom Product Tab
To customize the styling of custom product tabs using WooCommerce Custom Product Tabs Manager, follow these steps:
Go to your WooCommerce dashboard and navigate to Products > Global Tabs.
Click on “Add New Tab” to begin creating a new custom product tab.
Styling Options:
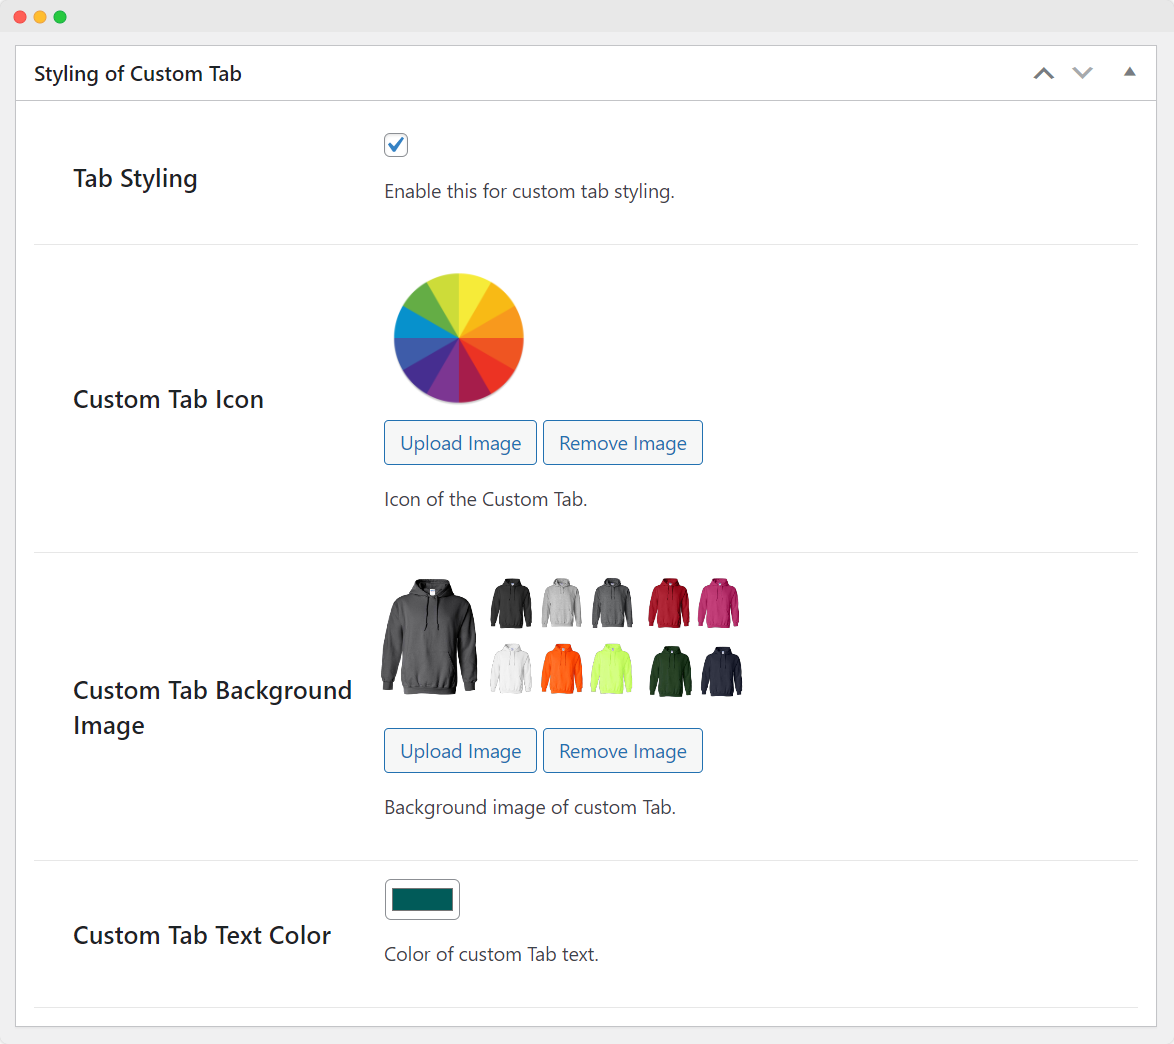
In the custom product tab settings, locate the “Styling of Custom Tab” section.
- Tab Styling: Enable the “Tab Styling” option to open up customization options.
- Custom Tab Icon: Upload an icon for the custom tab. Choose an image that represents the content or purpose of the tab effectively. This icon can help users quickly identify the type of information the tab contains.
- Custom Tab Background Image: Upload a background image for the custom tab. Choose an image that complements your site’s design and enhances the overall look of the tab. Ensure that the image doesn’t clash with the text color for better readability.
- Custom Tab Text Color: Define the text color of the custom tab. Choose a color that contrasts well with the background to ensure good visibility.
Publish Your Custom Tab:
After customizing the tab’s appearance, click on “Publish” to save the custom product tab with the selected styling.
By following these steps and paying attention to styling details, you can effectively customize the appearance of your custom product tabs in WooCommerce. This not only enhances the visual appeal of your product pages but also contributes to a positive user experience.