
Creating Checkout Notices at Checkout, Product, or Category Page
Below are the steps to create and configure these notices:
- Go to your WordPress Admin Panel.
- Look for “Cart Notices” and click on it.
- You should see a grid or list of existing dynamic cart and checkout notices.
- Go to “Cart Notices” again.
- Click on “Add New Notice.”
- Click on “Add New Message.”
- Provide a title for your notice.
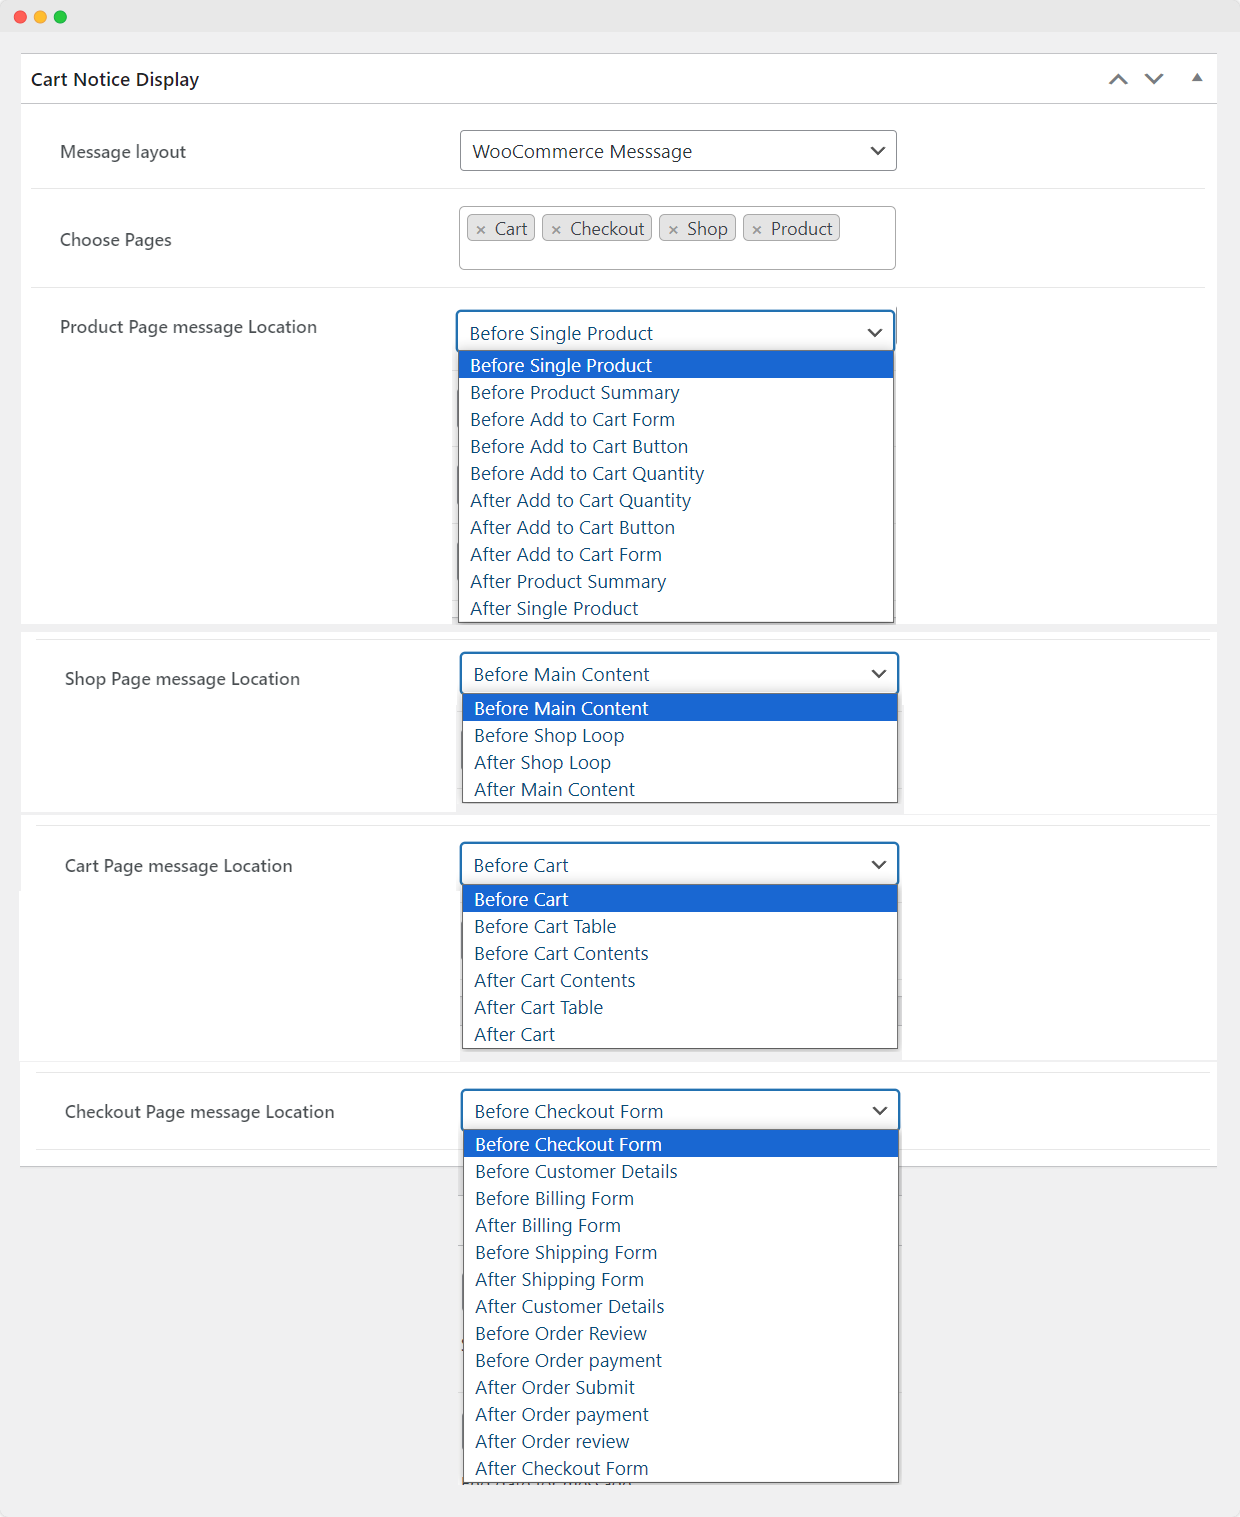
Cart Notice Display Settings:
Message Layout: Choose the layout for your cart notice:
- WooCommerce Info
- WooCommerce Message
- WooCommerce Error
- Paragraph
- Heading
If you choose “Heading,” specify the heading type.
Choose Pages: Select the pages where the notice will be displayed. Options include:
- Cart
- Checkout
- Shop
- Product
Product Page Message Location (if applicable): For Product pages, specify the message location. Options include:
- Before Single Product
- Before Product Summary
- Before Add to Cart Form
- Before Add to Cart Button
- Before Add to Cart Quantity
- After Add to Cart Quantity
- After Add to Cart Button
- After Add to Cart Form
- After Product Summary
Shop Page Message Location (if applicable): For Shop pages, specify the message location. Options include:
- Before Main Content
- Before Shop Loop
- After Shop Loop
- After Main Content
Cart Page Message Location (if applicable): For Cart pages, specify the message location. Options include:
- Before Cart
- Before Cart Table
- Before Cart Contents
- After Cart Contents
- After Cart Table
- After Cart
Checkout Page Message Location (if applicable): For Checkout pages, specify the message location. Options include:
- Before Checkout Form
- Before Customer Details
- Before Billing Form
- After Billing Form
- Before Shipping Form
- After Shipping Form
- After Customer Details
- Before Order Review
- Before Order Payment
- After Order Submit
- After Order Payment
- After Order Review
- After Checkout Form
Save or Publish:
Once you have configured all the settings, save or publish the notice.
These steps help you create and configure dynamic cart and checkout notices using the Addify Cart Notices plugin in WordPress. Make sure to check your site to see if the notices are displaying as expected on the specified pages and locations.