
Adding Multiple Custom Texts, Assigning Titles, and Making Them Required
To add multiple custom texts, assign titles, and make them required using the WooCommerce Terms and Conditions Checkbox plugin, follow these steps:
Install and Activate the Plugin:
- Download and install the WooCommerce Terms and Conditions Checkbox plugin from your preferred source.
- Activate the plugin in your WordPress dashboard.
Access Addify Terms and Conditions:
- Navigate to your WooCommerce dashboard.
- Look for the “Addify Terms and Conditions” option in the WooCommerce menu.
Creating New Terms and Conditions Checkbox:
- Inside the Addify Terms and Conditions section, click on “Add New” to begin creating a new terms and conditions checkbox.
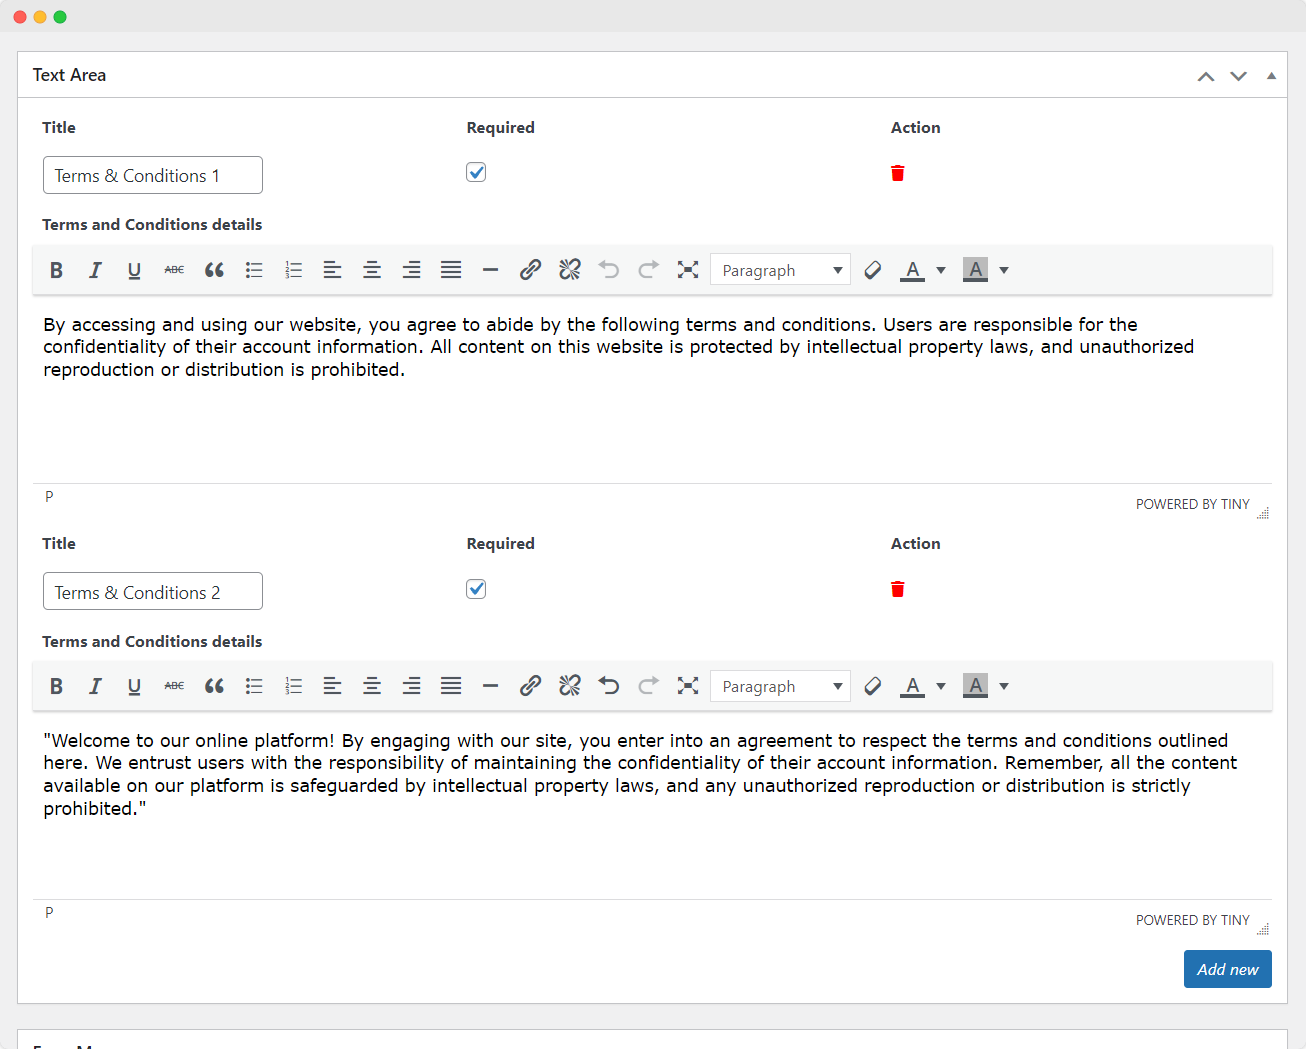
Locate Text Area:
- Within the new checkbox creation interface, find the “Text Area” section.
Add Multiple Custom Texts:
- Click on “Add New” in the Text Area to create a new custom text entry for your terms and conditions.
- Specify a unique Title for each custom text entry to easily identify it later.
- Make Them Required:
- For each custom text entry, mark the “Required” checkbox if agreement to these terms is mandatory for customers.
Enter Terms and Conditions Details:
- In the “Terms and Conditions Details” field, input your custom text providing information about your store’s policies, regulations, or any other relevant details you want customers to agree to.
Provide Remaining Details and Publish:
- Fill in any remaining details for the terms and conditions checkbox, such as placement options.
- Click on “Publish” to save the new checkbox rule.
By following these steps, you can add multiple custom texts with unique titles, make them required if necessary, and ensure they are properly displayed for customers to agree to during their shopping experience on your WooCommerce store.