
Setting up tax exemption in WooCommerce is important for businesses that sell to both wholesale and retail customers. It helps businesses follow tax rules and allows flexibility for customers who don’t have to pay taxes due to certain qualifications. Tax exemption allows customers to save money, increasing their ability to make more purchases.
This article provides you with a detailed guide on how to set up tax exemption in WooCommerce, covering General Settings, Exempt Customers & Roles, Tax Exemption Requests, Email & Notification Settings, and Guest User Settings.
A Complete Guide To Configure Tax Exemption
Here’s the article to help you and guide you on the simplest and easiest way to set up tax exemptions for a customer in WooCommerce.
Install and Activate Tax Exempt for WooCommerce
To set up WooCommerce Tax Exemption, the user has to begin by ensuring that WooCommerce is installed and activated on your WordPress website. This basic step is crucial for running your online store smoothly.
Configure General WooCommerce Settings
Navigate to the WooCommerce settings in the WordPress dashboard. Under the general tab, verify that your store address is correctly set. Accurate store location information is crucial for determining tax rates.

Enable Tax Options
In the WooCommerce settings, go to the tax and check the “Enable taxes and tax calculations” option. This step is the starting point for setting up tax options.
Set Tax Rates
After navigating to tax, under the “Standard Rates” section, add tax rates based on your store’s location. Click “Insert Row” to create a new tax rate and configure rates in accordance with local tax regulations.
Customer Tax Exemption
Since WooCommerce doesn’t have a built-in option for exempting customers from taxes, check out third-party plugins. Look for one that supports customer tax exemption, install it, and set it up to exclude certain customers from taxes.
Test the Setup
After configuring tax exemption settings, perform a test by placing an order with a tax-exempt customer account. This step makes sure that everything is set up correctly and follows the tax rules in your area.
WooCommerce Tax Exempt Plugin Capabilities
WooCommerce Tax Exempt enables store admins to provide tax exemption for certain user roles and customers. Admins can either manually grant tax exemption from the backend or allow customers to request it through their “My Account” page. Now that we’ve talked about setting up the process in the article, you will be able to explore and understand the features of WooCommerce Tax Exempt Plugin following;
Auto/Manual Tax Exemption
In the General Settings, you have the option to set auto or manual tax exemption. If you choose to remove tax automatically, customers won’t see a checkbox on the checkout page. Keeping this option unchecked allows customers to manually remove tax by selecting a checkbox during checkout.
Text Field and Textarea Settings
- Enable Text Field: Activate a text field on the tax form in the user’s My Account page. This field is customizable for collecting information such as name and tax ID.
- Enable Textarea Field: Similar to the text field, this option enables a textarea field for additional information.
- Enable File Upload Field: Add a file upload field to collect documents like tax certificates.
For each field type, you can customize labels and set whether they are required.
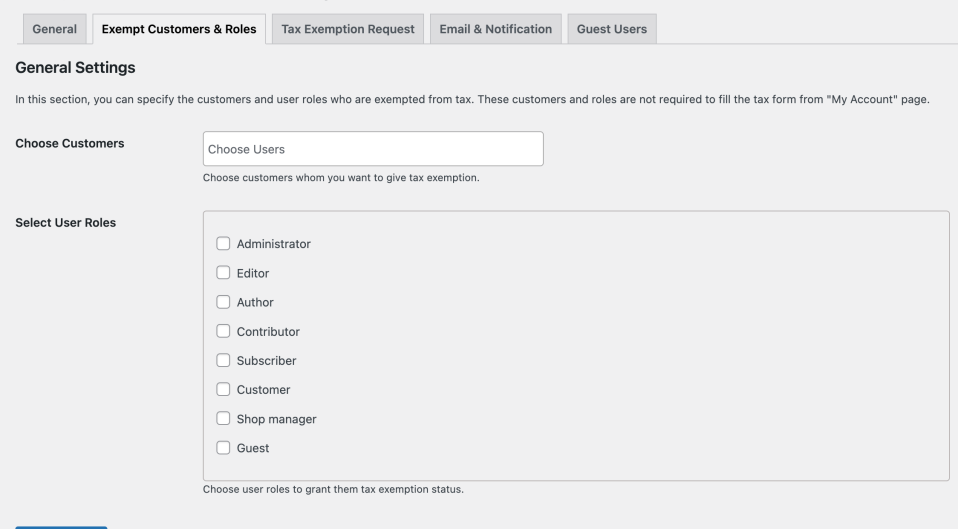
Choose Customers and User Roles
WooCommerce Tax Exempt Plugin specifies which customers or user roles are exempt from taxes, such as Administrators, Editors, Authors, Contributors, Subscribers, Customers, Shop Managers, Wholesale users, B2B participants, Retailers, and Guests.
Select User Roles for Tax Exemption Request
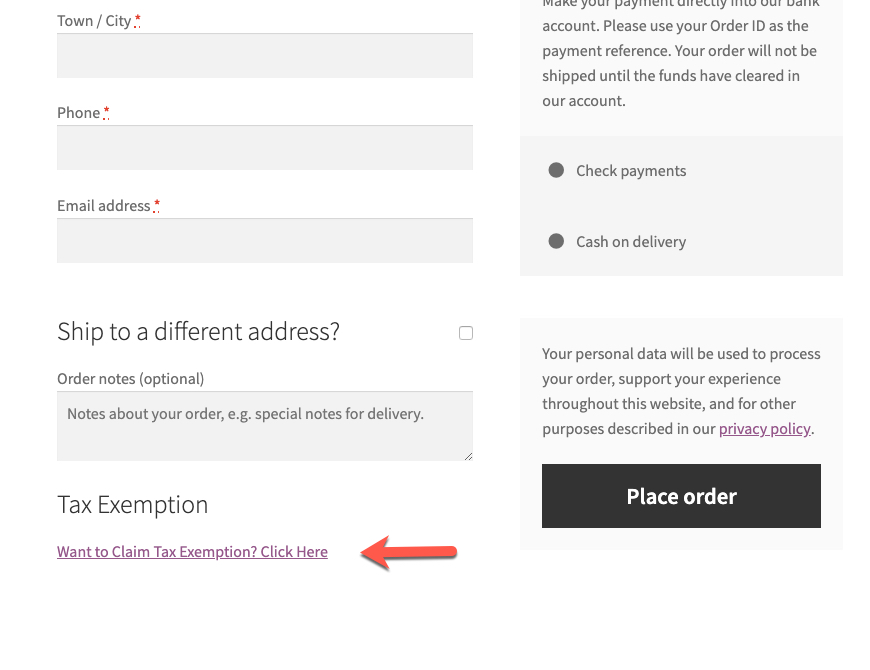
Select the user roles eligible to request tax exemption via the My Account page and have a corresponding checkbox displayed on the checkout page. Implement the auto-approved tax-exempt requests feature for smooth automatic approval of such requests. The user can easily grant tax exemption to specific user roles.
Display Tax Exemption Message
Using this plugin, the customer can show a message on the checkout page for users with tax exemptions. It also helps in customizing the message text as needed.
Email & Notification Settings
Admin/Shop Manager Email
Set the email address to receive all admin-related emails regarding tax exemption.
Add/Update Tax Info Email Messages
Customize messages for adding or updating tax information for both admin and customer emails.
Approve and Disapprove Tax Info Email Messages
Notify customers via email/message when admin approves or disapproves submitted tax information.
Expire Tax Info Email Messages
Tax Exempt WooCommerce plugin creates messages for notifying users when submitted tax information expires, ensuring timely updates and compliance.
Show Tax Exemption Message for Guest Users
The plugin also allows the customer to display a tax exemption message on the checkout page for guest users.
Final Words
In conclusion, setting up tax exemption in WooCommerce is an important step for businesses dealing with both wholesale and retail customers. This article has explained the essential steps covering such as installing and activating WooCommerce, configuring general settings, enabling tax options, setting tax rates, and implementing customer tax exemptions.
Tax Exempt for Woocommerce plugin By Addify is a top-rated plugin as mentioned in Pluginhive. This plugin adds valuable capabilities, allowing for auto/manual tax exemptions, customizable text and file upload fields, and specific user role selections. With detailed email and notification settings, businesses can efficiently manage tax exemption requests and keep customers informed. By following this, you can streamline the tax exemption process in your online store, providing flexibility to customers and building trust in the market.
FAQs
Q: How do I exclude taxes in WooCommerce?
Navigate to WooCommerce Settings, click on the “Tax” tab, and uncheck “Enable Taxes.” This simple step ensures that taxes are excluded from your WooCommerce transactions, smoothing the purchasing process for your customers.
Q: How do I change my tax settings in WooCommerce?
Easily modify your tax settings by accessing the WooCommerce tax settings. Here, you can select tax classes and customize options to align with your business’s specific tax requirements, ensuring accurate and compliant calculations.
Q: Is WooCommerce tax-free?
WooCommerce itself is not tax-free. It is a plugin for WordPress that enables you to create an online store, and the taxation depends on the laws and regulations of your specific location. You need to configure tax settings based on your business location and the regions where you sell products.


