
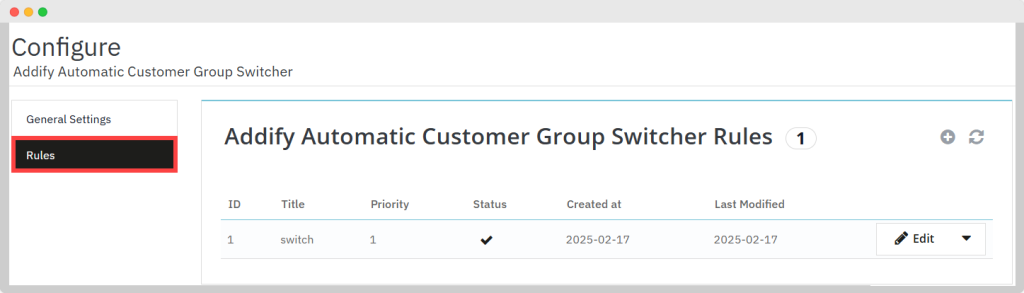
Viewing Automatic Customer Switcher Rules in a Log
Automatic Role Changer Rules:
Here you can:
- View a complete list of all rules created in a log
- Change the status of these rules from a log
- Edit any existing rule
- Perform bulk actions on multiple rules at once
Adding a New Rule to Switch Customer Group
Click on “+” to create a new rule and fill in the following details.

Rule Details:
Active Rule: Choose ‘Yes’ to activate the rule
Rule Name: Enter a unique name for the rule you want to create
Rule Priority: Enter a numeric value to set the priority for this rule. Lower numbers indicate higher priority
Choose Switch or Assign: Select one of the following options based on your requirement:
- Assign the Group/s: Choose this option if you want to assign the customer to a specific group
- Switch the Existing Group: Choose this option if you want to switch the customer from their current group to a new one
Current Group: Mark any/all of the customer group(s) that you have already assigned to the customer. You can select from the following options:
- Visitor
- Guest
- Customer
- VIP Customer
- Professional Customer
- Legend Customer
Assigned Group: Mark the customer group(s) you want to assign the customer to. Choose from the following options:
- Visitor
- Guest
- Customer
- VIP Customer
- Professional Customer
- Legend Customer
Conditions: Add multiple conditions to determine when the rule should be applied. The conditions can be based on:
- On Product:
- Search Product: Search for the products and add them to the rule
- Apply rule on purchase of any of the selected products
- Apply rule on purchase of all of the selected products
- Search Product: Search for the products and add them to the rule
- On Category:
- Categories: Select the relevant categories you want to include in the rule
- On Order Amount:
- Order Amount Limit From: Specify the starting amount limit for the specific order
- Order Amount Limit To: Specify the ending amount limit for the specific order
- On Total Spent Amount:
- Total Spent Amount Limit From: Enter the starting amount limit for a customer’s total spending
- Total Spent Amount Limit To: Enter the ending amount limit for a customer’s total spending
- Customers Shopping Start Date: Specify the starting date for the period you want to consider for the customer’s total spending
- Customers Shopping End Date: Specify the ending date for the period you want to consider for the customer’s total spending
- On Supplier:
- Supplier: Specify the desired supplier
- On Brand:
- Brand: Specify the desired brand
- On Country:
- Country: Specify the desired country
- On State:
- State: Specify the desired state
- On City:
- City: Specify the desired city
- On Postcode:
- Postcode: Specify the desired postcode
- On Number of Orders:
- Number of Orders: Define the minimum number of orders
- Number of Days: Specify the period over which the number of orders should be counted
- On Current Customer Group: Choose the customer’s current group
Conditions: Select how conditions should be applied:
- All Conditions Met: The rule applies only if all specified conditions are satisfied
- Any Condition Met: The rule applies if any of the specified conditions are met
Email Notification: Option to enable or disable email notifications for customers
Admin Email Notification: Enable or disable sending email notifications to the admin
- Multiple Emails: Add multiple admin email addresses separated by commas
Rule Timing:
Rule Starting Date: Enter the starting date for when this rule should become active
Rule Ending Date: Enter the ending date for when this rule should no longer be active. Leave this field blank if you want the rule to be active indefinitely
Group Ending Limit: Enter the ending limit of the group in days. This is the duration for which the customer will be assigned to the new group before being switched back to their original group.
Click “Save” to create a new rule.

Keeping a Record of Customer Groups Changes in a Log
History List:
- View a record of customer group changes in a log
- Access the following details of each customer:
- Customer ID
- Customer Name
- Previous Group
- New Group
- Group Changing Reason
- Date Updated
- View the details of each customer group change:
- Customer ID
- Customer Name
- Previous Group
- New Group
- Group Changing Reason
- Rule Name
- Rule Starting Date
- Rule Ending Date
- Group Assigned Limit (Days)
- Date Updated
- Take action to delete any history
- Perform bulk actions


