
Customizing the Best Price Button
Go to WooCommerce > Settings > Best Price Setting > General.
Configure Best Price Button:
Activate Plugin: Enable the Plugin to activate the Best Price feature.
Button Text Field: Enter the text you want to display on the Best Price button.
Show the Button: Choose where you want to display the Best Price button on the product page. Options include:
- Before Price
- After Price
- Before Add to Cart Button
- After Add to Cart Button
- Before Product Excerpt
Show Product Info: Check this option if you want to hide product information in the Best Price modal window.
Show Site URL: Choose whether to show or hide the site URL field in the Best Price popup.
Required Site URL: Check this option if you want to make the site URL field a required field in the Best Price popup.
Show Note: Choose whether to show or hide the note field in the Best Price popup.
Required Price Field: Check this option if you want to make the note field a required field in the Best Price popup.
Modal Width: Specify the width of the Best Price modal window.
Modal Height: Specify the height of the Best Price modal window.
Additional Field Message: Enter any additional information or instructions for customers regarding the fields or the Best Price feature.
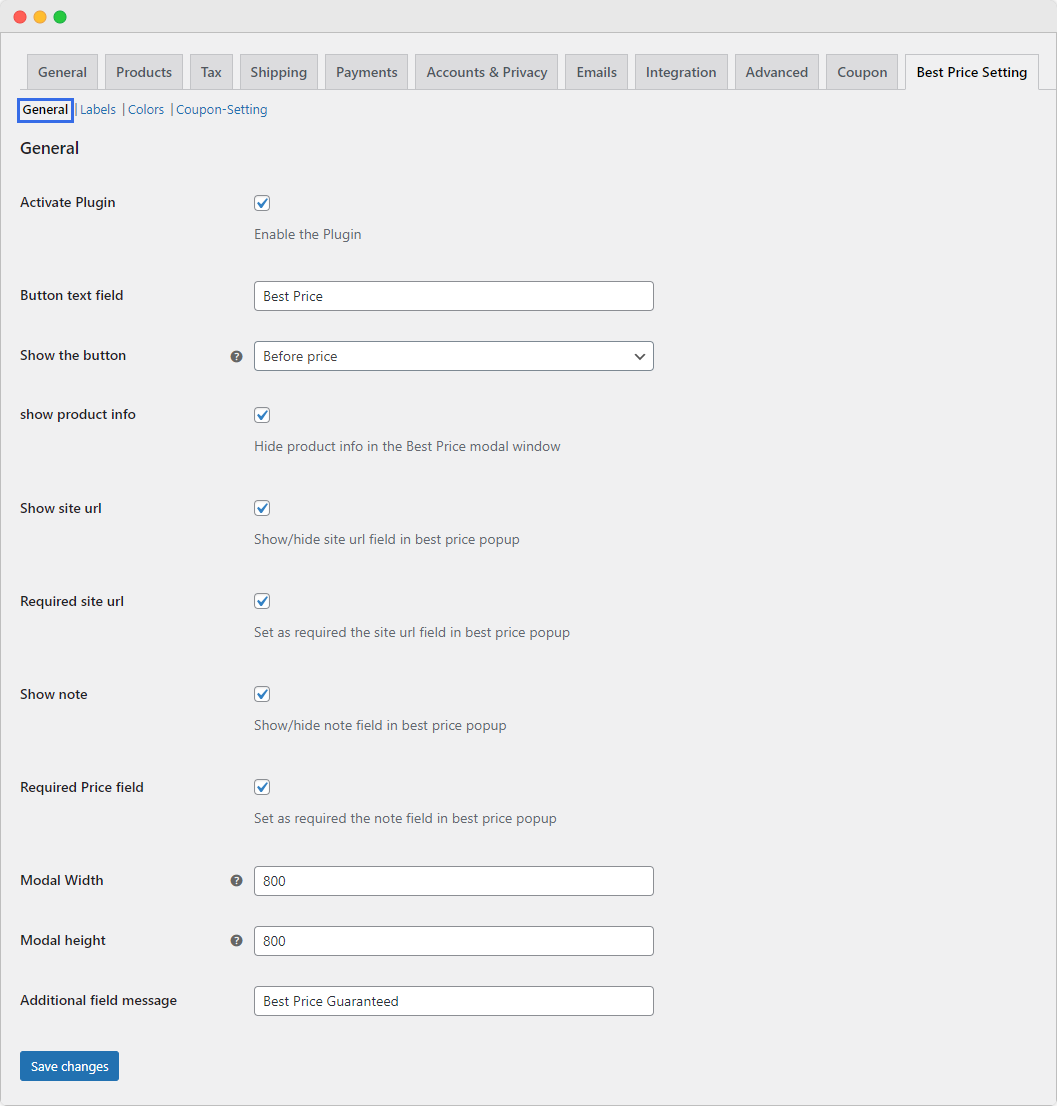
Save Changes:
After making the desired configurations, save your changes.
These settings allow you to control the visibility and requirements of various fields in the Best Price popup, as well as customize the text and dimensions of the modal window.