
Managing Best Price Requests in the Log
To manage Best Price Requests in the log, including editing, accepting, or rejecting requests using the “Best Price Guaranteed for WooCommerce” plugin, follow these steps:
Go to WooCommerce > Best Price.
- Here, you can see a complete list of all the best price requests in a log.
- You can perform bulk actions to edit or delete any request.
- Apply filters based on the date to narrow down the list of requests.
- Use the search bar to find a specific best-price request.
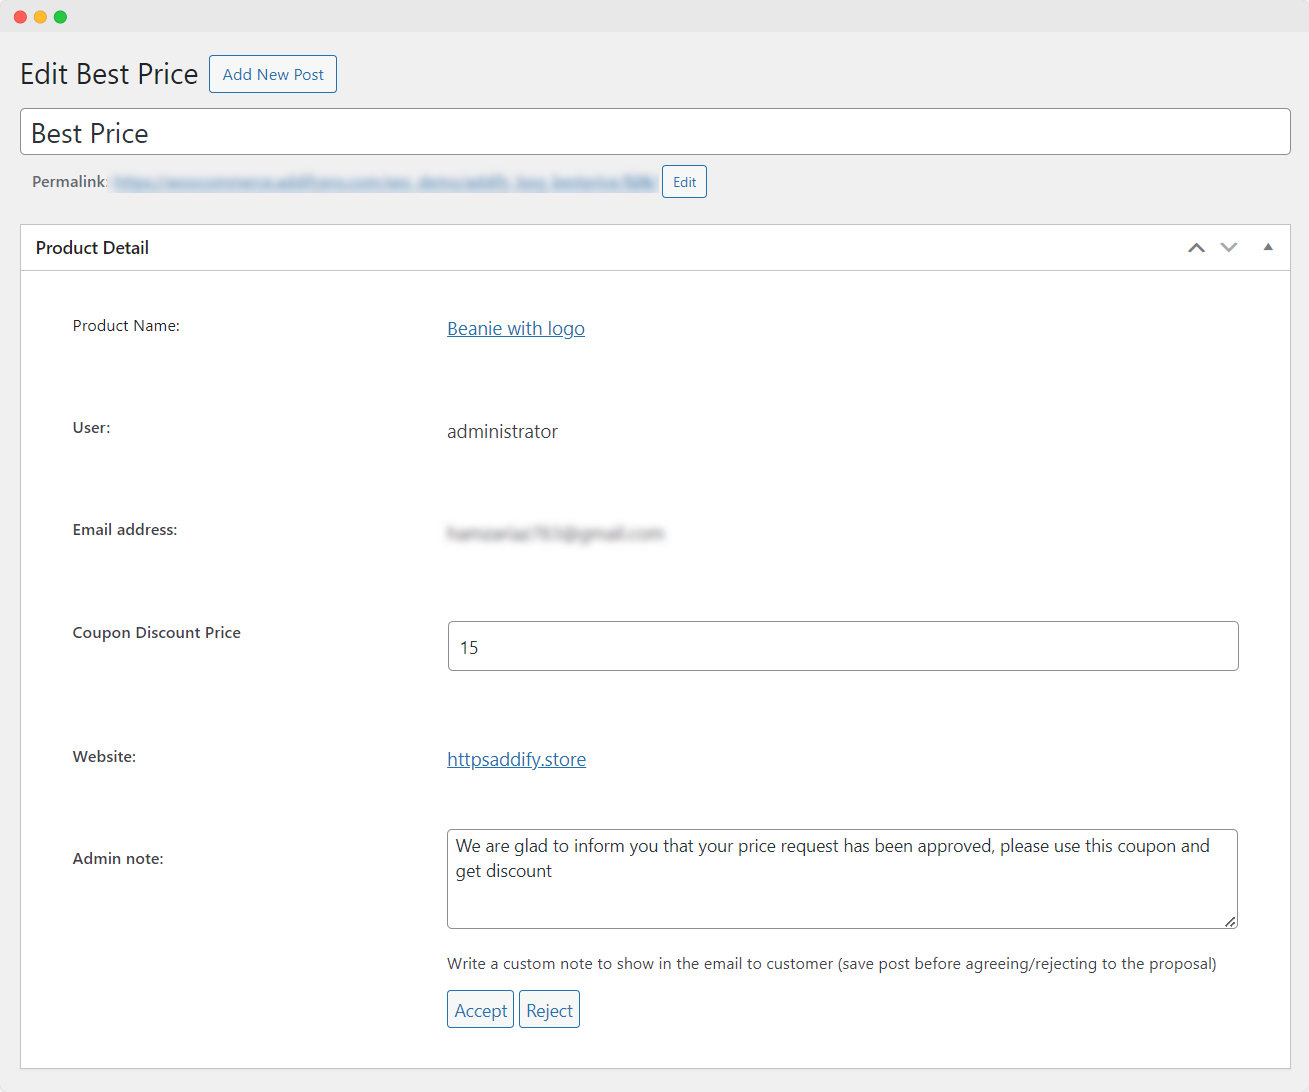
Edit the existing best price request or create a new request by clicking on “Add New.”
Provide the necessary request details and proceed to “Accept/Reject” to approve/disapprove any request.
Request Details:
Add Title: Provide a title for the best price request. This title helps you identify and manage the request.
Product Detail:
Product Name: Enter the name of the product for which the customer is requesting a better price.
User: Specify the name of the user making the request.
Email Address: Enter the email address of the user.
Coupon Discount Price: Provide the proposed discounted price.
Website: Indicate the website or store where the product is listed.
Admin Note: Write a custom note to show in the email to the customer. Save the post before agreeing/rejecting the proposal.
Accept/Reject:
Once you have reviewed the request, you have the following options:
Accept: To accept the best price request from the customer.
Reject: To reject the best price request from the customer.
Save Changes:
Save the post after accepting or rejecting the proposal.
These steps provide a comprehensive overview of how to manage Best Price Requests, including viewing the log, performing actions, and adding new requests with options to accept or reject.