
Setting the Best Price Button for Specific Users
Go to WooCommerce > Best Price.
Add a New Best Price Request:
Click on “Add New” to create a new best-price request.
Provide Request Details:
Add Title: Provide a title for the best price request. This title is for your reference and will help you identify and manage the request.
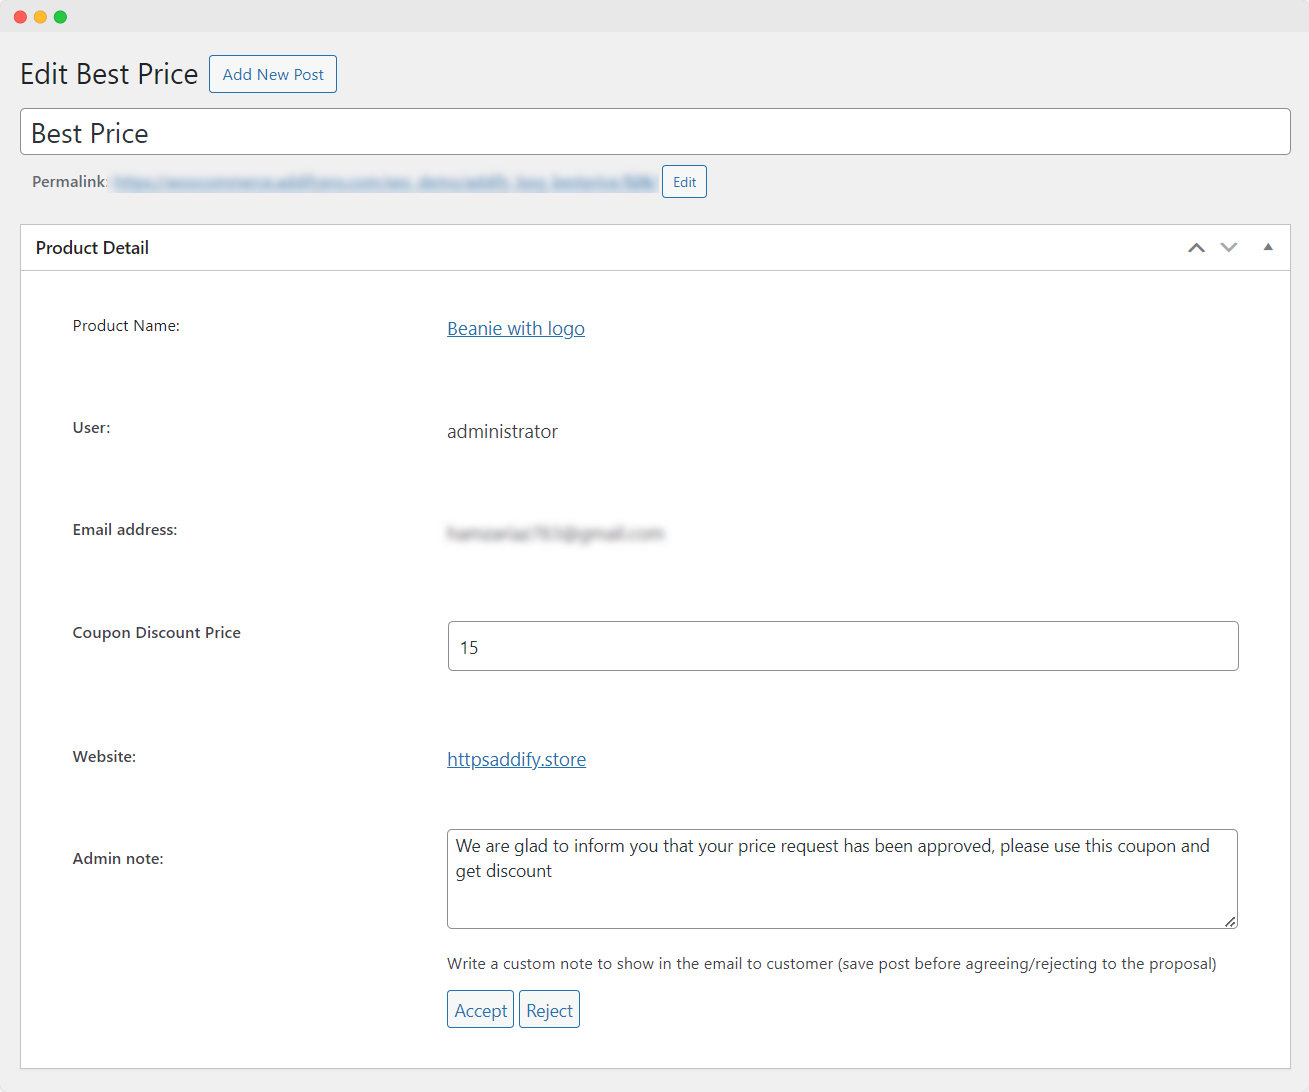
Product Detail:
Product Name: Enter the name of the product for which the customer is requesting a better price.
User: Specify the name of the user making the request.
Email Address: Enter the email address of the user.
Coupon Discount Price: Provide the proposed discounted price. This is the price you are willing to offer to the customer as a discount.
Website: Indicate the website or store where the product is listed. This information helps in identifying the product.
Admin Note: Write a custom note to show in the email to the customer. This note could contain any additional information or terms related to the proposal.
Save the Post:
Save the post before agreeing/rejecting the proposal. This ensures that your changes are saved.
After saving the post, you can review the request and decide whether to agree or reject the proposal. The customer will receive an email notification with the admin note you provided.