
Adding a Store Location on the Dedicated Store Finder Page
To add a store location on the dedicated Store Finder page using Store Locator for WooCommerce, follow these steps:
Go to your WordPress Admin Panel.
Look for “Store Locator” in the menu and click on “Manage Stores.”
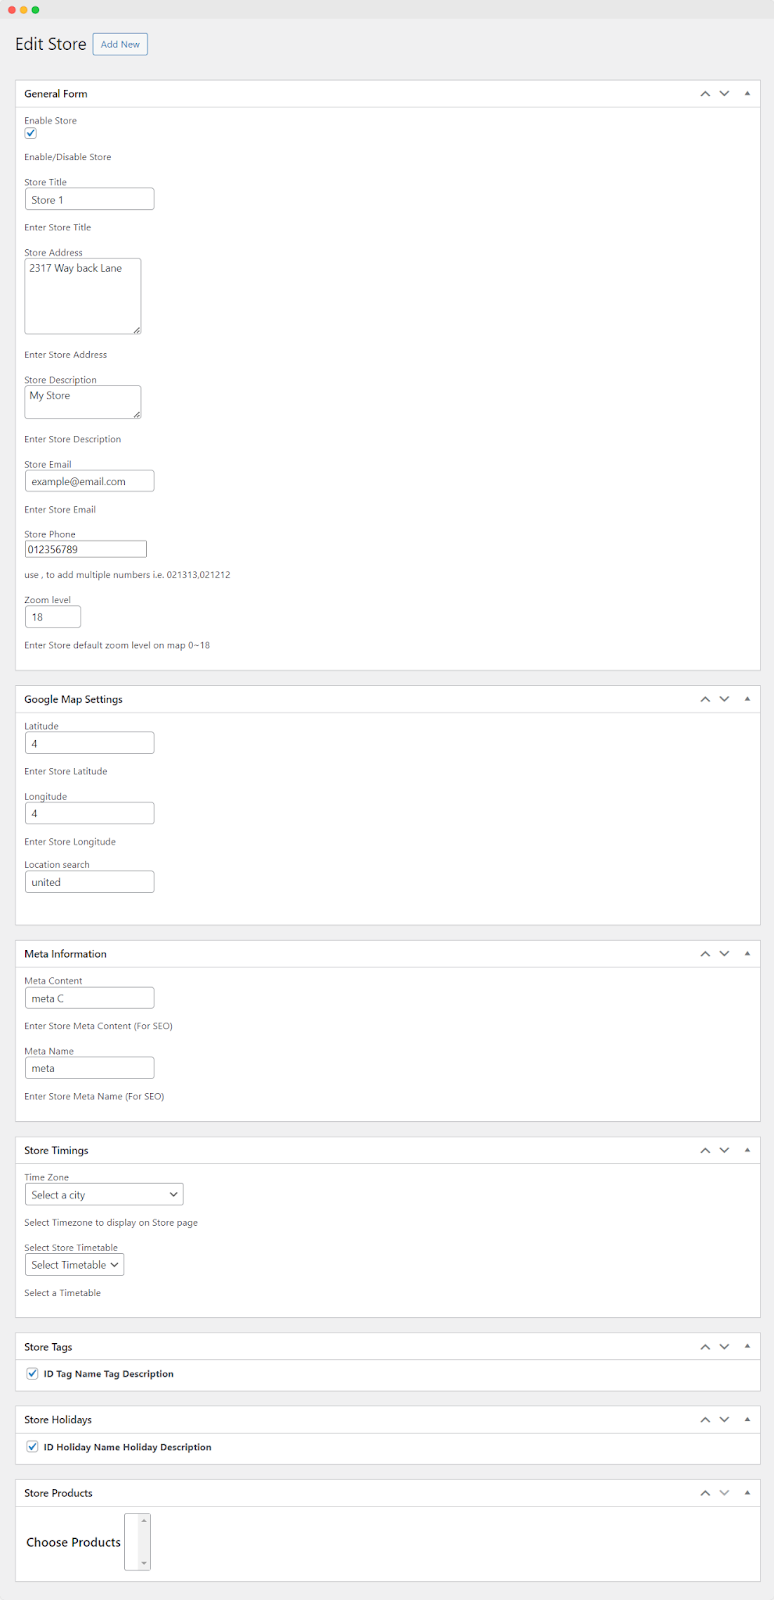
Adding a New Store Locator
To add a new store locator, click on the “Add New” button. Fill in General Information:
- Enable Store: Check this option to enable the store.
- Store Title: Enter a custom title for the store.
- Store Address: Provide the store’s address.
- Store Description: Add a custom description for the store.
- Store Email: Enter the store’s email address.
- Store Phone: Add one or more phone numbers separated by commas.
- Zoom Level: Set the default zoom level for the store on the map.
Set General Map Settings:
- Latitude: Enter the store’s latitude.
- Longitude: Enter the store’s longitude.
- Location Search: Enter a location search term.
Add Meta Information:
- Meta Content: Enter SEO-optimized meta content for the store.
- Meta Name: Enter SEO-optimized meta name for the store.
Configure Store Timings:
- Time Zone: Select the city from the dropdown to display the timezone on the Store page.
- Select Store Timetable: Choose the store’s timetable from the dropdown.
Enable Additional Features:
- Store Tags: Checkmark to enable store tags.
- Store Holidays: Checkmark to enable store holidays.
Associate Store with Products:
Store Products: Choose products to associate with the store.
Save the Store Locator:
Once you have filled in the necessary information, click on the “Save” button to create the new store locator.
These steps should help you add a new store location to the dedicated Store Finder page using the Store Locator for WooCommerce plugin. Users will be able to find and view this store on the Store Finder page with the provided information.