
Displaying Useful Information About Store Location
To display useful information about store locations for customers using the WooCommerce Store Locator plugin, follow these steps to configure the settings:
Log in to your WordPress Admin Panel.
Look for “Store Locator” in the menu and click on “Configurations.”
Configure General Settings:
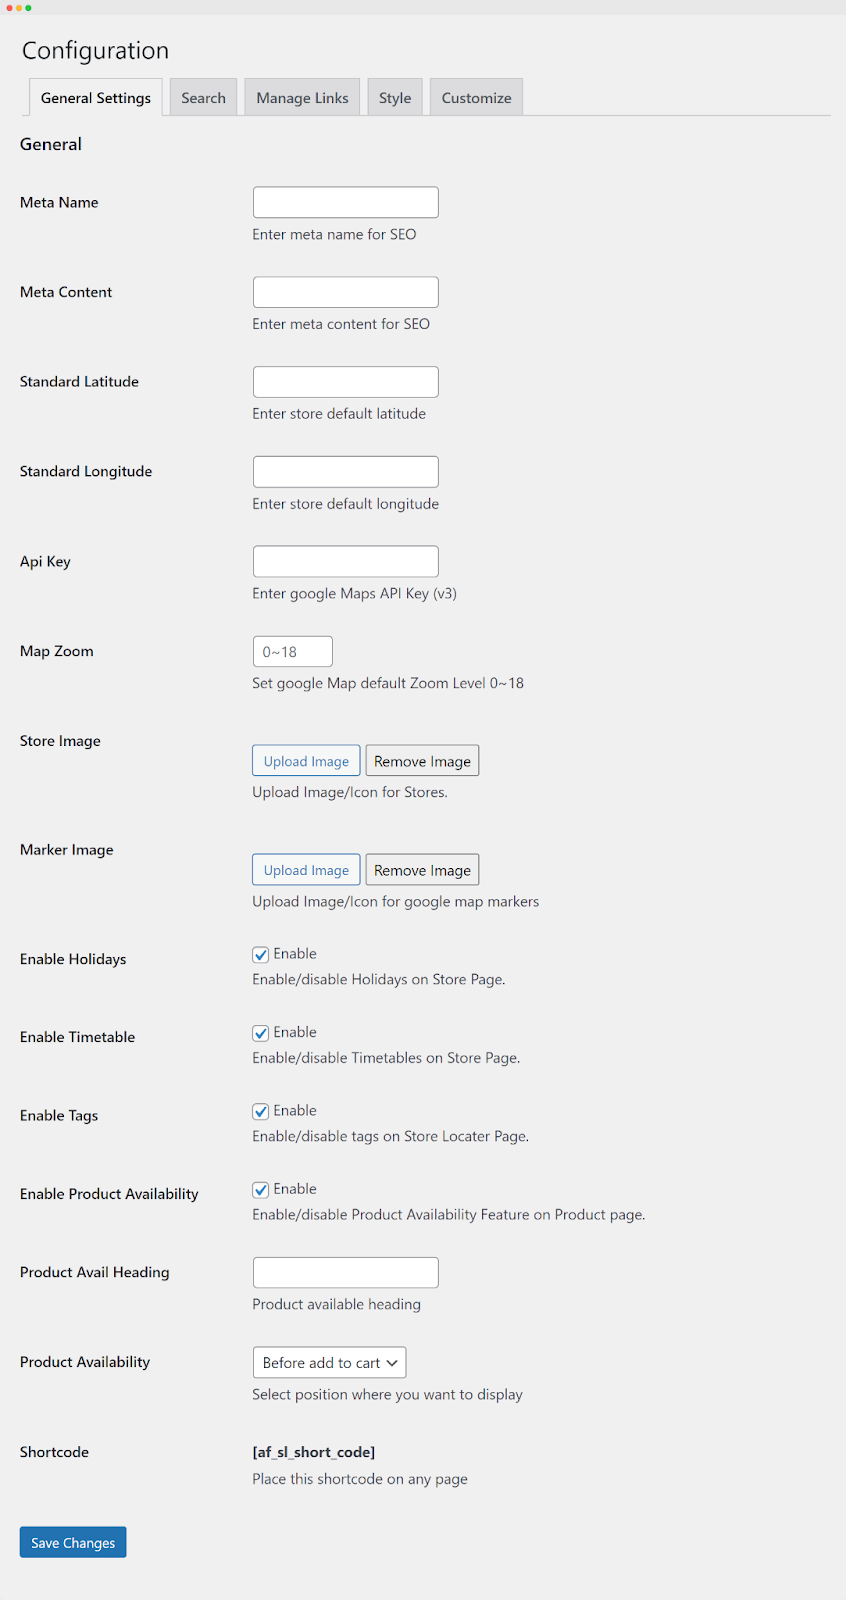
In the “General Settings” section, you can set various parameters for your store.
Meta Information:
- Enter a meta name for SEO in the “Meta Name” field.
- Enter meta content for SEO in the “Meta Content” field.
Location Settings:
- Enter the default latitude for your store location in the “Standard Latitude” field.
- Enter the default longitude for your store location in the “Standard Longitude” field.
- Enter your Google Maps API Key (v3) in the “API Key” field.
- Set the default Google Map zoom level (0~18) in the “Map Zoom” field.
Images:
- Upload an image/icon for your store in the “Store Image” field.
- Upload an image/icon for Google Maps markers in the “Marker Image” field.
Features:
- Enable or disable holidays on the store page using the “Enable Holidays” option.
- Enable or disable timetables on the store page using the “Enable Timetable” option.
- Enable or disable tags on the store locator page using the “Enable Tags” option.
- Enable or disable the Product Availability feature on the product page using the “Enable Product Availability” option.
- Set the heading for product availability in the “Product Avail Heading” field.
- Select the position where you want to display product availability using the “Product Availability” options. Options include:
- After Add to Cart
- Before Add to Cart
- Before Summary
- After Summary
- In Tab
Shortcode:
Use the provided shortcode [af_sl_short_code] on any page to enable the store locator.
Search Settings:
- Assign the default radius for Google map search in the “Default Radius” field.
- Assign the maximum radius for Google map search in the “Maximum Radius” field.
Save Changes:
After configuring these settings, scroll to the bottom of the page and click on the “Save Changes” button to apply the changes.
By following these steps, you have configured the WooCommerce Store Locator plugin to display useful information about store locations for customers. The specified settings will affect the appearance and functionality of the store locator on your website.