
Managing Multiple Store Locations
Adding a New Store Locator
Go to WP Admin Panel > Store Locator > Manage Stores.
View a complete log of all store locators with the following details:
- Description
- Address
- Latitude
- Longitude
- Zoom Level
- Status

Click on “Add New” to create a new store locator.
Fill in the following information:
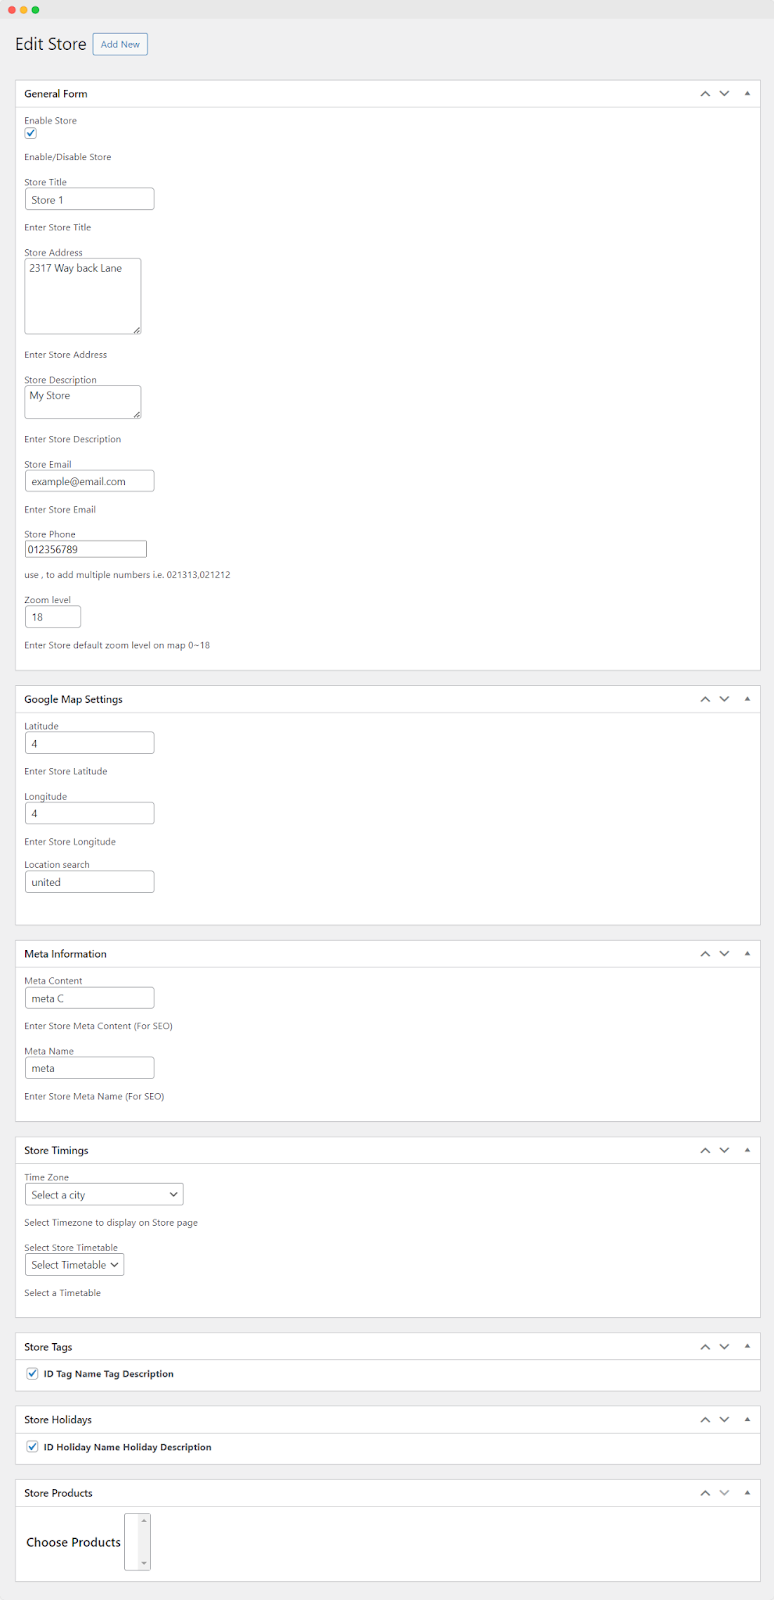
General Form:
- Enable Store: Checkmark to enable the store
- Store Title: Enter a custom store title
- Store Address: Enter a custom store address
- Store Description: Enter a custom description for the store
- Store Email: Add a store email
- Store Phone: Add multiple phone numbers separated by a comma
- Zoom Level: Enter the store default zoom level on the map
General Map Settings:
- Latitude: Enter a store latitude
- Longitude: Enter a store longitude
- Location search: Enter a location search
Meta Information:
- Meta Content: Enter SEO-optimized meta content for the store
- Meta Name: Enter SEO-optimized meta name for the store
Store Timings:
- Time Zone: Select a city from the dropdown to display the timezone on the Store page
- Select Store Timetable: Select timetable from the dropdown
Store Tags:
Checkmark to enable store tags
Store Holidays:
Checkmark to enable store holidays
Store Products:
Choose Products: Select products to include in the store
Adding a New Store Timetable
Go to WP Admin Panel > Store Locator > Timetable.
View a complete log of all store timetables with the following details:
- Title
- Monday
- Tuesday
- Wednesday
- Thursday
- Friday
- Saturday
- Sunday
Click on “Add New” to create a new store timetable.

Fill in the following information:
Daily Timetable Form:
- Enable Timetable: Enable/Disable timetable on your store
- Timetable Name: Enter a custom name for the timetable
Monday Timings:
- Monday Status: Enable/Disable Monday from the timetable
- Start Time: Set the opening time of the store
- Break Time: Set break time for the store
- End Break: Set a store time when the break ends
- End Time: Set a closing time for the store
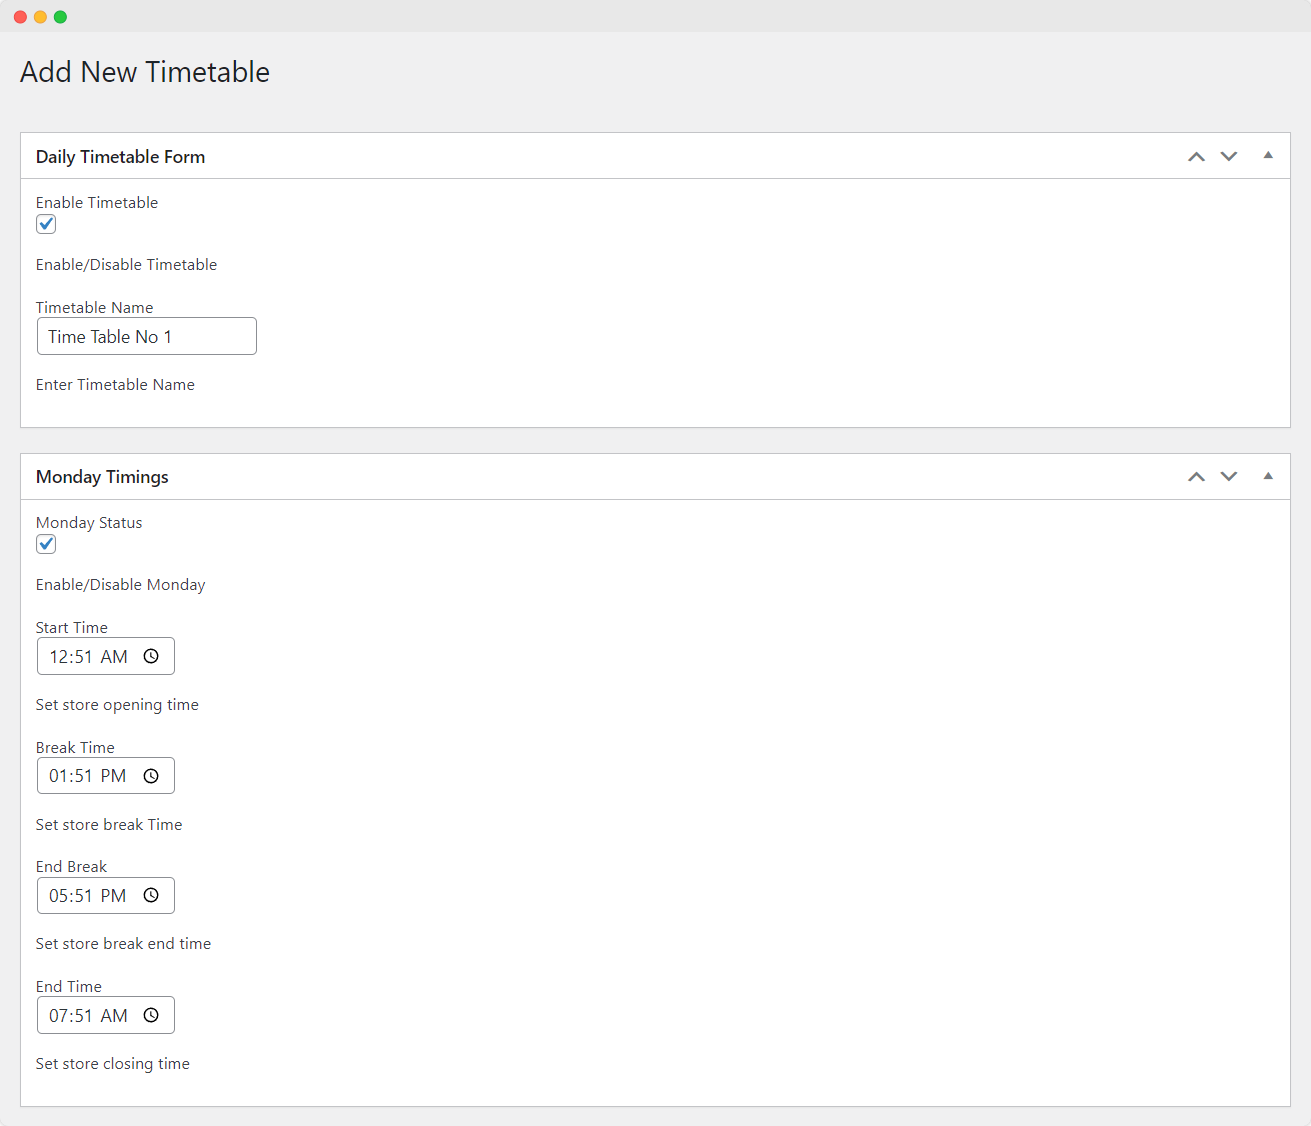
(Repeat the above steps for Tuesday, Wednesday, Thursday, Friday, Saturday, and Sunday.)
Adding Multiple Store Tags
Go to WP Admin Panel > Store Locator > Tag.
View a complete log of all store tags with the following details:
- Title
- Tag Description

Click on “Add New” to create a new store tag.
Fill in the following information:
New Tags:
- Tag Title: Enter a custom tag title
- Tag Description: Enter a custom tag description

Adding Store Holidays
Go to WP Admin Panel > Store Locator > Holidays.
View a complete log of all store holidays with the following details:
- Title
- Description
- Is Special
- Status
- Start Date
- End Date

Click on “Add New” to create a new store holiday.
Fill in the following information:
Holiday Form:
- Enable Holiday: Enable/Disable store holiday
- Special Holiday: Enable/Disable special holiday on your store
- Start Date: Set start date for the holiday
- End Date: Set the end date for the holiday
- Vacation Name: Specify the vacation name
- Explanation: Choose to enter the explanation for the vacation

Configuring the Store Locator
Go to WP Admin Panel > Store Locator > Configurations.
General Settings:
- Meta Name: Enter meta name for SEO
- Meta Content: Enter meta content for SEO
- Standard Latitude: Enter the default latitude for your store location
- Standard Longitude: Enter the default longitude for your store location
- API Key: Enter your Google Maps API Key (v3)
- Map Zoom: Set the default Google Map zoom level (0~18)
- Store Image: Upload an image/icon for your store
- Marker Image: Upload an image/icon for Google Maps markers
- Enable Holidays: Enable or disable holidays on the store page
- Enable Timetable: Enable or disable timetables on the store page
- Enable Tags: Enable or disable tags on the store locator page
- Enable Product Availability: Enable or disable the Product Availability feature on the product page
- Product Avail Heading: Set the heading for product availability
- Product Availability: Select the position where you want to display product availability:
- After Add to Cart
- Before Add to Cart
- Before Summary
- After Summary
- In Tab
- Shortcode: Place this shortcode on any page to enable the store locator [af_sl_short_code]

Search:
- Default Radius: Assign the default radius for Google map search
- Maximum Radius: Assign the maximum radius for Google map search

Manage Links:
- Enable Footer Link: Enable or disable the footer link
- Footer Link Label: Set the label/title for the footer link

Style:
Enable Styling: Enable or disable custom styling
Icons: Set custom icons for the phone and email on the store-locator page
Search/Reset Button Style: Set custom background and text color for the search and reset buttons on the store-locator page
Header Portion Style: Set custom background and text color for headings on the store-locator page
Street/direction/GO Button Style: Set custom background and text color for the street, direction, and GO buttons on the store-locator page
Tags Button Style: Set a custom background and text color for the Tags button on the store-locator page

Customize:
- Page Title: This text will be displayed on the frontend
- Page Heading: Main heading of the GMap store locator page
- Page Sub Heading: Subheading of the GMap store locator page
- Stores Section: Add a custom Store heading text
- Tag Section: Change the heading text for the tags section
- Holiday Section: Change the heading text for the holiday section
- Timetable Section: Change the heading text for the timetable section
- Street Button: Change store streetview button text
- Direction Button: Change store direction button text
- GO Button: Change store Go button text
- Time-Zone Heading: Change store time heading text
- Search Button: Change the Search button text
- Reset Button: Change the Reset button text


