
Defining Custom Order Numbers Format
Configuring General Settings
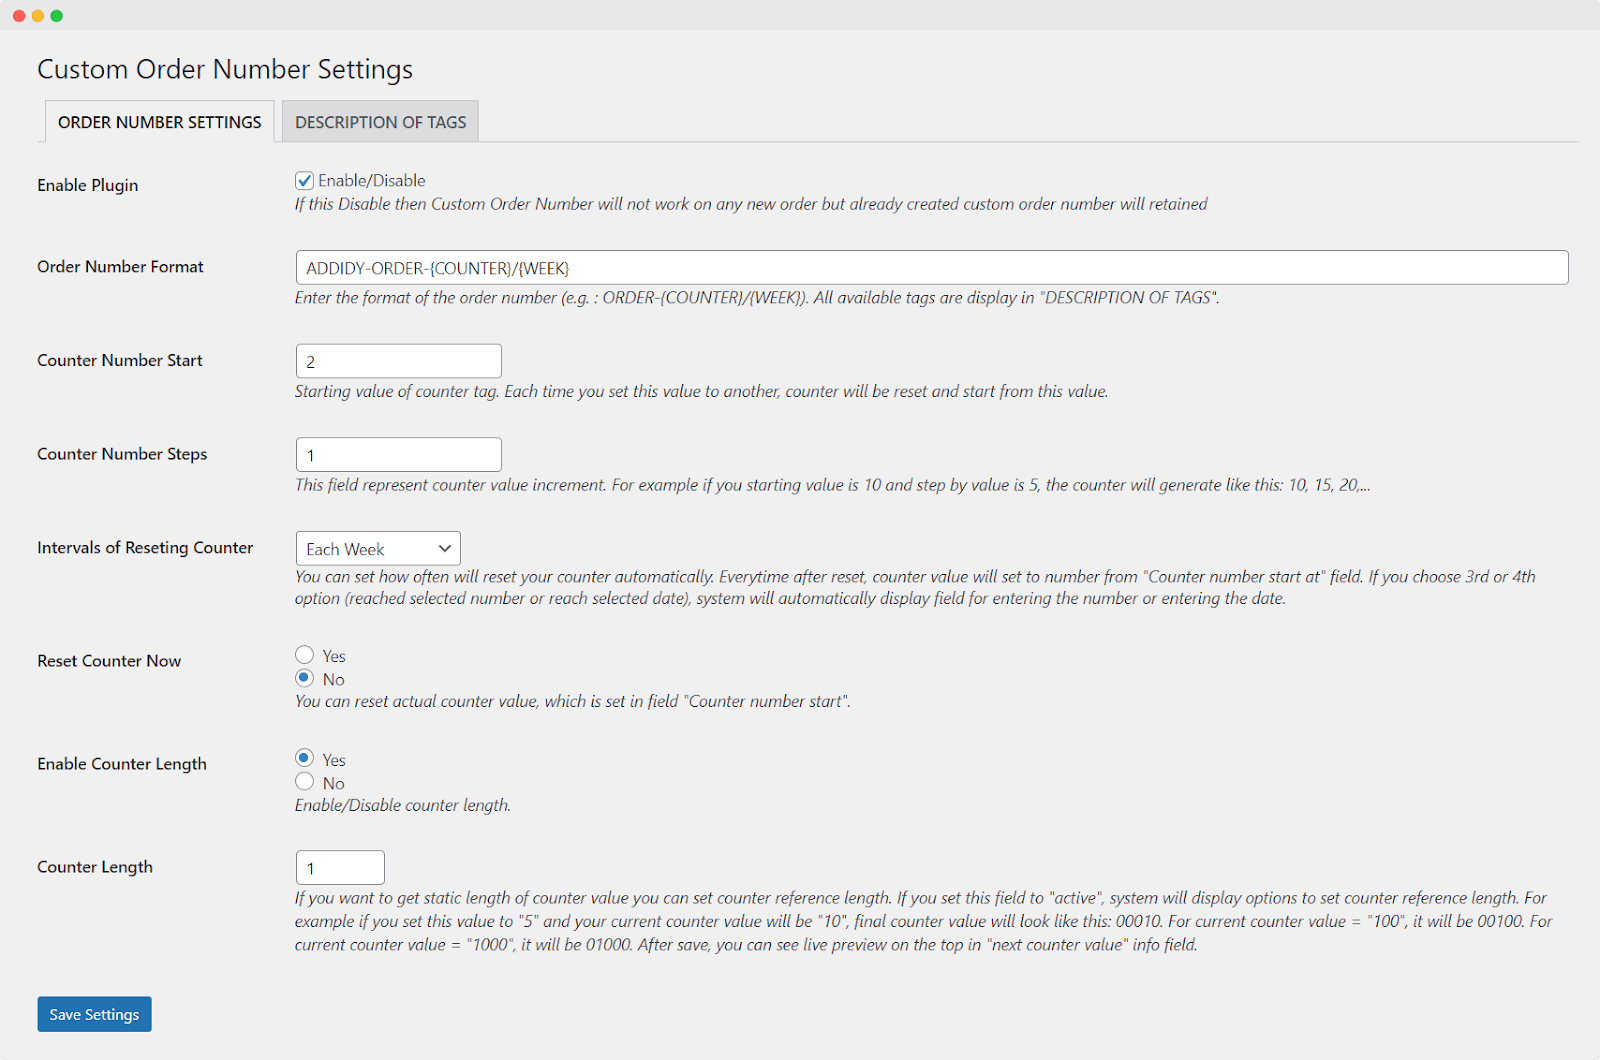
Go to WooCommerce > Custom Order Number > Order Number Settings. In this section, you can configure the following settings:
Enable Plugin: If this option is disabled, Custom Order Numbers will not function for new orders; however, previously generated custom order numbers will be retained
Order Number Format: Enter the format you wish to use for your order numbers (e.g., “ORDER-{COUNTER}/{WEEK}”)
Counter Number Start: Set the starting value of the counter tag. Changing this value will reset the counter, and it will start from the specified value
Counter Number Steps: Set the increment value for the counter. For example, if your starting value is 10 and the step value is 5, the counter will generate numbers like this: 10, 15, 20, and so on
Intervals of Reseting Counter: Configure how often the counter resets automatically. After each reset, the counter value will be set to the number specified in the “Counter Number Start” field. You have several options for resetting the counter:
- Each week
- Each Month
- Each Year
- Selected Number
- Selected Date
- Never
Reset Counter Now: Choose “yes” or “no” to manually reset the current counter value, which is set in the “Counter Number Start” field.
Enable Counter Length: If you want a fixed length for the counter value, enable this option. When set to “active,” the system displays options to set the counter reference length.
Click “Save Settings” to apply your new configuration.
Accessing Description of Tags
To explore and understand the various tags you can use to create unique and customized order numbers for your WooCommerce store, go to WooCommerce > Custom Order Number > Description of Tags.
There is a table that displays the prefixes and descriptions of each available tag, including:
- {RANDOM_NUMBER}
- {RANDOM_ALPHABETIC}
- {RANDOM_ALPHANUMERIC}
- {COUNTER}
- {ORDER_ID}
- {YEAR}
- {YEARSHORTCUT}
- {MONTH}
- {WEEK}
- {DAYINWEEK}
- {DAY}


