
Managing and Customizing Order Statuses
To manage and customize order statuses according to your business process in WooCommerce using custom order statuses, follow these steps:
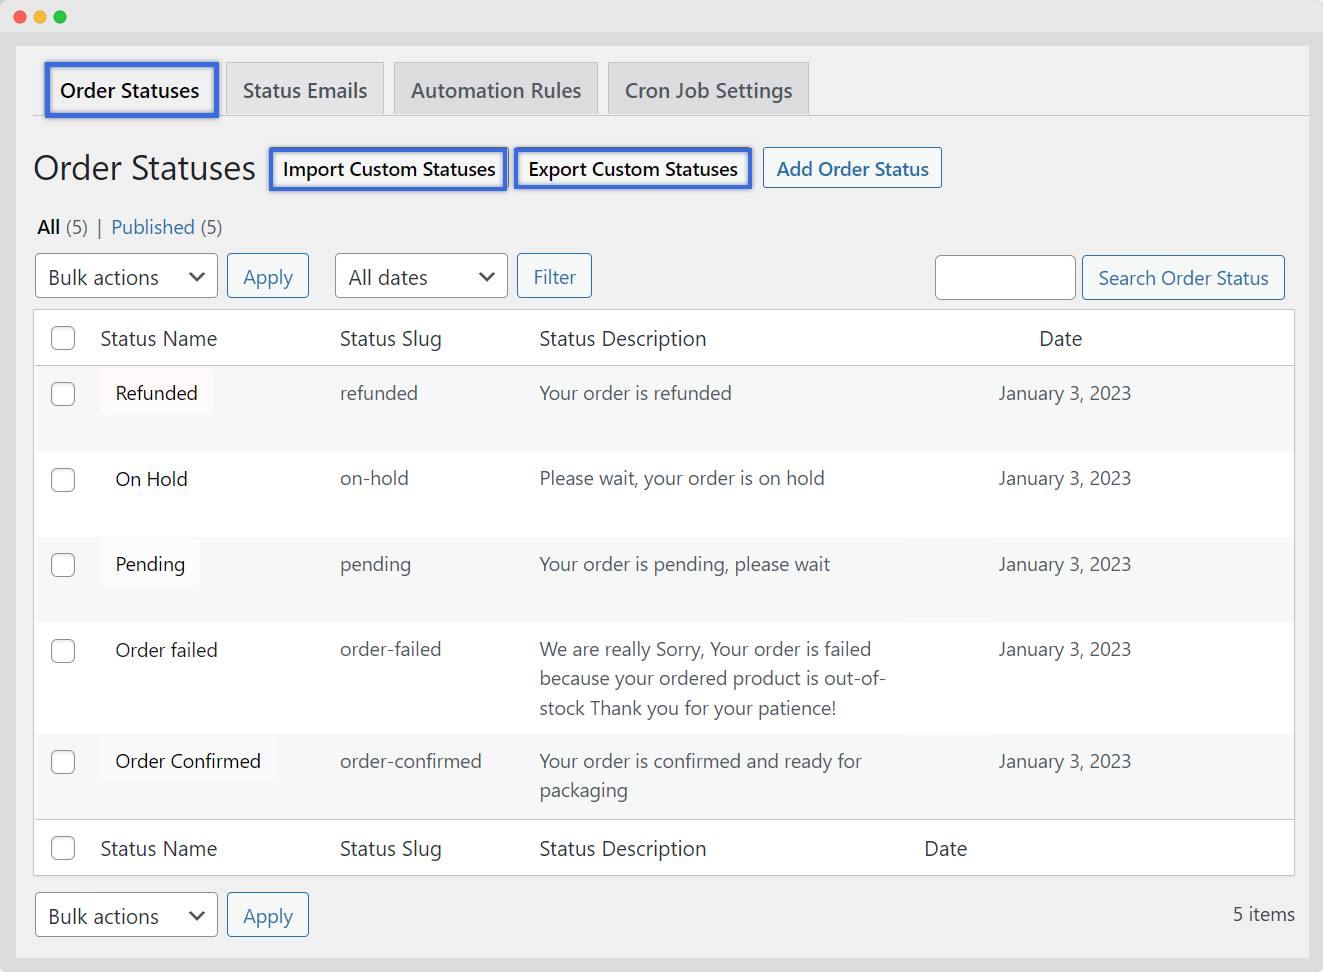
Managing Order Statuses in a Log
Go to WooCommerce > Order Statuses.
In the grid format, you can:
- Perform bulk actions
- Search for specific order statuses using the search bar
- Apply filters based on dates
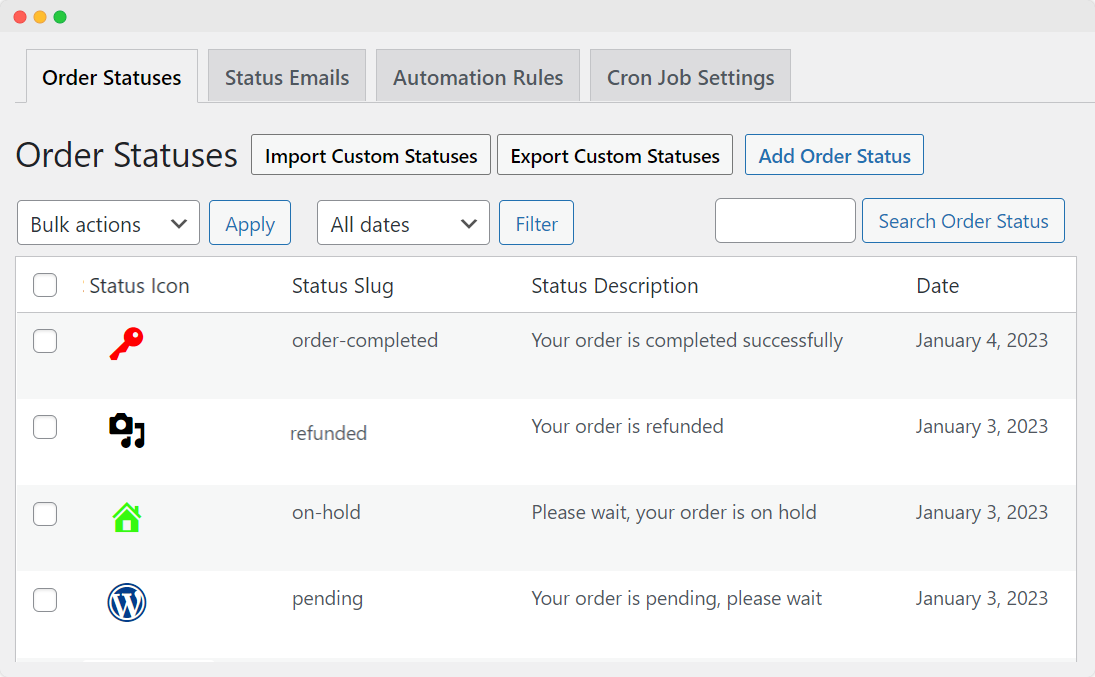
Importing Custom Statuses:
If you prefer not to add order statuses manually, click the “Import Custom Statuses” button.
Note: You can download the “import file format” file for reference
Exporting Custom Statuses:
To download a CSV file containing the flow of your order statuses, click the “Export Custom Statuses” button.
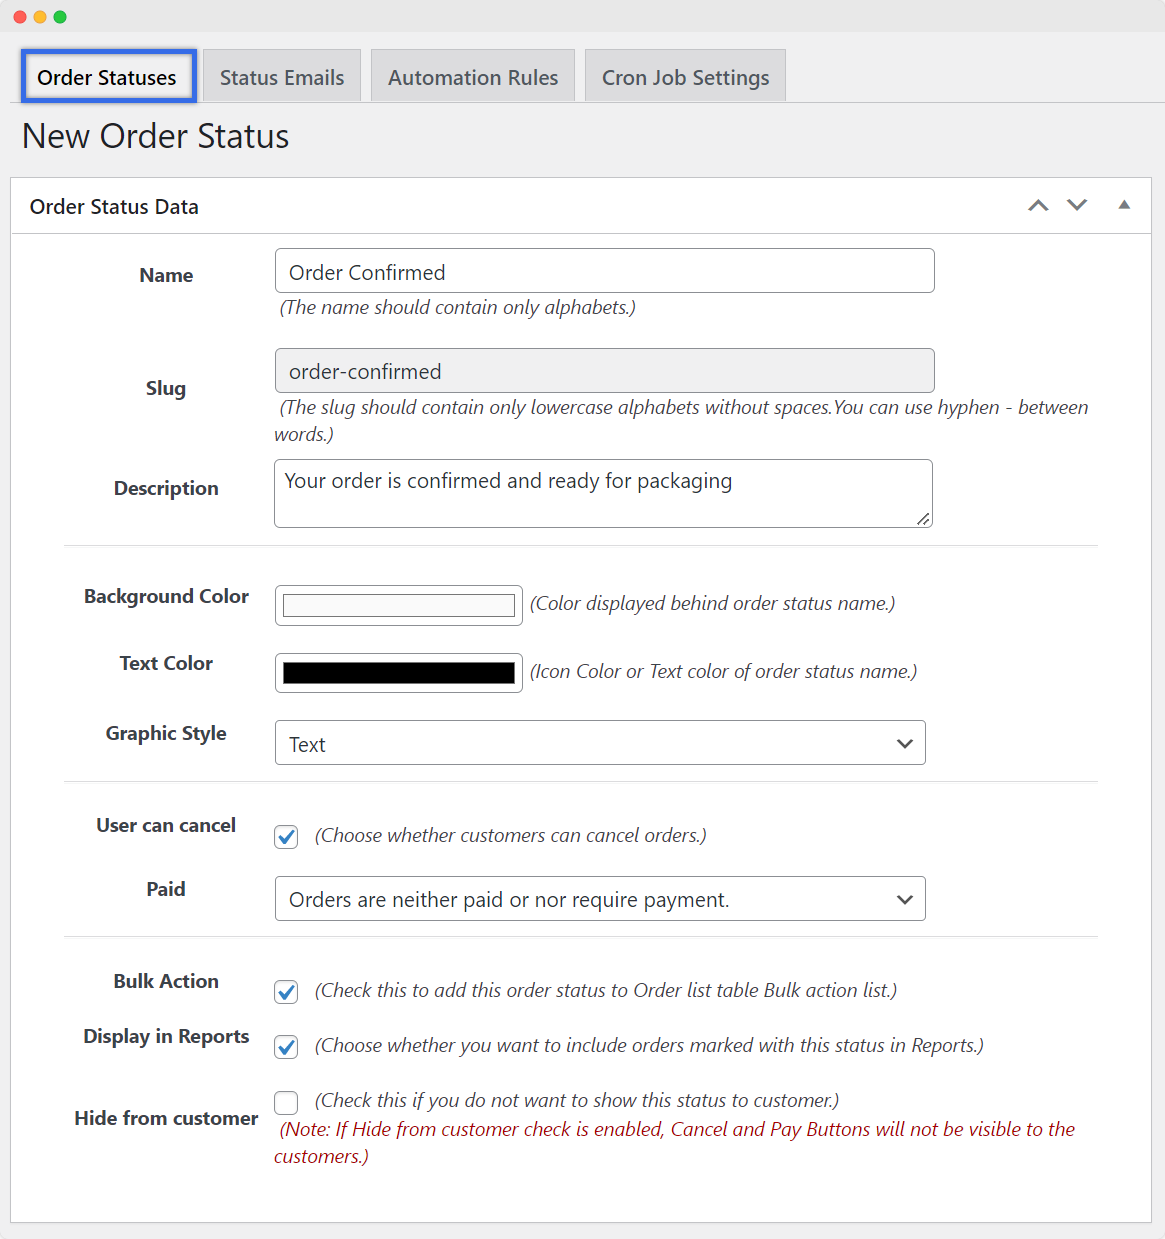
Adding A New Order Status:
Click the “Add Order Status” button.
While creating and adding a new order status, customize the following settings:
Order Status Data:
Name: Enter a unique descriptive name for your custom order status
Slug: Set the slug for the order status (lowercase letters, no spaces, words separated by hyphens)
Description: Provide a brief description of your custom order status
Background Color: Choose a color displayed behind the order status name
Text Color: Select the icon or text color of the order status name
Graphic Style: Choose a graphic style for the order status (Text or Icon)
User Can Cancel: Mark this to allow customers to cancel their orders at this status
Paid: Select the payment status when orders are in this status:
- Orders are neither paid nor require payment
- Orders with the status have been paid
- Orders with this status require payment (similar to pending payment)
Additional Options:
Bulk Action: Check this option to add this order status to the Order list table Bulk action list
Display in Reports: Mark this to enable orders with this status to be included in sales and order reports
Hide from Customer: Enable this option to hide this order status from customers. (Note: When enabled, Cancel and Pay buttons associated with this status will also be hidden from customers.)
Click “Publish” to save the new custom order status for your products.
By following these steps, you can efficiently manage and customize order statuses in WooCommerce, tailoring them to your specific business processes.