
Configuring Pre Orders and Back Orders
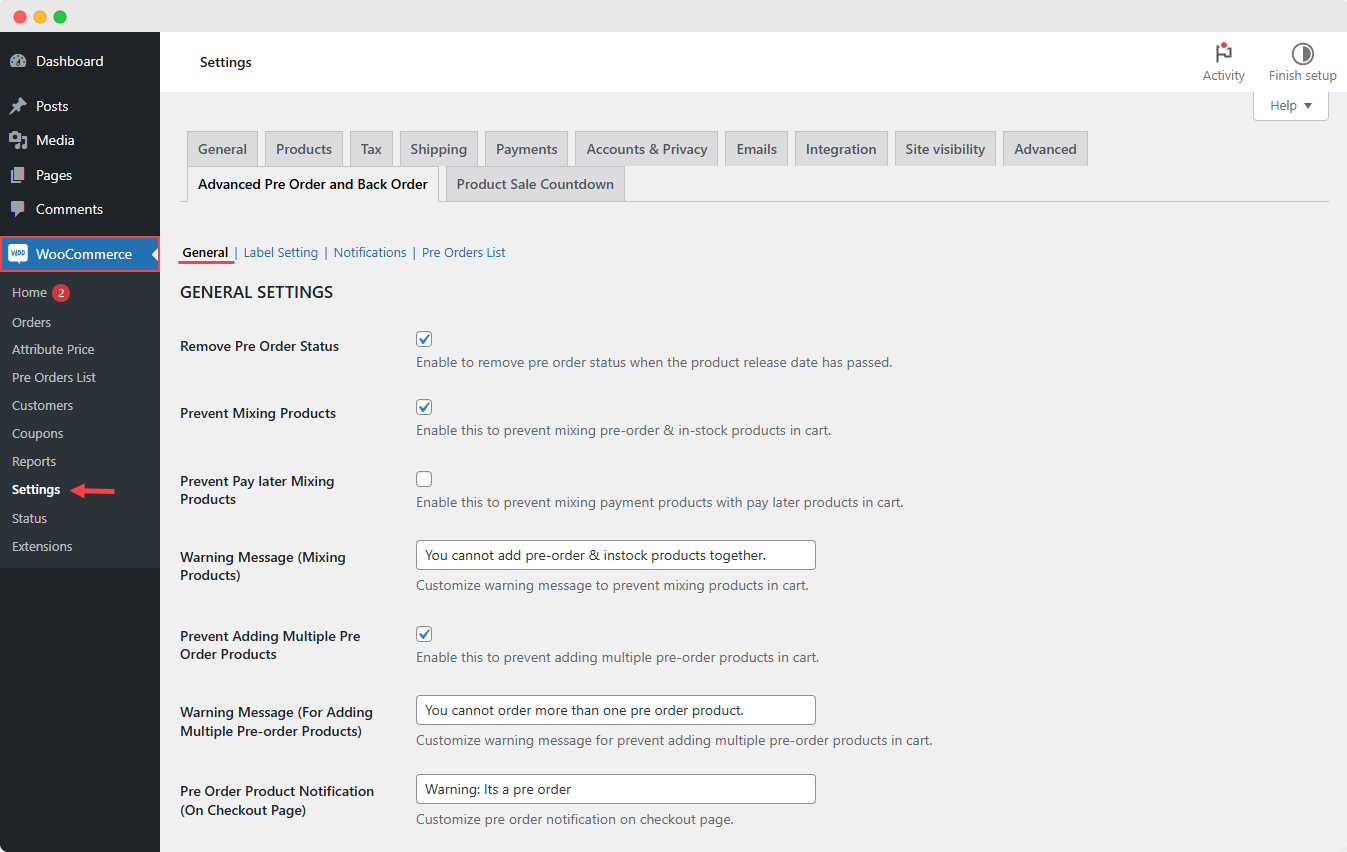
Go to WooCommerce > Settings > Advanced Pre Order and Backorder > General settings. Here, you can configure general, stock, and badge settings.
- Remove Pre Order Status: Enable this setting to remove the pre order status of products that have been released.
- Prevent Mixing Products: Enable this setting to avoid mixing pre order & in-stock products in the cart.
- Prevent Pay Later Mixing Products: Enable this setting to avoid mixing pay later products with payment products in the cart.
- Warning Message (Mixing Products): Customize a warning message to avoid mixing products in the cart. E.g., “pre order & in-stock products can’t be added together.”
- Prevent Adding Multiple Pre Order Products: Enable this setting to avoid adding multiple pre order products to the cart.
- Warning Message (For Adding Multiple Pre-order Products): Customize the warning message to prevent adding multiple pre-order products to the cart. For example, “You cannot order more than one pre-order product.”
- Pre-Order Product Notification (On Checkout Page): Customize pre-order notifications on the checkout page.
Stock Settings:
Automatically enable or disable the pre order status of products using the following stock settings:
Automatic Pre Orders (Out of Stock): Enable this setting for out-of-stock products to automatically obtain pre order status and revert to cart once restocked.
Quantity Above Zero: Disable pre order status for products with a quantity above zero.
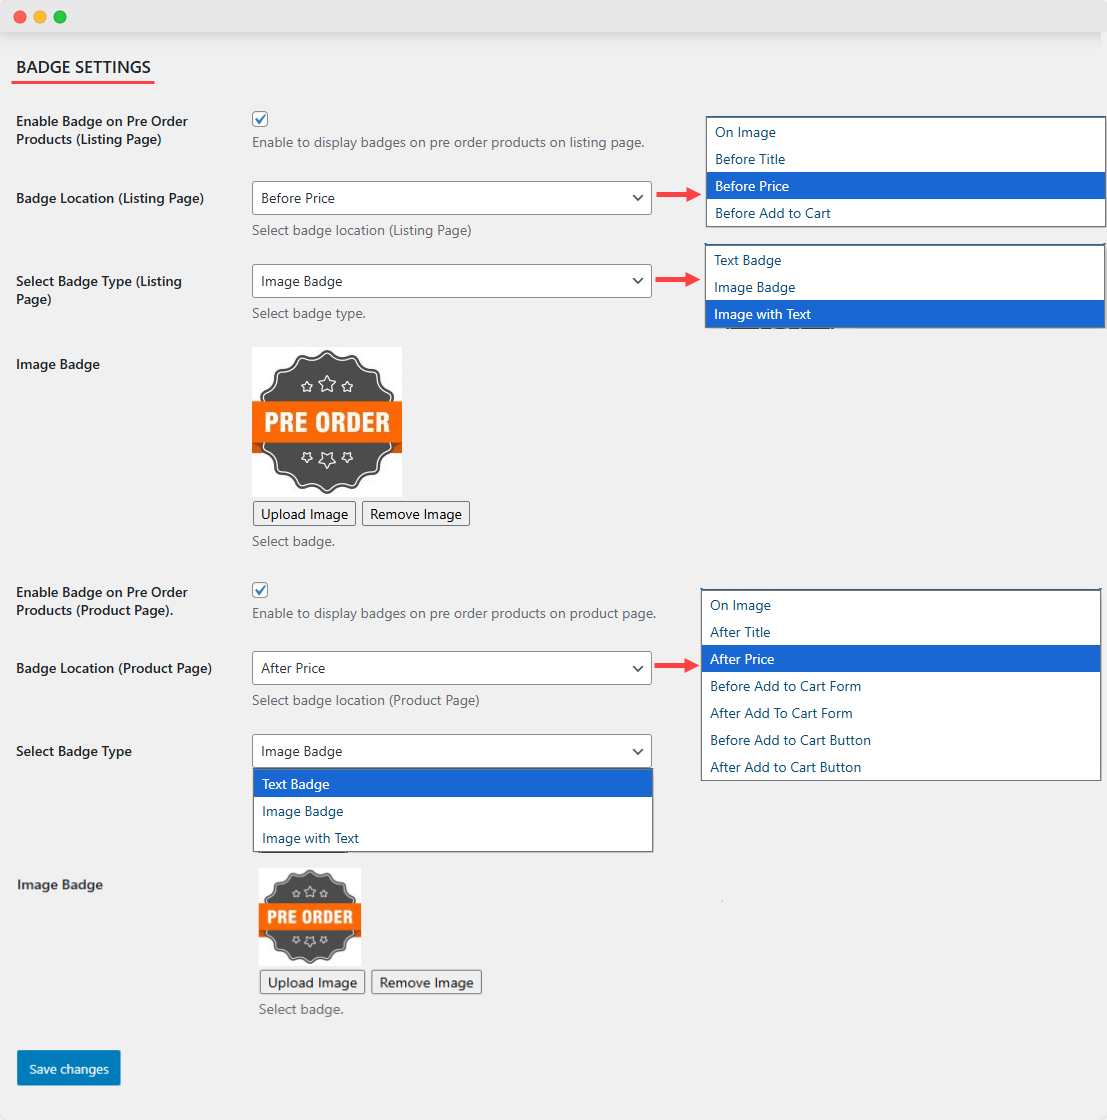
Badge Settings:
Using the badge setting, you can customize the following settings:
- Enable Badge on Pre Order Products (Listing Page): Enable this setting to display badges on pre order products.
- Badge Location (Listing Page): Select the location of the badge:
- On Image
- Before Title
- Before Price
- Before Add to Cart
- Select Badge Type (Listing Page): Choose badge type on the listing page:
- Text Badge
- Image Badge
- Image with Text
If you select “Text Badge” option, specify the following details:
- Text Badge (Listing Page): Enter the custom text for the badge for the listing page.
- Background Color: Set a custom background color for the badge on the listing page.
- Text Color: Specify the text color for the badge.
If you select “Image Badge” option, specify the following details:
- Image Badge: Upload the desired badge image.
- Enable Badge on Pre Order Products (Product Page): Enable this setting to display badges on pre order products on the product page.
- Badge Location (Product Page): Select badge location on the Product Page:
- On Image
- After Title
- After Price
- Before Add to Cart Form
- After Add to Cart Form
- Before After Add to Cart Button
- After Add to Cart Button
- Select Badge Type (Product Page): Choose from these types:
- Image Badge
- Text Badge
- Image with Text
If you select “Text Badge” option, specify the following details:
- Text Badge: Customize the text of the badge. E.g., “pre order NOW AND SAVE $100.”
- Background Color: Choose the background color for the badge (only for the text badge).
- Text Color: Choose a text color for the badge.
If you select “Image Badge” option, specify the following details:
- Image Badge: Upload the desired badge image for the product page.
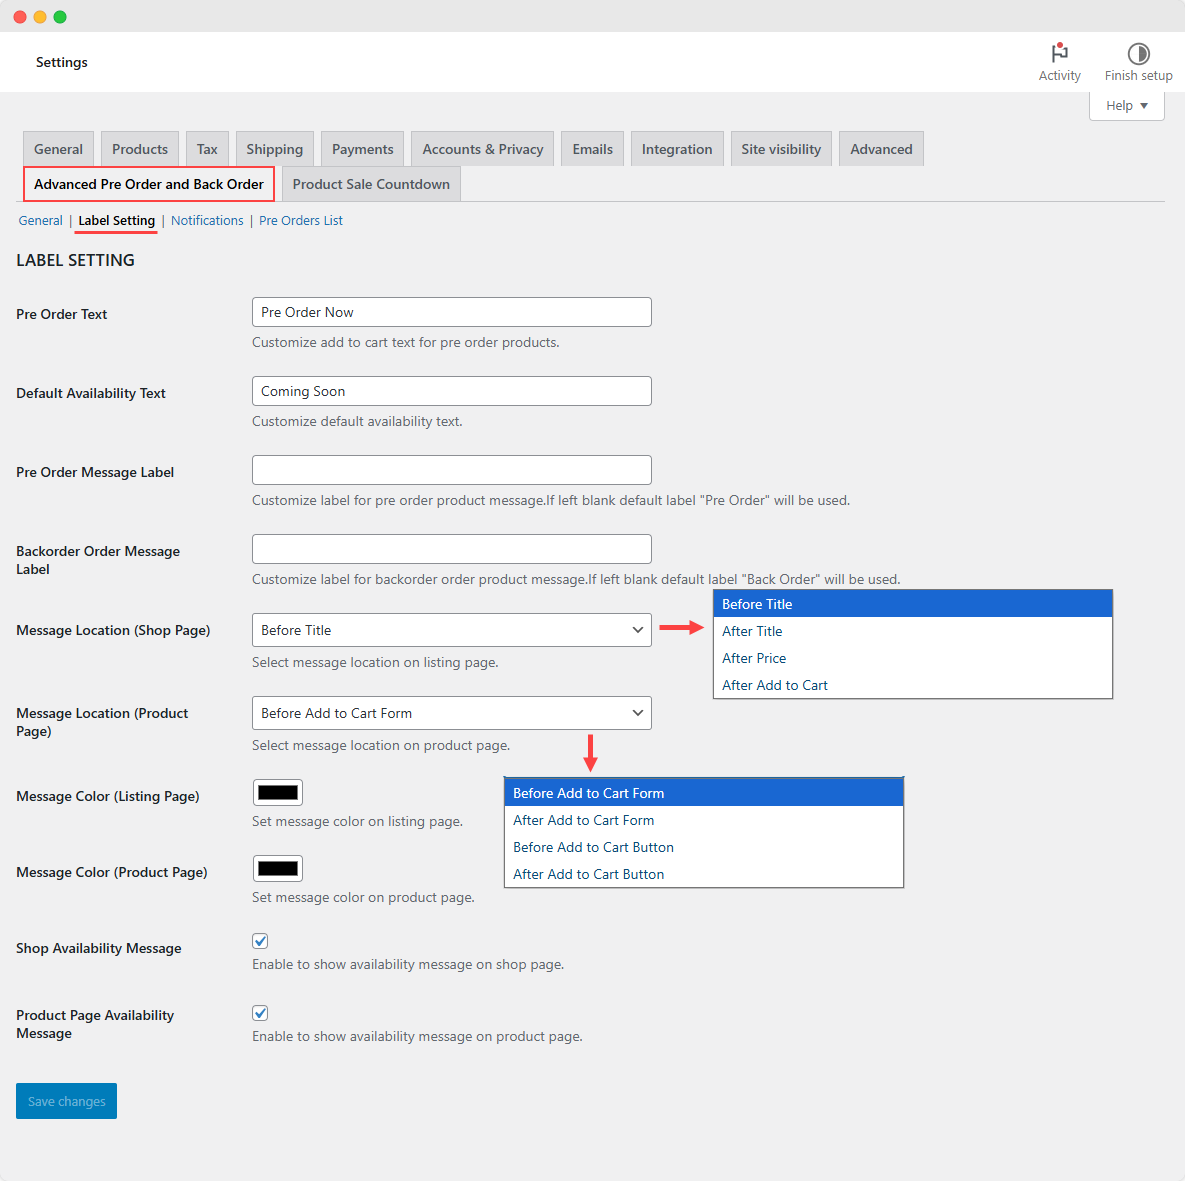
Customizing Labels for Pre Orders and Back Orders
To customize product labels for pre orders and back orders, navigate to “Label Setting” tab and customize the following labels:
- Pre Order Text: Customize the add-to-cart text for the pre order products. E.g., “Pre Order Now”
- Default Availability Text: Customize the default availability text for products. E.g., “Coming Soon,” “pre order Now,” etc.
- Pre-Order Message Label: Customize the label for the pre-order product message. If left blank, the default label “Pre Order” will be used.
- Backorder Order Message Label: Customize the label for the backorder order product message. If left blank, the default label “Back Order” will be used.
- Message Location (Shop Page): Select the message location on the listing page:
- After Title
- After Price
- Before Title
- After Add-to-cart
- Message Location (Product Page): Select the message location on the product page:
- Before Add-to-cart Form
- After Add-to-cart Form
- Before Add-to-cart Button
- After Add-to-cart Button
- Message Color (Listing Page): Choose a message color on the Listing page
- Message Color (Product Page): Choose a message color on the Product page
- Message Color (Cart Page): Choose a message color on the Cart page
- Shop Availability Message: Enable this setting to display the availability message on the shop page
- Product Page Availability Message: Enable this setting to show the availability message on the product page
Personalize Email Notifications for Admin & Customer
In the “Notifications” tab, customize the email template for admin and customers using the following settings:
- Admin Mail for Automatic Pre-Orders: Get automatic email notifications when a product attains the pre-order status.
- Admin Mail Before Pre-Order End Date: Get automatic email notifications before a product is available for pre-order (before a certain number of days as set by admin).
- Number of Days: Set the number of days before you get notified about a pre-order product that is to be launched.
- Admin Mail When Pre-Order Date has Passed: Get automatic email notifications when the pre-order date for a product has passed.
- Customer Mail when Product is Available: Notify customers about product availability.
- Custom Subject and Heading: Customize your pre-order emails with a unique subject line and heading. These will only apply to orders that include pre-order products.
- Heading in Order Mail: Customize the heading in default order mail (for the user).
- Subject in Order Mail: Customize the subject in default order mail (for the user).


