
Tracking Customer Group Change in a History Log
To automatically maintain a customer group change history log for every customer in PrestaShop using the “Automatic Role Changer” module, follow these steps:
Install and Configure the Module:
After installing the “Automatic Role Changer” module, access your PrestaShop admin backend.
Navigate to the “Modules” section in your PrestaShop admin panel and find the “Automatic Role Changer” module.
Select the module to access its configuration settings.
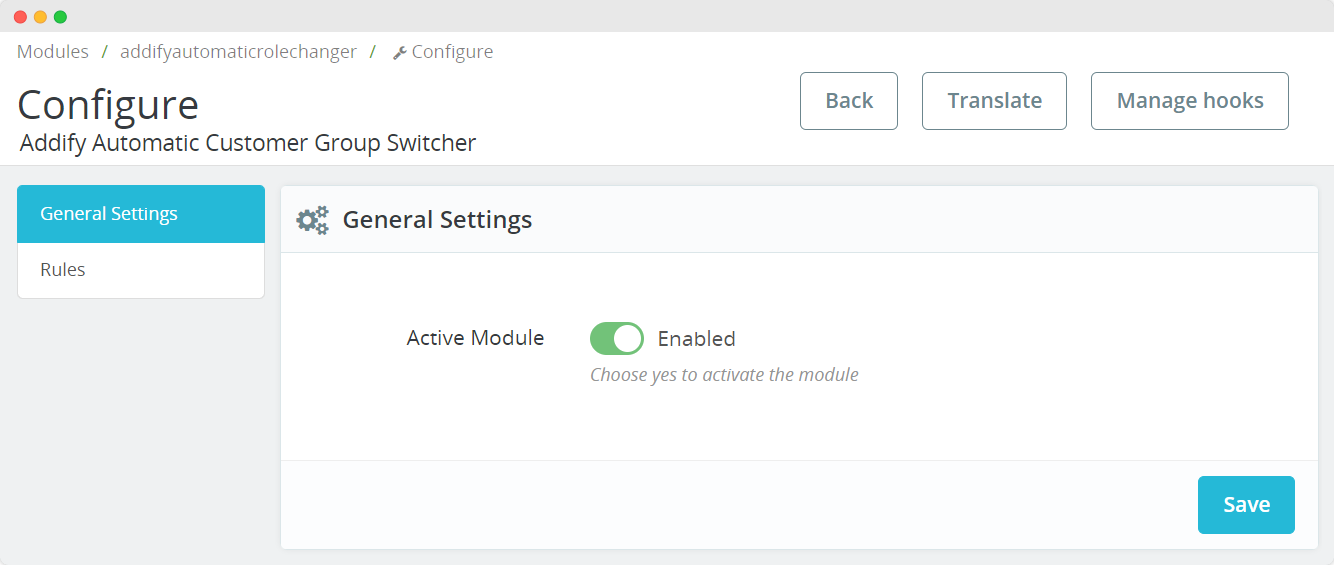
General Settings:
In the module’s configuration, you will find the “General Settings” section.
To activate the module, make sure the “Active Module” option is set to ‘Yes’. This enables the Automatic Customer Switcher module.
Maintain Customer Group Change History Log
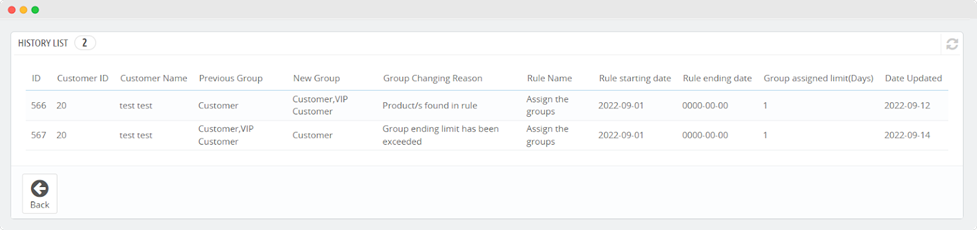
Look for the “History List” section in the module’s configuration. This is where you can maintain a log of customer group changes.
Access Customer Group Change Details:
In the “History List” section, you can access the following details of each customer group change:
- Customer ID
- Customer Name
- Previous Group
- New Group
- Group Changing Reason
- Date Updated’

View Individual Change Details:
You can also view the details of each customer group change, including:
- Customer ID
- Customer Name
- Previous Group
- New Group
- Group Changing Reason
- Rule Name
- Rule Starting Date
- Rule Ending Date
- Group Assigned Limit (Days)
- Date Updated
Take Action:
You have the option to take actions such as deleting specific history records.
Perform Bulk Actions:
The module may provide the ability to perform bulk actions, allowing you to manage multiple customer group change records simultaneously.
By following these steps and enabling the “Automatic Role Changer” module, you can maintain a record of customer group changes for every customer in a log. This log will help you track the history of group changes, view details of each change, and take necessary actions when needed.