Creating Multiple Rules to Define Conditions
To create multiple rules in PrestaShop to define conditions for assigning and switching customer groups using the “Automatic Role Changer” module, follow these steps:
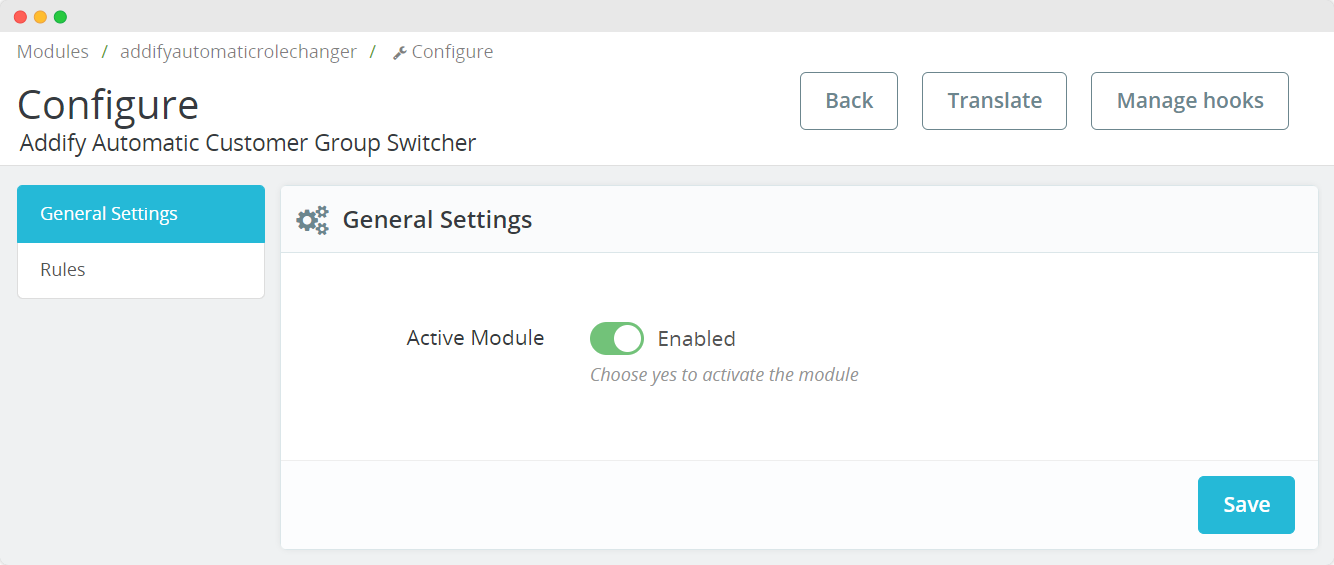
Install and Configure the Module:
After installing the “Automatic Role Changer” module, access your PrestaShop admin backend.
Navigate to the “Modules” section in your PrestaShop admin panel and find the “Automatic Role Changer” module.
Select the module to access its configuration settings.
General Settings:
In the module’s configuration, you will find general settings. Here, you can enable or disable the entire Automatic Customer Switcher module.
Active Module: Enable or disable the entire Automatic Customer Switcher module
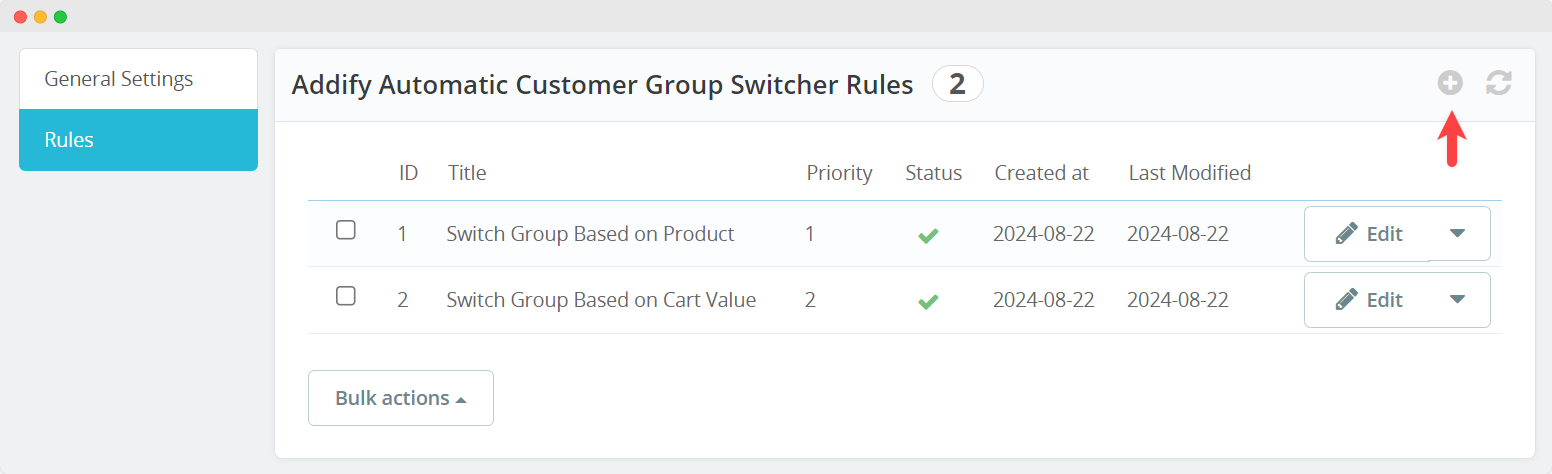
Create New Rule:
To create multiple rules, click on the “+” (plus) button to add a new rule.
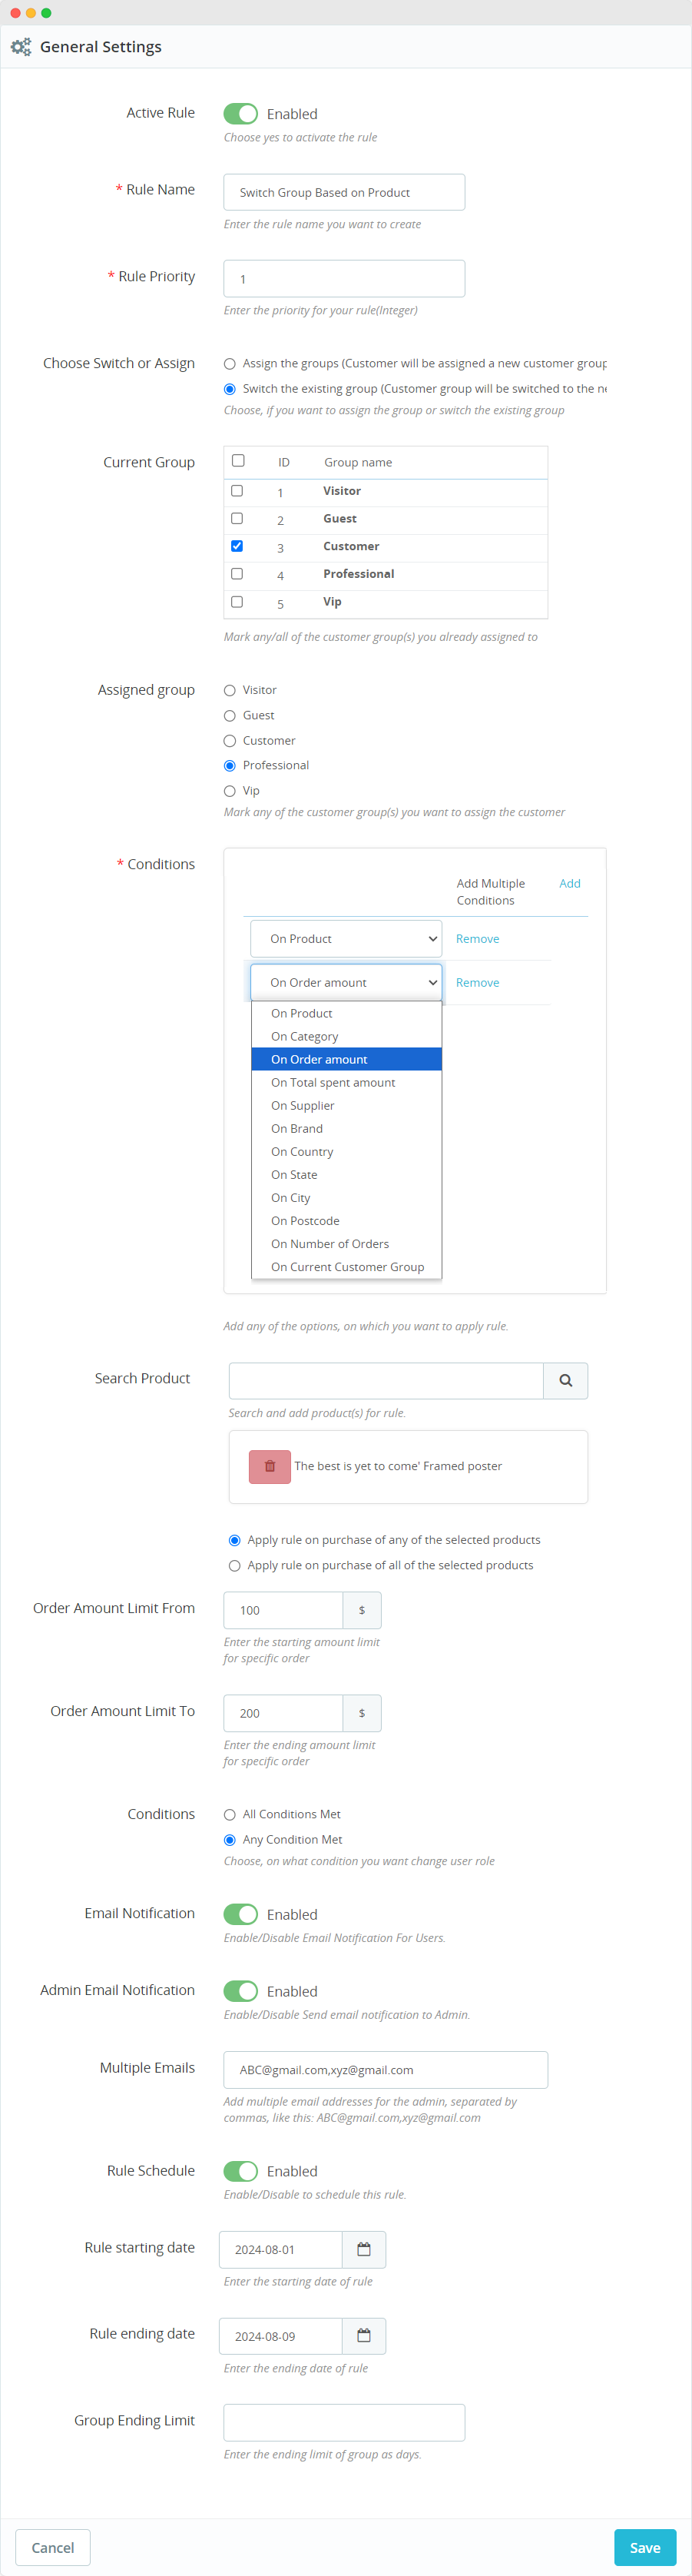
Rule Details:
In the rule creation form, fill in the following details for the rule you want to create:
Rule Name: Enter a unique name for the rule. This name will help you identify the rule.
Rule Priority: Assign a numeric value to set the priority for this rule. Lower numbers indicate higher priority, meaning that rules with lower numbers will be applied first.
Active Rule: Choose ‘Yes’ to activate the rule. An inactive rule will not be applied.
Choose Switch or Assign:
In the same rule creation form, you will need to select one of the following options based on your specific requirement:
Assign the Group/s: Choose this option if you want to assign the customer to a specific group. This is useful if you want to directly assign customers to a group when they meet certain conditions.
Switch the Existing Group: Choose this option if you want to switch the customer from their current group to a new one when they meet specific conditions. This is useful when you want to change a customer’s group based on their behavior or order history.
Complete Rule Details:
Once you’ve selected “Assign the Group/s” or “Switch the Existing Group,” complete the rest of the rule details according to your specific conditions. These details can include conditions related to product purchases, categories, order amounts, and customer total spending, as described in your previous question.
Ensure that you define the conditions that trigger the rule and specify the target customer group to which the rule applies.
Save the Setting:
After configuring the rule with the necessary details, save the rule settings.
Repeat for Multiple Rules:
If you need to create multiple rules with different conditions or priorities, repeat the process by clicking on the “+” button again and creating additional rules.
Each rule you create can have its unique set of conditions and actions, allowing you to automate the assignment or switching of customer groups based on various criteria.