Adding Image Captcha on Your Store
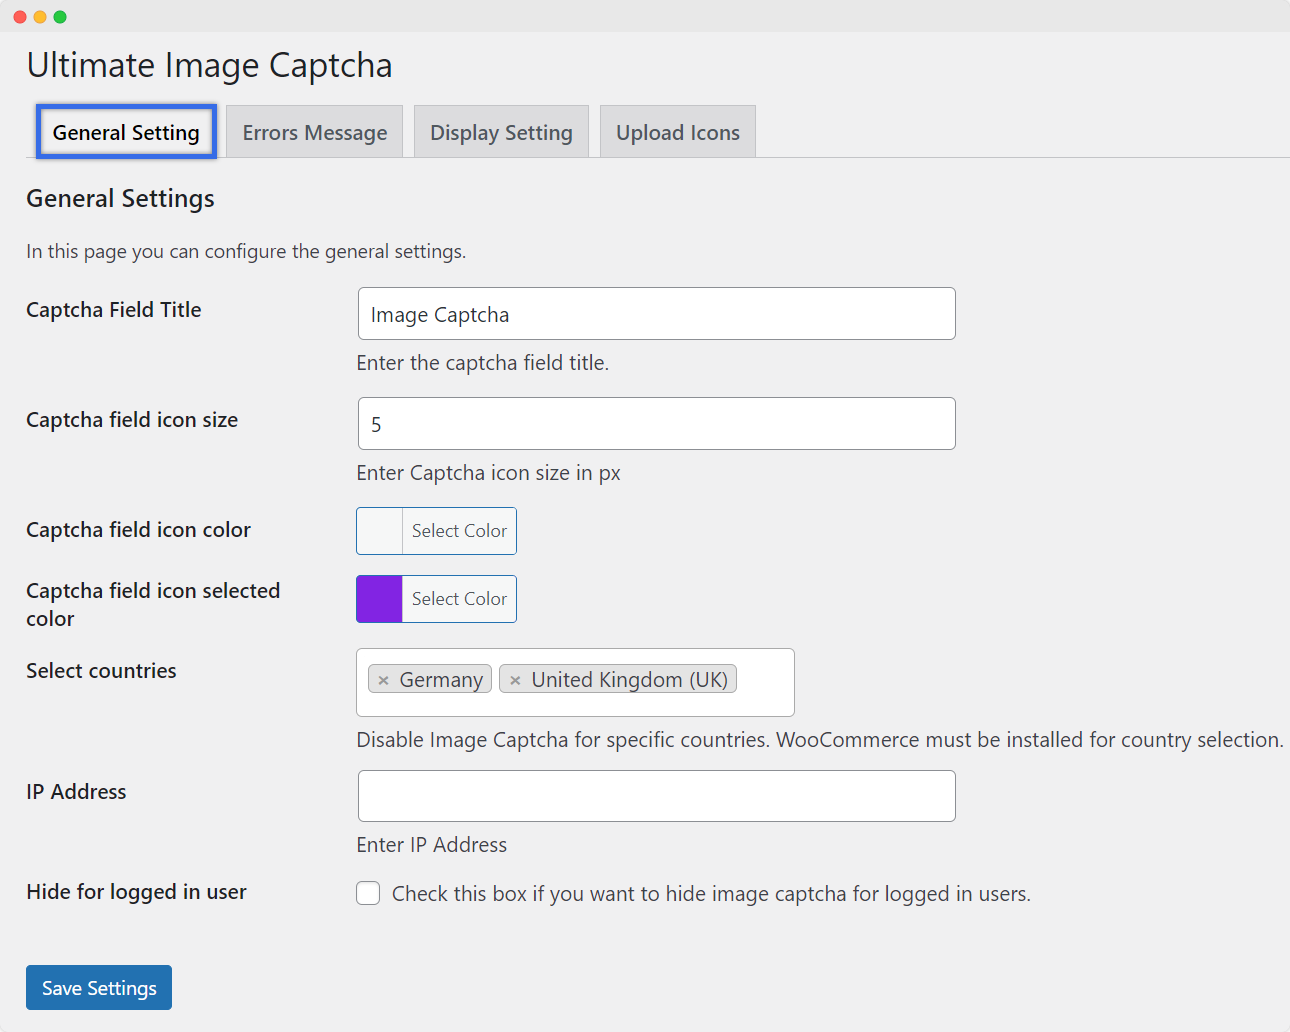
Personalizing Image Captcha Appearance
Personalize the appearance of the Image Captcha to suit your website’s design and preferences.
Go to WP Admin Panel > Image Captcha for WordPress > General Settings.
Captcha Field Title: Enter the desired title for the Captcha field
Captcha Field Icon Size: Set the size of the Captcha icon in pixels by entering a numerical value
Captcha Field Icon Color: Specify the primary color of the Captcha icon by selecting the appropriate color
Captcha Field Icon Selected Color: Define the color that the Captcha icon should change to when selected by choosing the desired color
Select Countries: If you want to disable Image Captcha for specific countries, you can do so in this section. However, please note that WooCommerce must be installed for country selection to be available.
IP Address: Restrict access to the Image Captcha based on IP addresses. Enter the IP addresses you wish to allow
Hide for Logged-In User: Enable this option to hide the Image Captcha for users who are logged-in
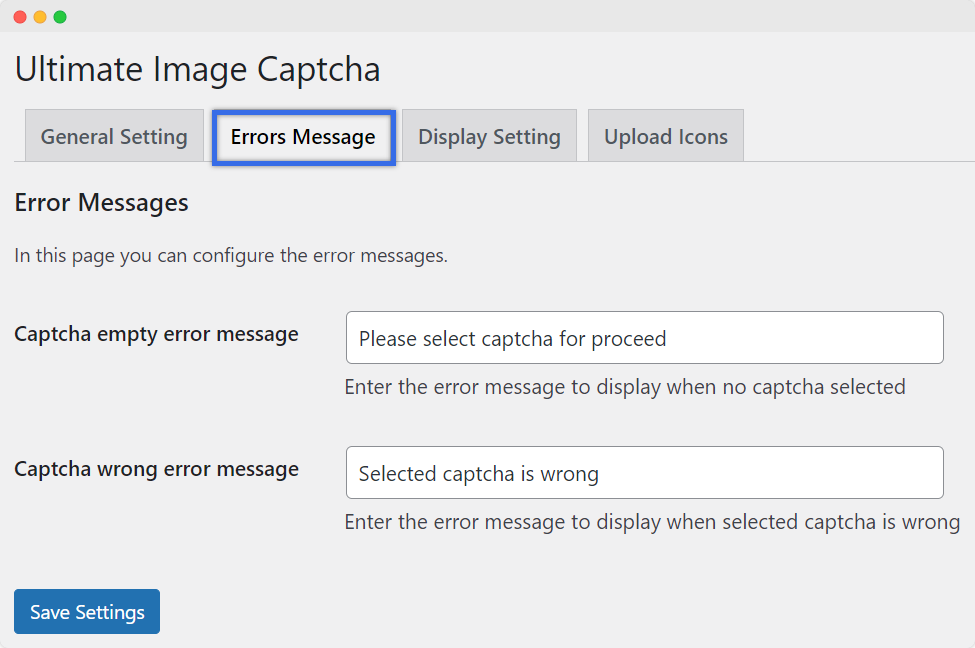
Customize Error Messages
Customize error messages for Image Captcha in your WordPress site. Error messages are essential for providing clear feedback to users when they encounter issues with Captcha.
Go to WP Admin Panel > Image Captcha for WordPress > Error Message.
Captcha Empty Error Message: Enter the error message you want to display when no Captcha is selected. This message should inform users that they need to complete the Captcha
Captcha Wrong Error Message: Enter the error message you want to display when the selected Captcha is incorrect. This message should instruct users to try again with the correct Captcha
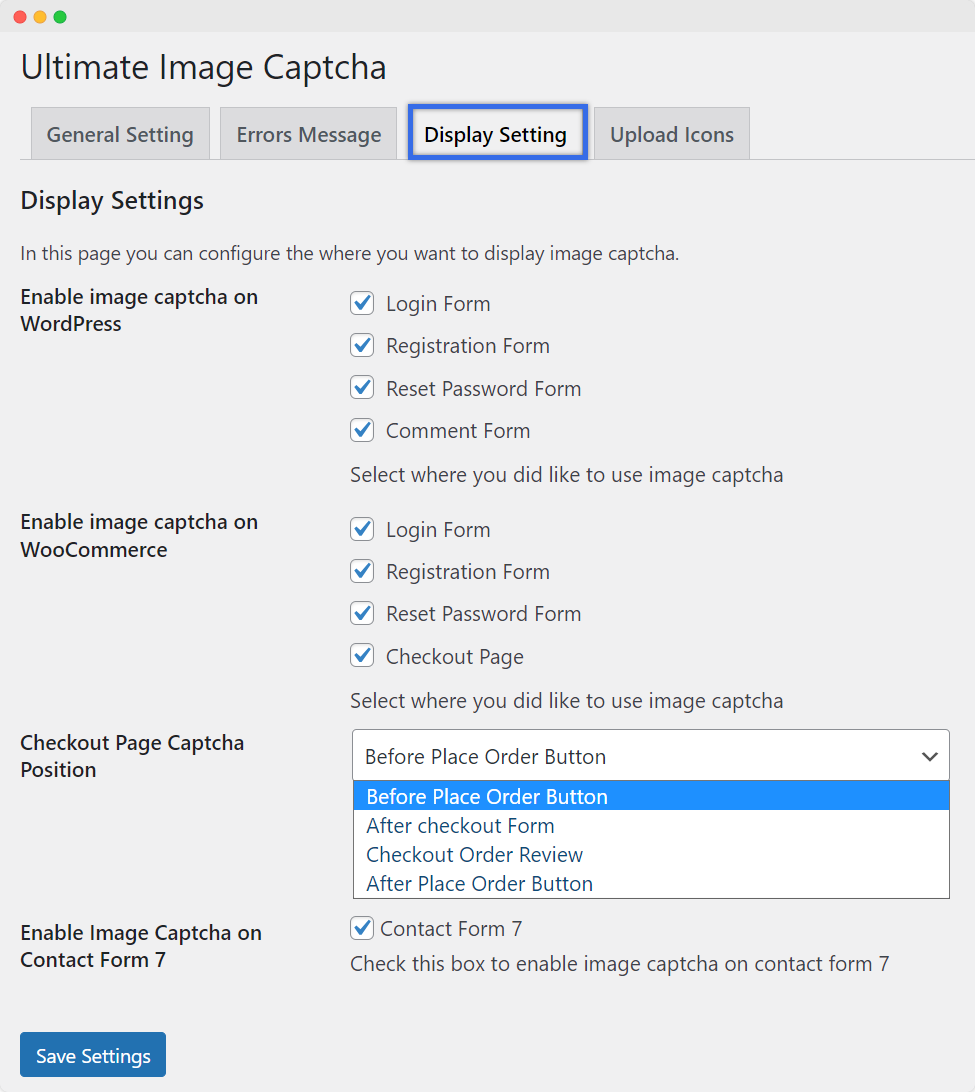
Configuring Image Captcha Display
Configure where Image Captcha is displayed on your WordPress site. You can choose the specific forms and pages where you’d like to use Image Captcha.
Go to WP Admin Panel > Image Captcha for WordPress > Display Setting.
Enable Image Captcha on WordPress: Select the areas of your WordPress site where you would like to use Image Captcha. You can enable it for the following options:
- Login Form
- Registration Form
- Reset Password Form
- Comment Form
Enable Image Captcha on WooCommerce: Select the areas of your WooCommerce store where you want to use Image Captcha. You can enable it for the following options:
- Login Form
- Registration Form
- Reset Password Form
- Checkout Page
Checkout Page Captcha Position: Choose the specific position where you want the Captcha to appear on the Checkout Page. Options include:
- Before Place Order Button
- After Checkout Form
- Checkout Order Review
- After Place Order Button
Enable Image Captcha on Contact Form 7: Check the box to enable Image Captcha on Contact Form 7
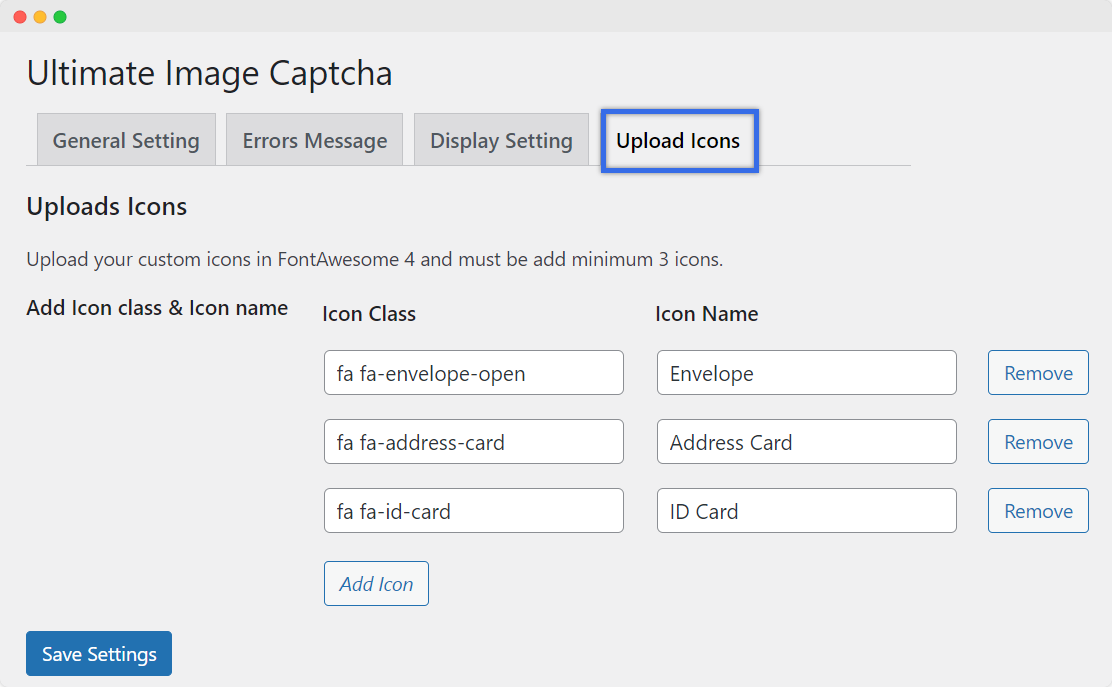
Uploading Custom Icons
Upload custom icons for your Image Captcha. These icons should be in FontAwesome 4 format, and you must add a minimum of three icons.
Go to WP Admin Panel > Image Captcha for WordPress > Upload Icons.
Upload your custom icons, ensuring they are in FontAwesome 4 format.
For each icon, add the Icon Class and Icon Name to specify how they should be used.