
Managing Product Stock
To manage stock in a detailed list view of products using the WooCommerce Product Stock Manager plugin, follow these steps:
- Obtain the .zip file for the Product Stock Manager plugin from your WooCommerce account.
- Log in to your WordPress admin dashboard.
- In the WordPress admin, go to “Plugins” and select “Add New.”
- Choose the “Upload Plugin” option.
- Click on the “Choose File” button to upload the .zip file you downloaded for the Product Stock Manager plugin.
- Click “Install Now” to initiate the installation.
- Once the installation is complete, click “Activate” to activate the plugin.
Locate Stock Manager:
- After activating the plugin, go to the WooCommerce section in your WordPress admin.
- You should now see a new option called “Stock Manager” under the WooCommerce menu.
- Click on “Stock Manager” to access the stock management features provided by the plugin.
- Once inside the Stock Manager section, look for an option to “Manage Stock.” Click on it.
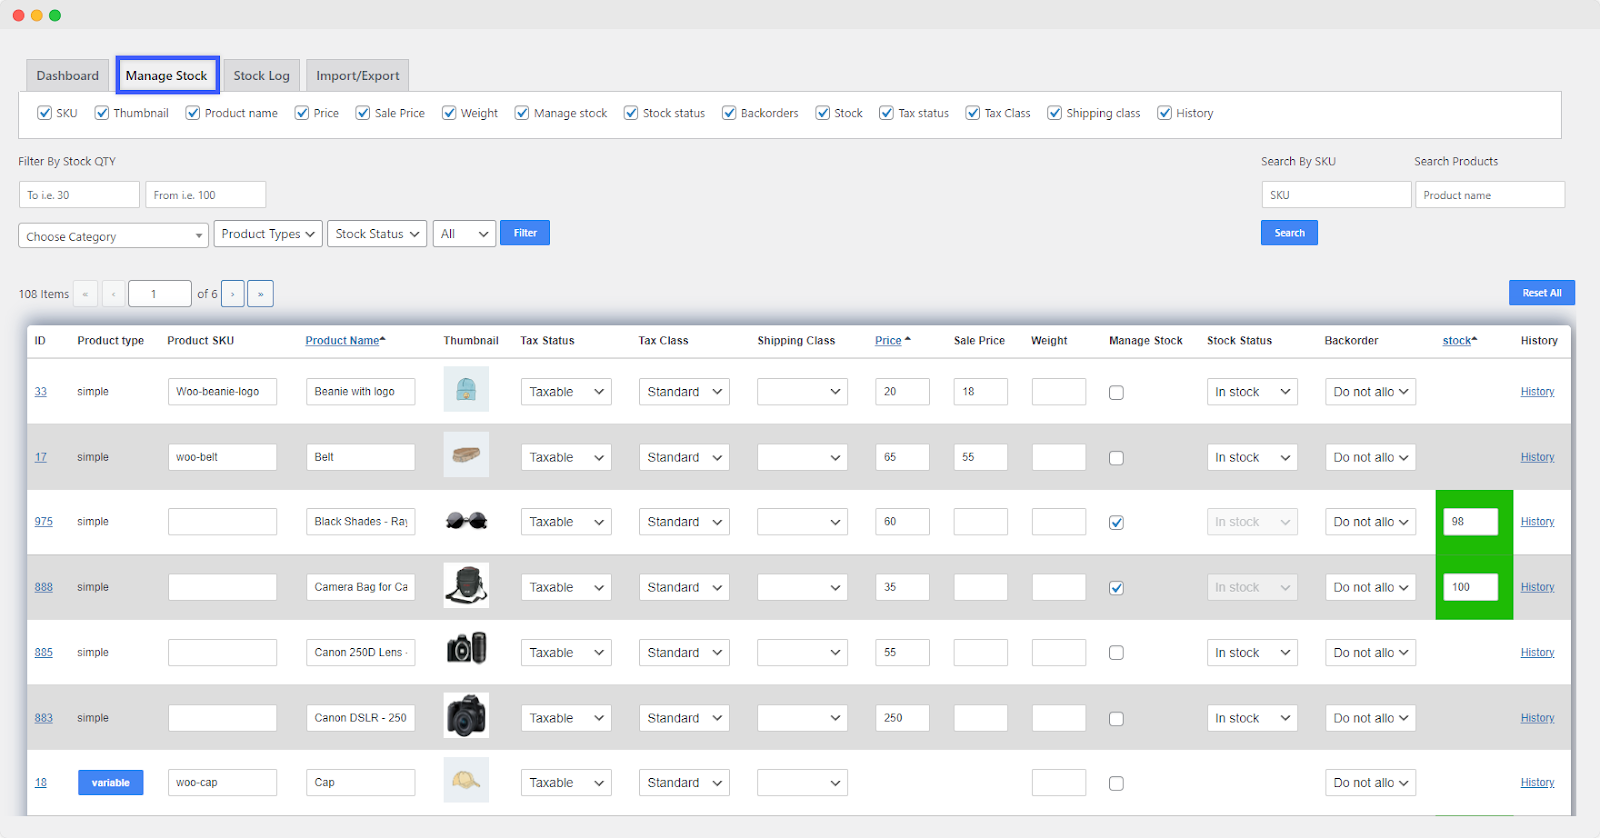
Detailed List View:
- In the Manage Stock section, you should be presented with a detailed list view of your products.
- This list view typically includes columns with information.
- For each product, manage stock settings, stock quantity, stock status, backorders, and other relevant details.
Save Changes:
After making adjustments, be sure to save the changes to apply the new stock management settings.
By following these steps, you can install, activate, and use the WooCommerce Product Stock Manager plugin to manage stock in a detailed list view of your products. This allows for efficient and organized control over your inventory within the WordPress admin interface.