
Showing Order Tracking Information on Orders
Enabling Order Tracking on Your Store
Go to WooCommerce > Order Tracking > Order Tracking Settings.
In the General Settings section, you can configure the following options:
Enable Plugin: Toggle to enable or disable Order Tracking for WooCommerce
Default Carrier: To display a list of carriers, you must first select them from the specific “Carriers” tab located at the top of the screen under “Carrier Companies.”
Enable Order Tracking Information: Toggle to enable or disable Order Tracking information on the order view page
Tracking Title: Select the tracking title that will be displayed above the tracking information
Text in the Orders Page: Customize the text shown on the Order details page using placeholders such as {CARRIER_NAME}, {TRACKING_ID}, {PICKUP_DATE}, and {TRACKING_LINK} to represent real tracking information
Text Position in Order Details Page: Choose where the tracking text appears on the order detail page. Options include:
- Before Order Details
- Before Order Details Table
- Before Customer Details
- After Customer Details
Tracking Info in the Order List: Choose whether to display the tracking information in a new column of the order list table
Button Label: Select the tracking button label. If left empty, the button title will default to the shipping name
Button Background Color: Choose the tracking button background color
Button Label Color: Select the tracking button label color
Button Icon: Customize the tooltip text appearing on the my-account > orders list when an order is marked as picked up. Use placeholders like {CARRIER_NAME}, {TRACKING_ID}, {PICKUP_DATE}, and {TRACKING_LINK} to represent shipping information
Order Non-Pickup: Customize the tooltip text appearing on the my-account > orders list when an order has not yet been picked up. Use placeholders like {CARRIER_NAME}, {TRACKING_ID}, {PICKUP_DATE}, and {TRACKING_LINK} to represent shipping information
Customizing Order Tracking Emails
Go to WooCommerce > Order Tracking > Order Tracking Settings.
Tracking Emails: In the Customizing Order Tracking Emails section, you can customize the text of the email that will be sent to the buyer when the order is marked as complete. Use placeholders like {CARRIER_NAME}, {TRACKING_ID}, {PICKUP_DATE}, and {TRACKING_LINK} in your email content.

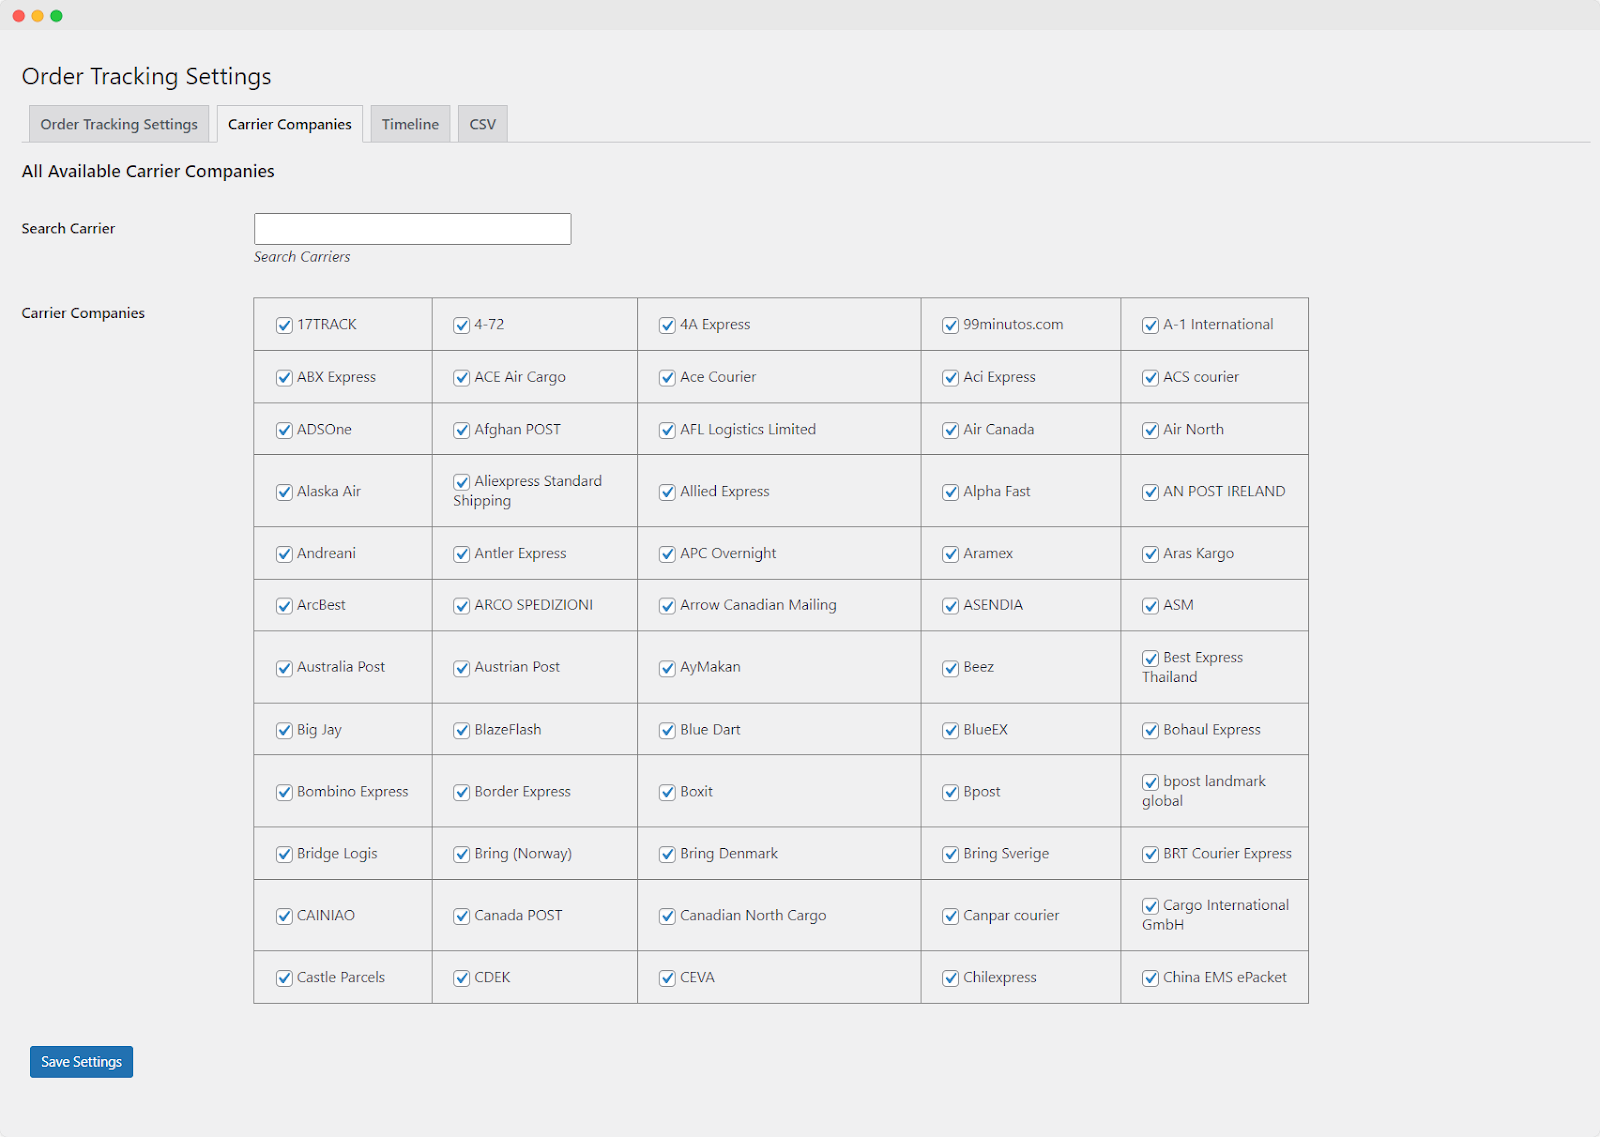
Selecting Carrier Companies
Go to WooCommerce > Order Tracking > Carrier Companies.
- You will see a list of all available carrier companies.
- Use the checkboxes to checkmark the carrier companies that you wish to enable.
- Use the search bar to search for the desired carrier company
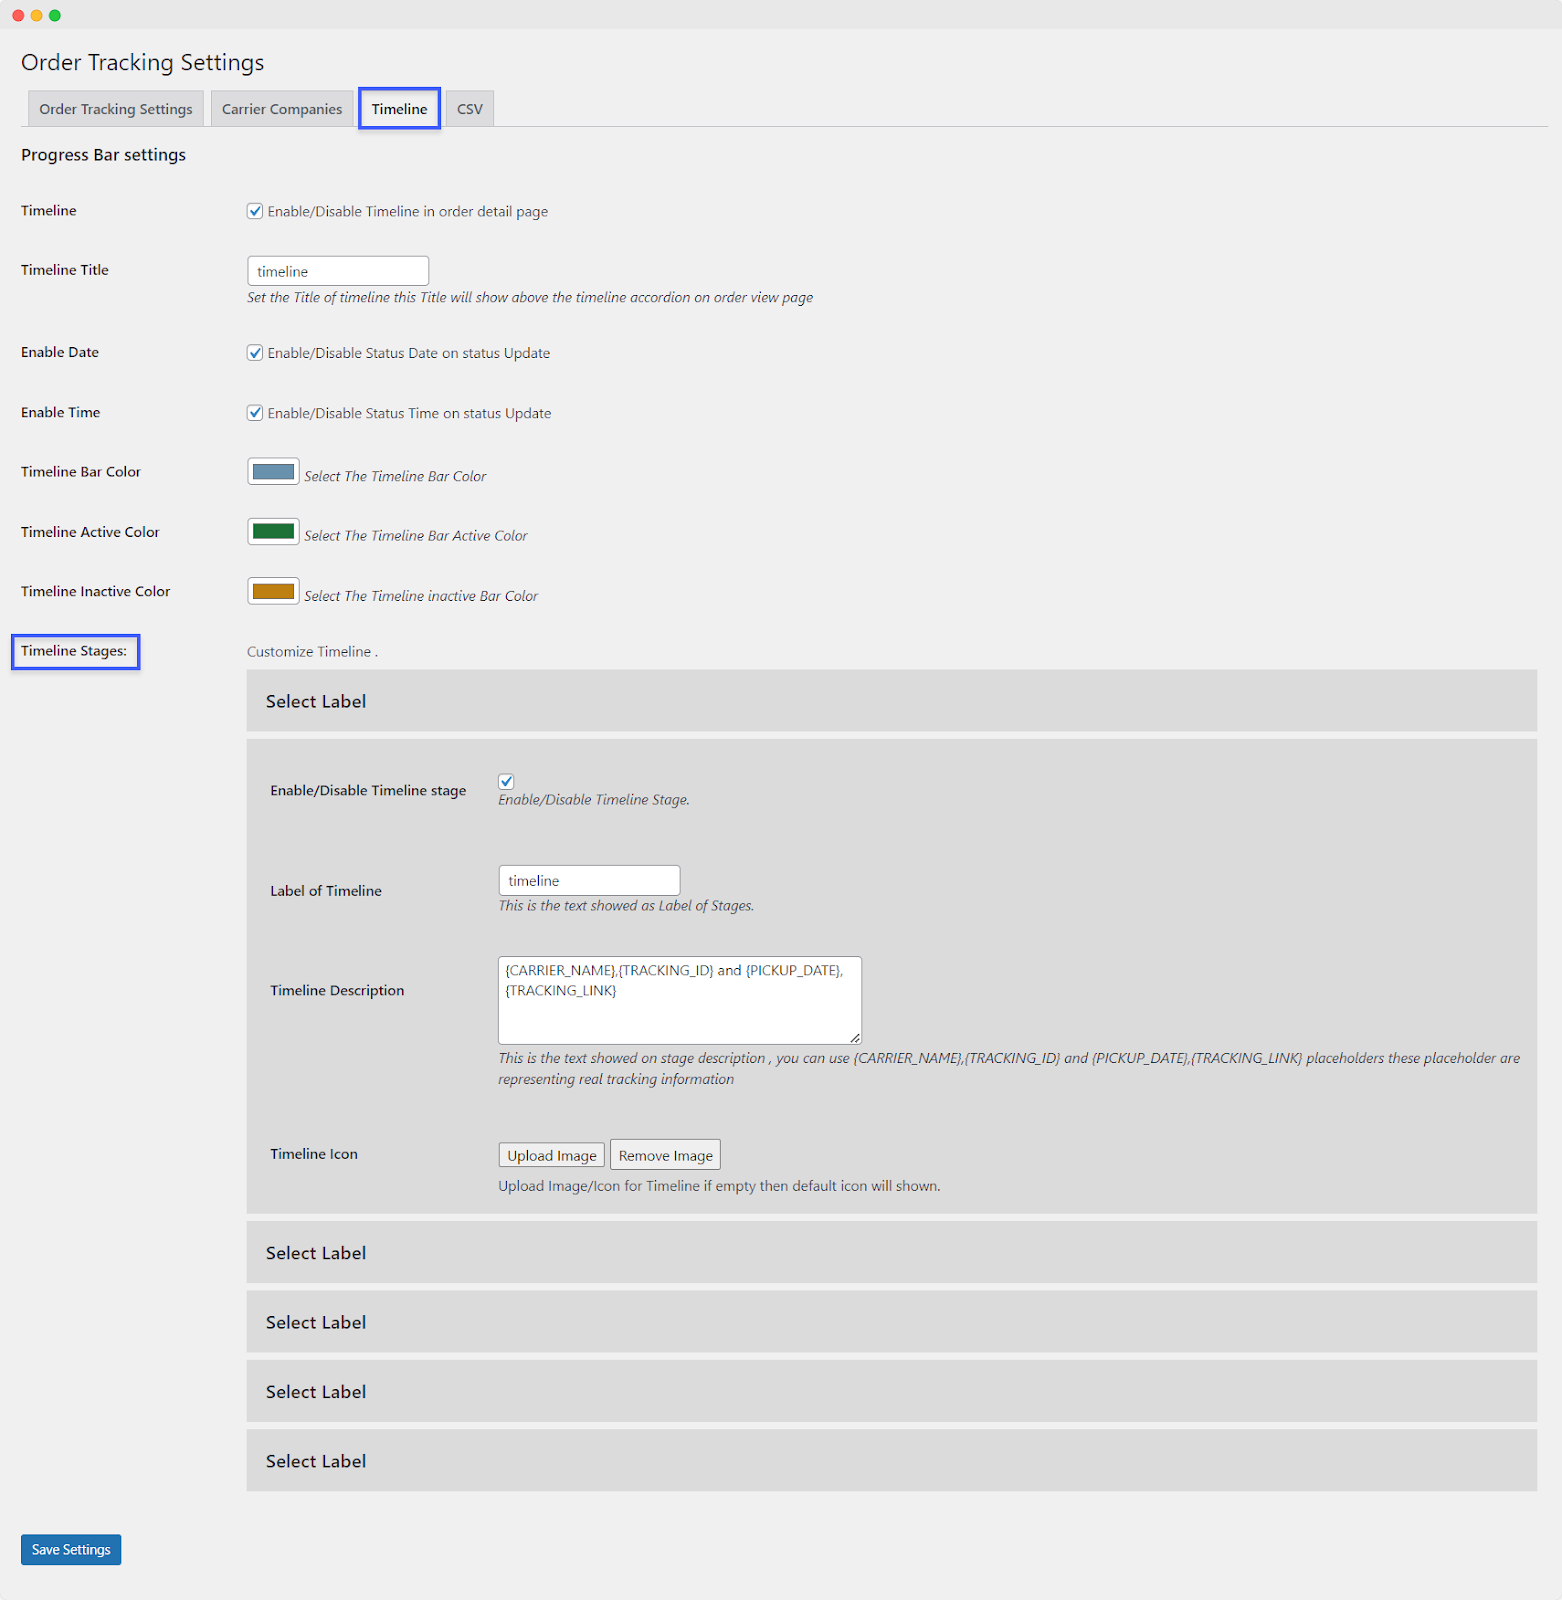
Displaying Customized Order Timelines
Go to WooCommerce > Order Tracking > Timeline.
In the Progress Bar Settings section, you can configure the following options:
Timeline: Toggle to enable or disable the timeline on the order detail page
Timeline Title: Set the title of the timeline. This title will be displayed above the timeline accordion on the order view page
Enable Date: Toggle to enable or disable the status date on status updates
Enable Time: Toggle to enable or disable the status time on status updates
Timeline Bar Color: Select the color for the timeline bar
Timeline Active Color: Select the color for the active timeline bar
Timeline Inactive Color: Select the color for the inactive timeline bar

Customizing the Timeline Stages
Go to WooCommerce > Order Tracking > Timeline.
In the Timeline Stages section, you can customize the timeline stages:
Enable/Disable Timeline Stage: Toggle to enable or disable a timeline stage
Label of Timeline: This is the text shown as the label of stages
Timeline Description: Customize the text shown on the stage description using placeholders like {CARRIER_NAME}, {TRACKING_ID}, {PICKUP_DATE}, and {TRACKING_LINK} to represent real tracking information
Timeline Icon: Upload an image/icon for the timeline stage. If left empty, the default icon will be used
Importing Tracking Info
Go to WooCommerce > Order Tracking > CSV to import tracking information for your WooCommerce orders.
Add CSV: Choose a file to add the CSV file
Upload CSV: Use the “Upload CSV” button to import the CSV file
CSV Format: Ensure that your CSV file follows the specified format with fields like:
- Order Id
- Shipping Id
- Carriers values
- Tracking Codes
- Shipping Date
- Shipping Status
- Order Pickup
Couriers Format: Couriers are displayed in the following format:
- Carriers Name
- Carriers values


