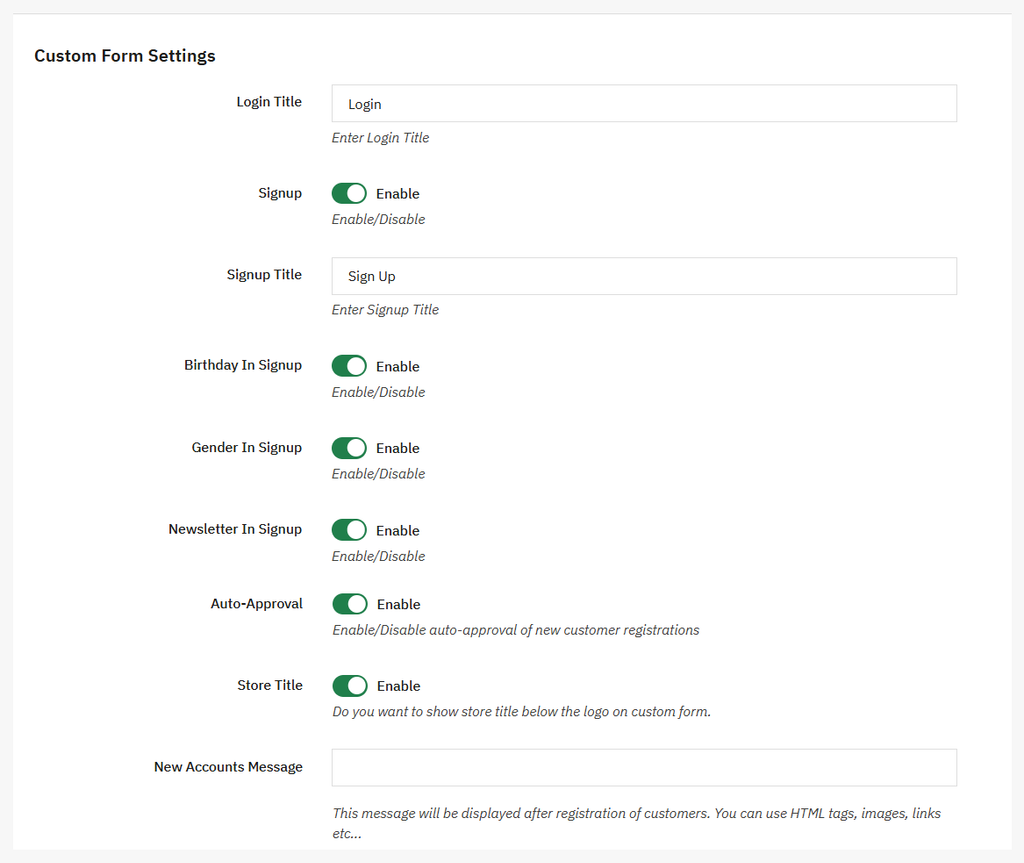
Click on the “Private Shop Settings” option and configure the following settings:
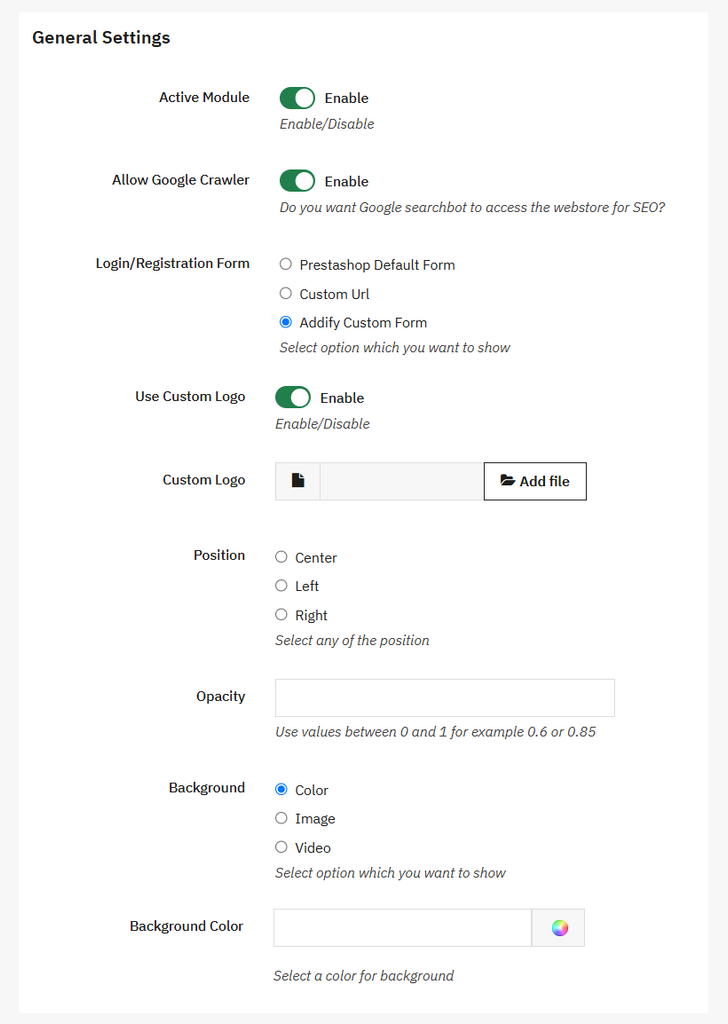
General Setting
Click on general settings on the side menu and apply the following settings:
- Active Module: Enable/disable this module as needed.
- Allow Google Crawler: Enable the Google crawler to access the restrict page for SEO.
- Login/Registration Form: Select the option of login/registration form based on your preference. You can add the:
- PrestaShop default form
- Custom URL
- Add custom form
- Use Custom logo: You can add the custom logo by enabling this option.
- Custom logo: Upload the custom logo.
- Position: Set the position of the form, such as center, left, or right.
- Opacity: Set the opacity by adding the values of 0 to 1, etc.
- Background: Set the background of the form, such as color, image, or video.
- If you select the color
- Background color: The background color field will open, where you can add a custom color for the background.
- If you select an image option:
- Background image: You can upload an image for the background.
- If you choose the video option:
- Background video: You can add the URL of a video or upload the complete video.
- If you select the color
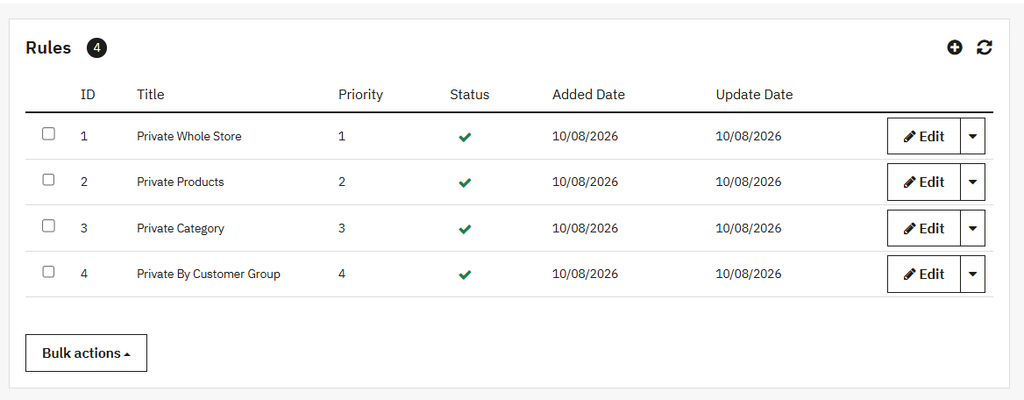
Private Shop Rules
Click to open the rule tab, where you can view the list of all existing rules in a grid and also create a new rule.
Grid View
- ID: Display the ruke ID.
- Title: Show the title of the rule.
- Priority: Show the rule priority.
- Status: Display the status of the rule.
- Added Date: Display the added date of the Rule.
- Update Date: Display the updated date of the Rule.
- Edit: You can edit existing rule.
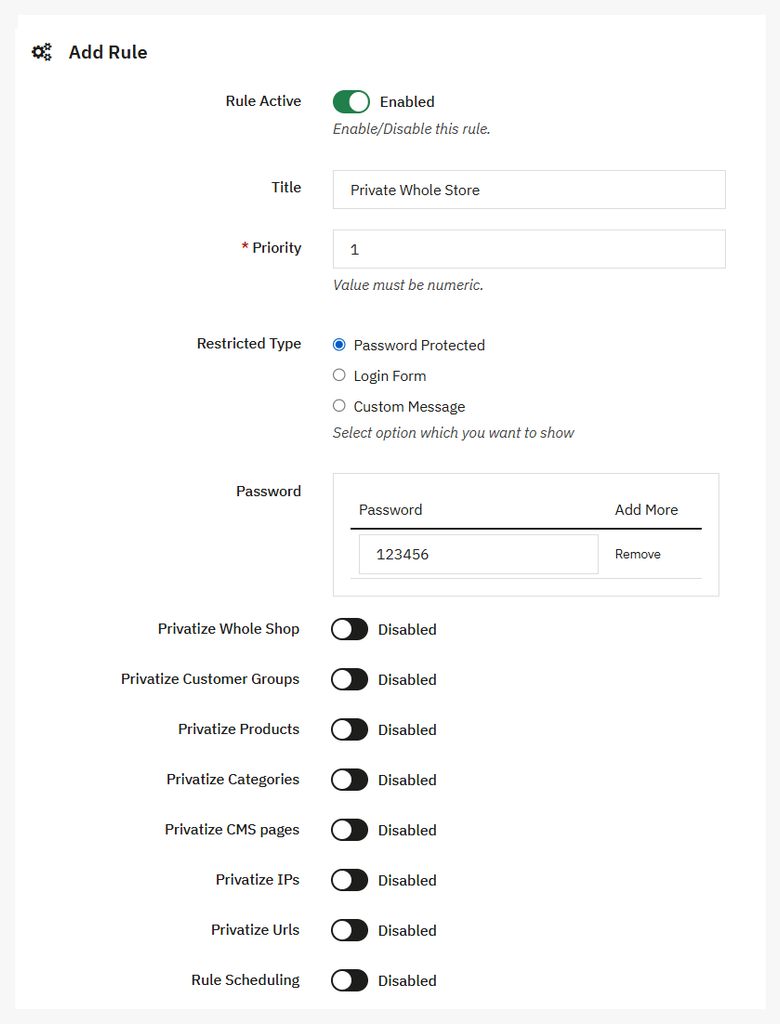
Creating New Private Shop Rule
Click on Add new button to create a new rule. To create a new rule, you can:
- Rule Active: Active/inactive the rule as needed.
- Title: Enter the custom title of the rule.
- Priority: Set the priority of the rule.
- Restricted type: Choose the type of restriction, such as password-protected, login form, or Custom message.
- If you select the password protection option, then you can:
- Password: Add the password for restriction
- If you select the Restricted message option, then you can:
- Restricted message: Add the custom message that informs the customer about the restriction.
- If you select the login form, then display the login form on the shop page.
- If you select the password protection option, then you can:
- Privatize Whole Shop: Privatize the shop/store, and only the specific customer can view this.
- Privatize Customer Groups: Specify the customers who can view the store. You can:
- Group: Select the specific customer from the list.
- Privatize Products: Restrict/Hide the specific product for a specific client or customer. To hide the product, you can:
- Search Product: Search specific product to privatize.
- Privatize Categories: Hide specific categories from the customer. You can:
- Category: Select the specific categories from the list.
- Privatize CMS pages: Restrict the CMS page for a specific user.
- CMS Pages: Select specific pages from the list.
- Privatize IPs: Enable this to privatize the specific IP address.
- IP Address: Add the specific IP address.
- Privatize URLs: Enable this to privatize the URL.
- URL: Add the specific URL.
- Rule Scheduling: Enable this to schedule the rule. To schedule the rule, you can:
- Rule Validity form: Add the ending date or form date of rule validity.
- Rule Validity To: Add the start or To date of rule validity.
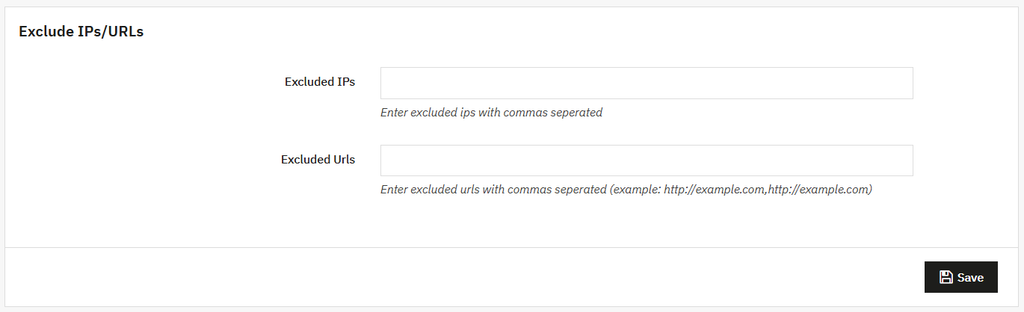
Exclude IPs/URL
Open the Exclude IPs/URL option to:
- Exclude IPs: Add the IP address that you want to exclude.
- Exclude URLs: Add the URLs to exclude.
Custom Form Settings
Click on this option and configure the following settings:
- Login Title: Add the login title of the form.
- Signup: Enable/disable the signup as needed. If enabled:
- Signup title: Enter the custom title of the signup.
- Birthday in signup: Enable/Disable the birthday signup.
- Gender in signup: Enable the Gender signup.
- Newsletter in signup: Enable the signup of Newsletter.
- Auto approval: Enable the auto-approval of new registered customers.
- Store Title: Enable the store title.
- Save: After applying all modifications, click on save button to implement them.