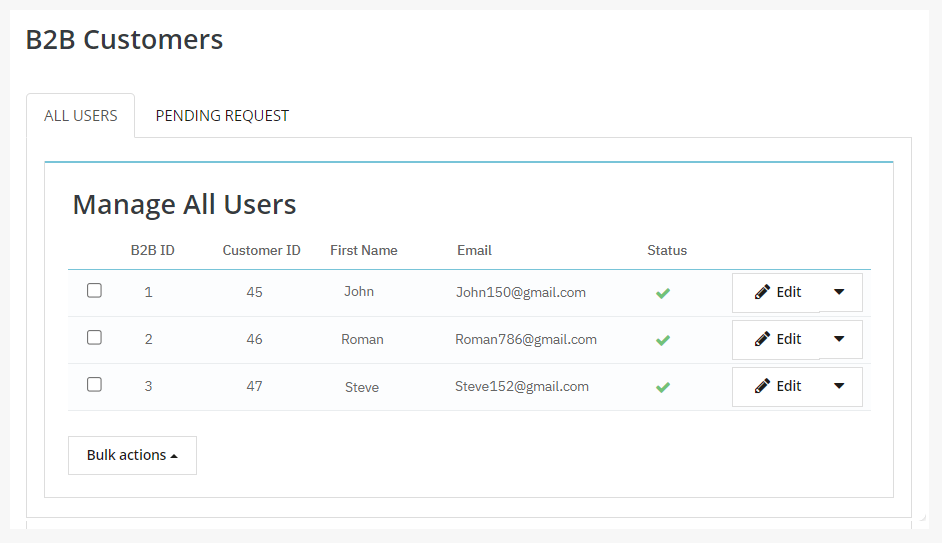
Open B2B Registration Setting to configure the following settings:
Configure General Setting
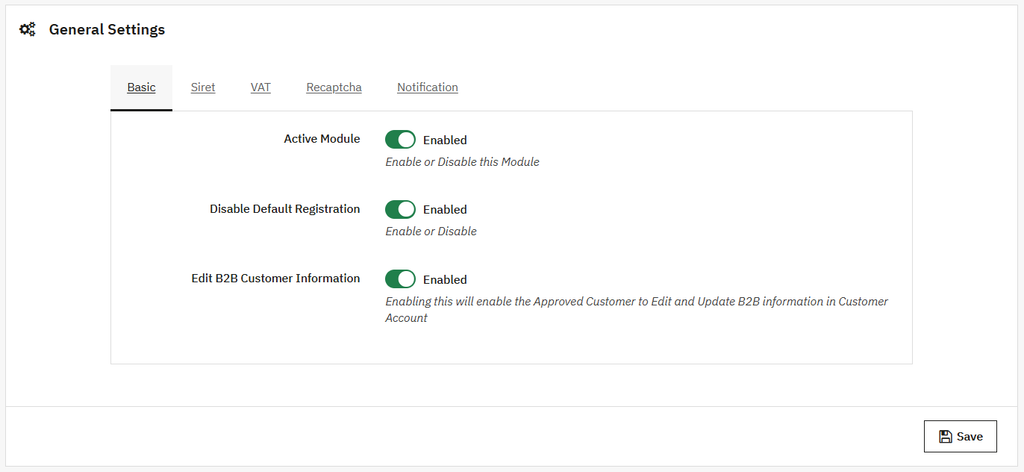
Basic
Click Apply, the basic setting, and you can:
- Active Module: Easily enable/disable this module.
- Disable Default Registration: You can easily enable/disable default registration as needed.
- Edit B2B customer information: Enable this option to edit the B2B customer information.
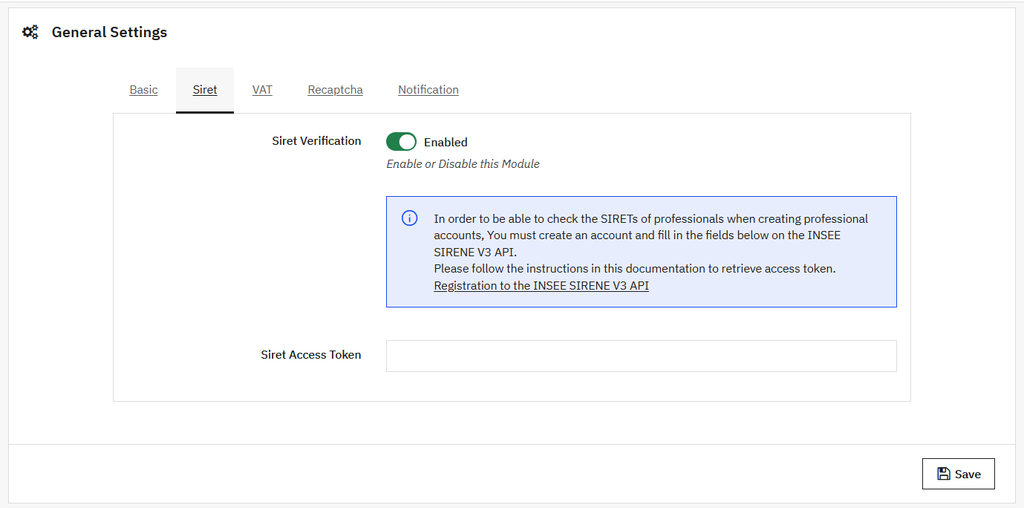
Siret
In this tab, you can:
- SIRET Verification: Easily enable/disable this module.
- SIRET Access Token: Add the SIRET access token.
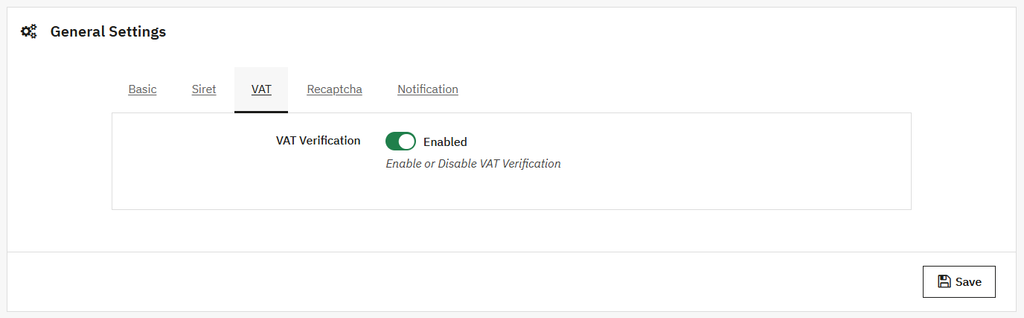
VAT:
In this tab, you can:
- VAT Verification: Enable/disable this module.
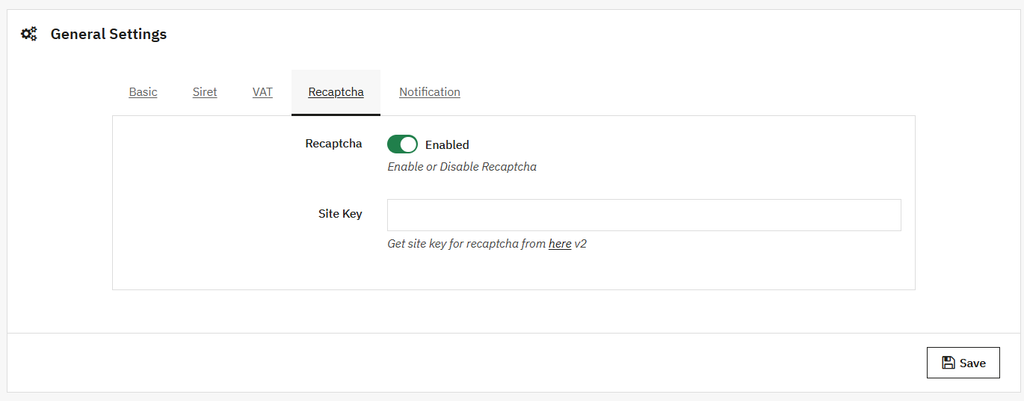
RECAPTCHA:
In this tab, you can:
- Recaptcha: Enable this module to implement the extra security.
- Site Key: Add the Site key for reCaptcha
Notification:
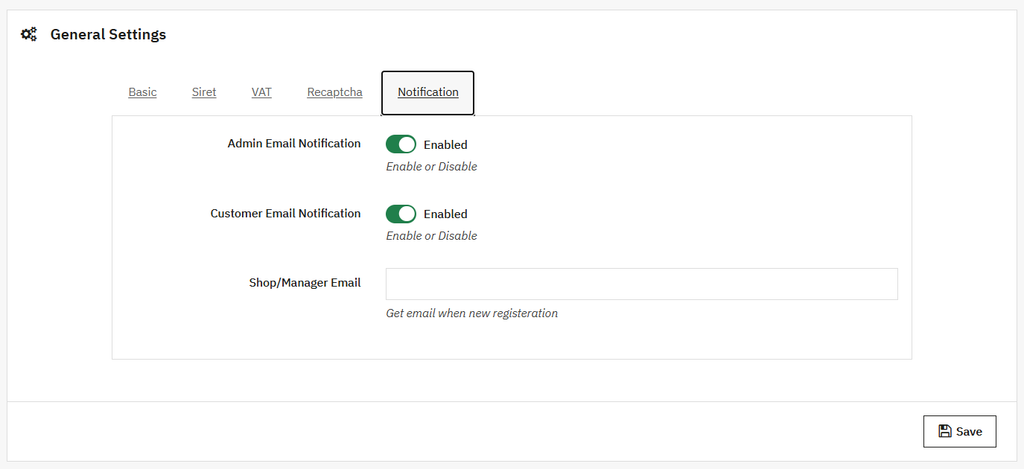
In this tab, you can:
- Admin Email Notification: Enable/Disable the admin email notification based on your preference.
- Customer Email Notification: Enable the customer email notification as needed.
- Shop/Manager Email: Add the email address of the Shop or manager.
Configuration Default Form
Apply the following settings to the default form.
BASIC Setting
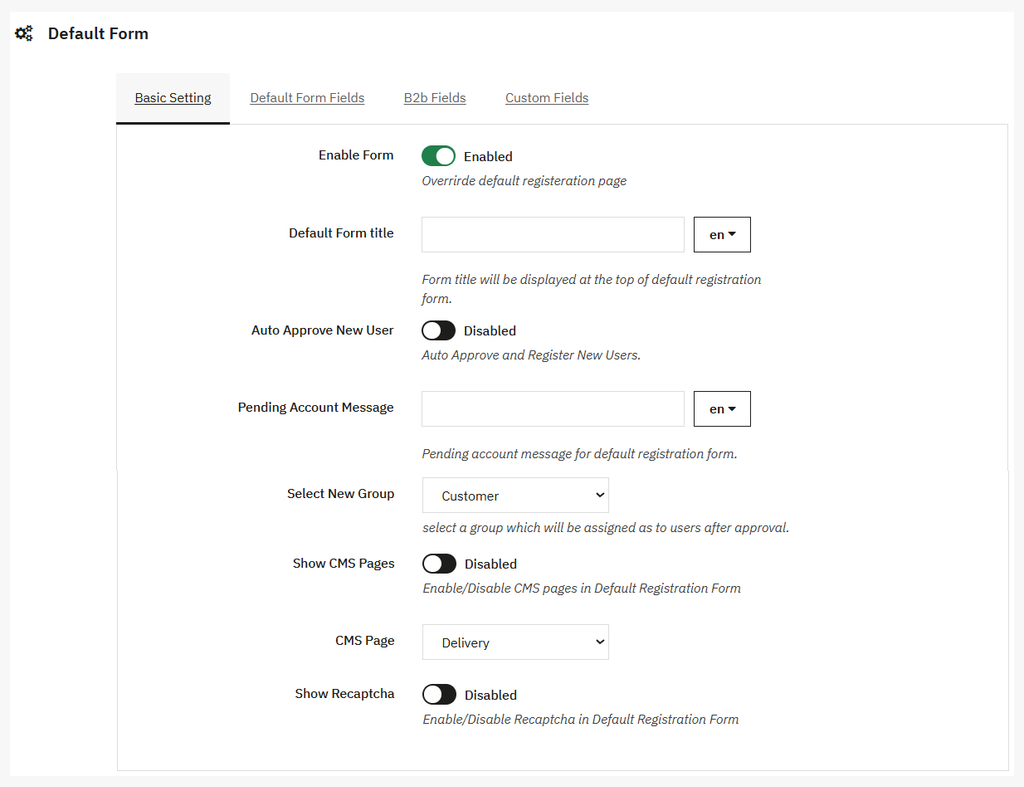
Click the basic settings tab to apply the following settings:
- Enable Form: Enable the default registration form.
- Default Form title: Add the custom title of the form.
- Auto approval New User: Enable the auto approval for registered new users.
- Pending Account Message: Add the custom message for the pending account.
- Select New Group: Select a new group that is assigned to the user after approval.
- Show CMS pages: Enable the CMS pages on the default registration form.
- CMS Pages: Select the CMS pages in a dropdown.
- Show ReCAPTCHA: Enable the ReCAPTCHA in the registration form for more security.
Default Form Field
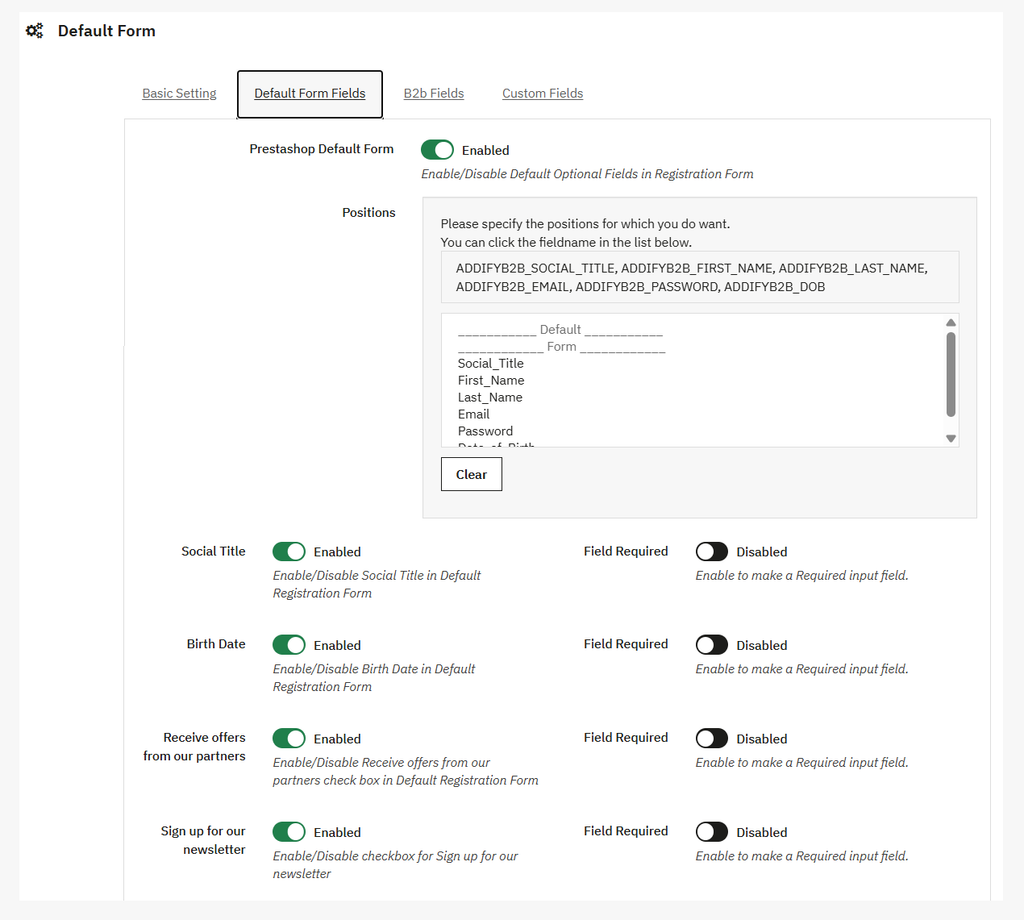
Open this tab and apply the following settings:
- PrestaShop Default Form: Enable the default registration form.
- Position: Specify the position of the field on the form.
- Social Title: Enable the social field on the form.
- Field Required: Enable this to make this field required.
- Birth Date: Enable this to show the Birthdate on the form.
- Field Required: Enable this to make this field required.
- Receive offers from our partners: Enable this to show the receive offer from our partner checkbox on the form.
- Field Required: Enable this to make this field required.
- Sign up for our newsletter: Enable this to show the newsletter field on the form.
- Field Required: Enable this to make this field required.
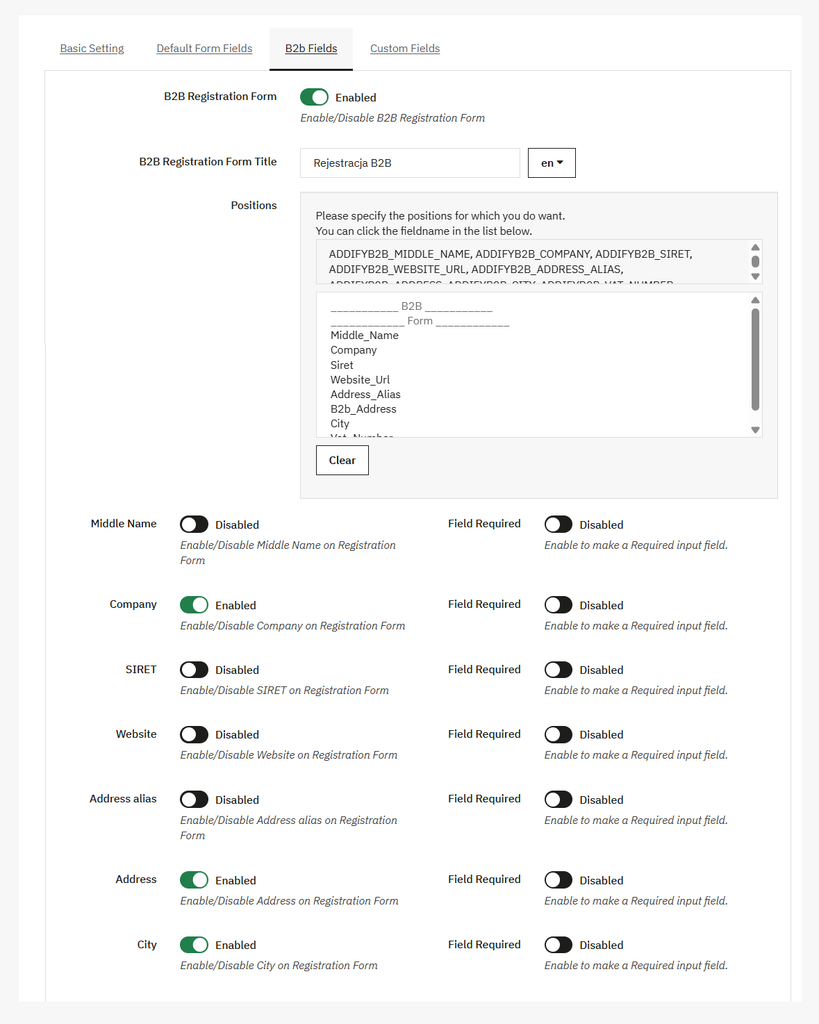
B2B Fields
Open this tab and configure the following settings:
- B2B Registration Form: Enable the B2B registration form.
- B2B registration title: Add the title of the registration form.
- Positions: Specify the position of the B2B field on the form.
- Middle Name: Enable the middle name field on the form.
- Field Required: Enable this to make this field required.
- Company: Enable the company field on the form.
- Field Required: Enable this to make this field required.
- Siret: Enable the Siret field on the form.
- Field Required: Enable this to make this field required.
- Website: Enable the website field on the form.
- Field Required: Enable this to make this field required.
- Address alias: Add the address alias field on the form.
- Field Required: Enable this to make this field required.
- Address: Enable the address field on the form.
- Field Required: Enable this to make this field required.
- City: Enable the city field on the form.
- Field Required: Enable this to make this field required.
- VAT Number: Enable the VAT number field on the form.
- Field Required: Enable this to make this field required.
Custom Fields:
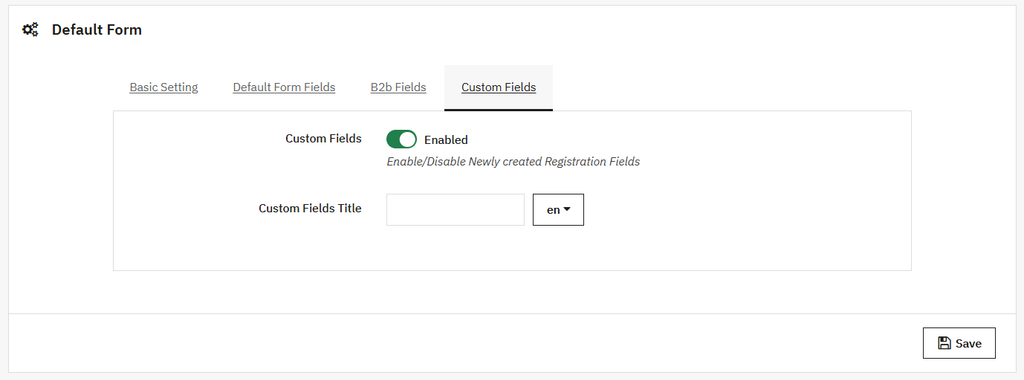
Open this tab and configure the following settings:
- Custom Fields: Enable or disable the custom field on the registration form.
- Custom field title: Add the title or label for the custom field.
Form Builder
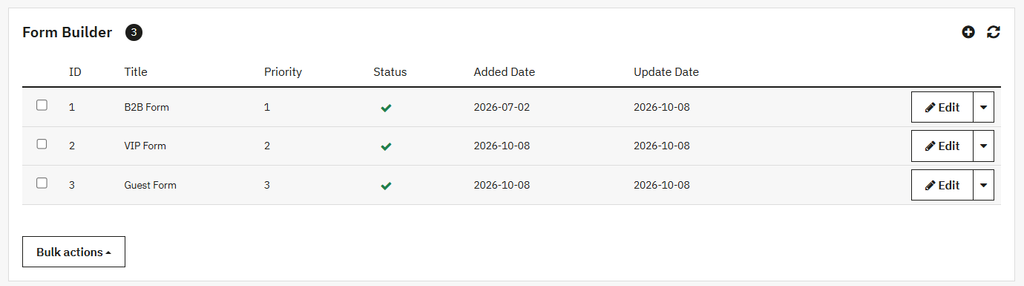
Open the Form Builder, where you can view all the existing forms in a grid layout and also create a new form
Grid Detail:
- ID: Display the Form ID.
- Title: Display the title of the form.
- Priority: Display the priority of the form.
- Status: Show the status of the form.
- Added Date: Show the added date of the form.
- Updated Date: Show the update date of the form.
- Edit: You can edit existing form.
Create New B2b Form
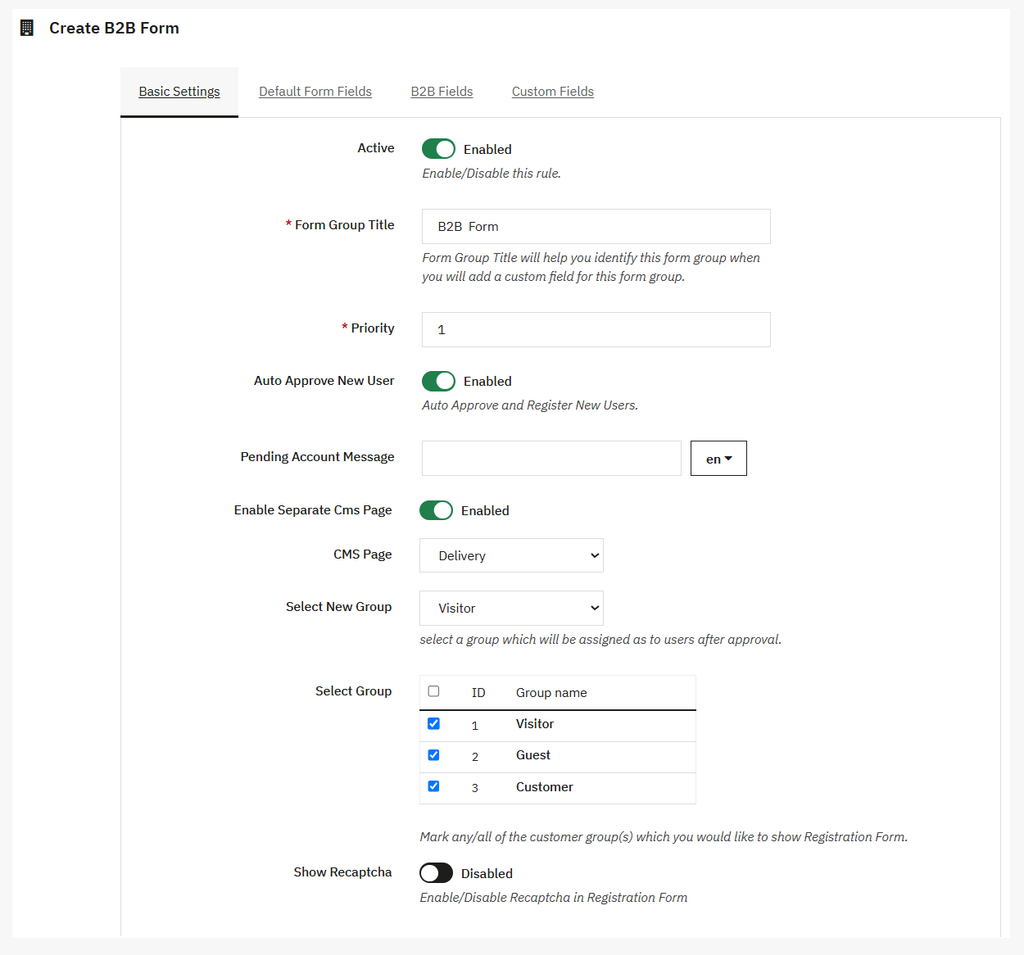
Click on Add new (+) icon to create a new form.
Basic Setting:
- Active: Easily enable/disable this rule.
- Form Group title: Add the title for the form group.
- Priority: Set the priority of the form.
- Auto-approve new user: Enable this option if you want to approve the registration of a new user automatically.
- Pending account message: Add the custom message for the pending account.
- Enable Separate CMS Page: Enable/Disable the separate CMS page.
- CMS pages: Add CMS page from the dropdown.
- Select New Group: Select the specific user who can view the registration form.
- Select Group: Select the specific customer group that can view the registration form.
- Show ReCAPTCHA: Enable the reCAPTCHA to make the registration form more secure.
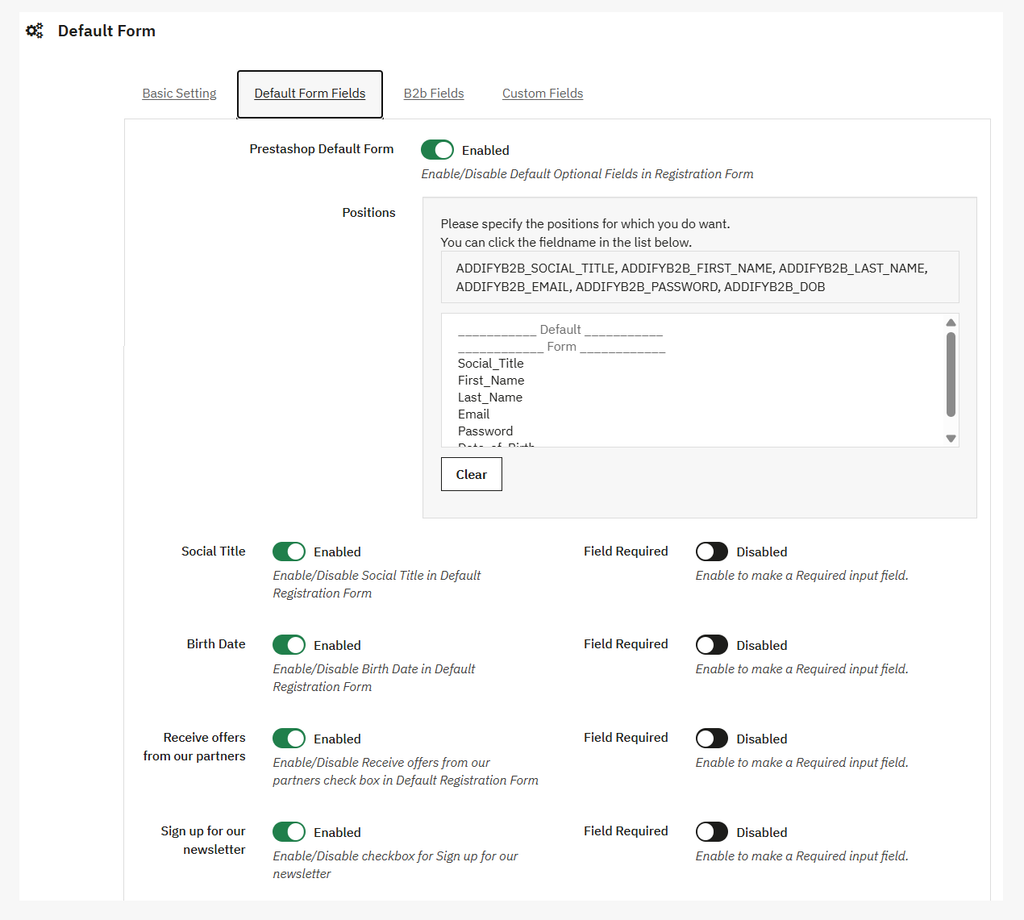
Default Form Field
Open this tab and apply the following settings:
- Default Form: Enable the default registration form.
- Default Form title: add the custom title for the default form.
- Position: Specify the position of the field on the form.
- Social Title: Enable the social field on the form.
- Field Required: Enable this to make this field required.
- Birth Date: Enable this to show the Birthdate on the form.
- Field Required: Enable this to make this field required.
- Receive offers from our partners: Enable this to show the receive offer from our partner checkbox on the form.
- Field Required: Enable this to make this field required.
- Sign up for our newsletter: Enable this to show the newsletter field on the form.
- Field Required: Enable this to make this field required.
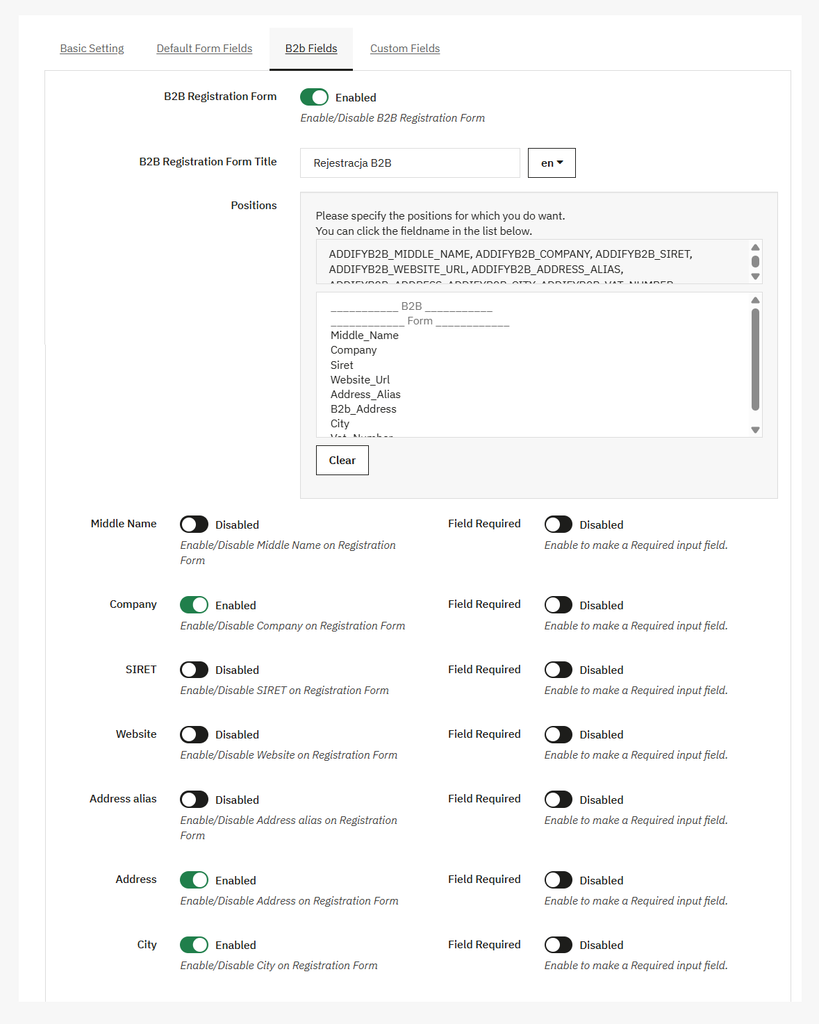
B2B Fields
Open this tab and configure the following settings:
- B2B Registration Form: Enable the B2B registration form.
- B2B registration title: Add the title of the registration form.
- Positions: Specify the position of the B2B field on the form.
- Middle Name: Enable the middle name field on the form.
- Field Required: Enable this to make this field required.
- Company: Enable the company field on the form.
- Field Required: Enable this to make this field required.
- Siret: Enable the Siret field on the form.
- Field Required: Enable this to make this field required.
- Website: Enable the website field on the form.
- Field Required: Enable this to make this field required.
- Address alias: Add the address alias field on the form.
- Field Required: Enable this to make this field required.
- Address: Enable the address field on the form.
- Field Required: Enable this to make this field required.
- City: Enable the city field on the form.
- Field Required: Enable this to make this field required.
- VAT Number: Enable the VAT number field on the form.
- Field Required: Enable this to make this field required.
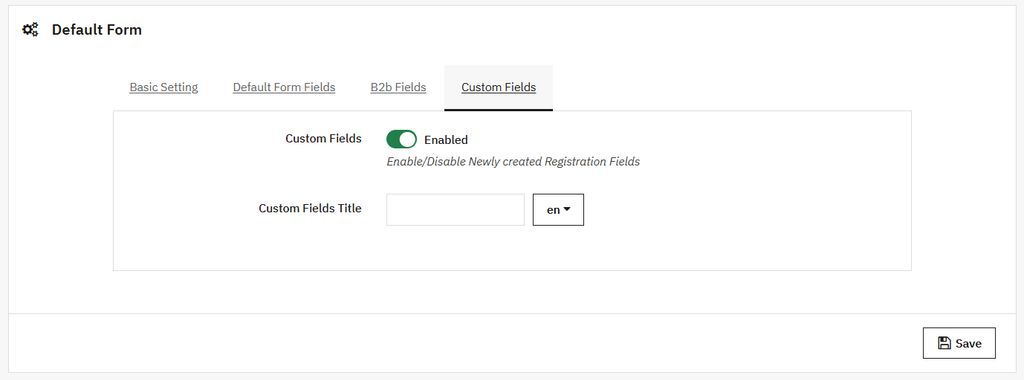
Custom Fields
Open this tab and configure the following settings:
- Custom Fields: Enable or disable the custom field on the registration form.
- Custom field title: Add the title or label for the custom field.
B2b Registration form Custom Fields
Click to open the custom fields view, where you can see all existing fields in a grid. You can also create new custom fields from this page
Grid Detail:
You can view the details of:
- Field ID: Show the ID of the field.
- Field Label: Display the field label.
- Field Status: Display the status of the field, such as enable/disable.
- Position: Show the position of the field.
- From Group ID: Show the ID of form Group.
- Field Type: Show the field type.
Image Mised
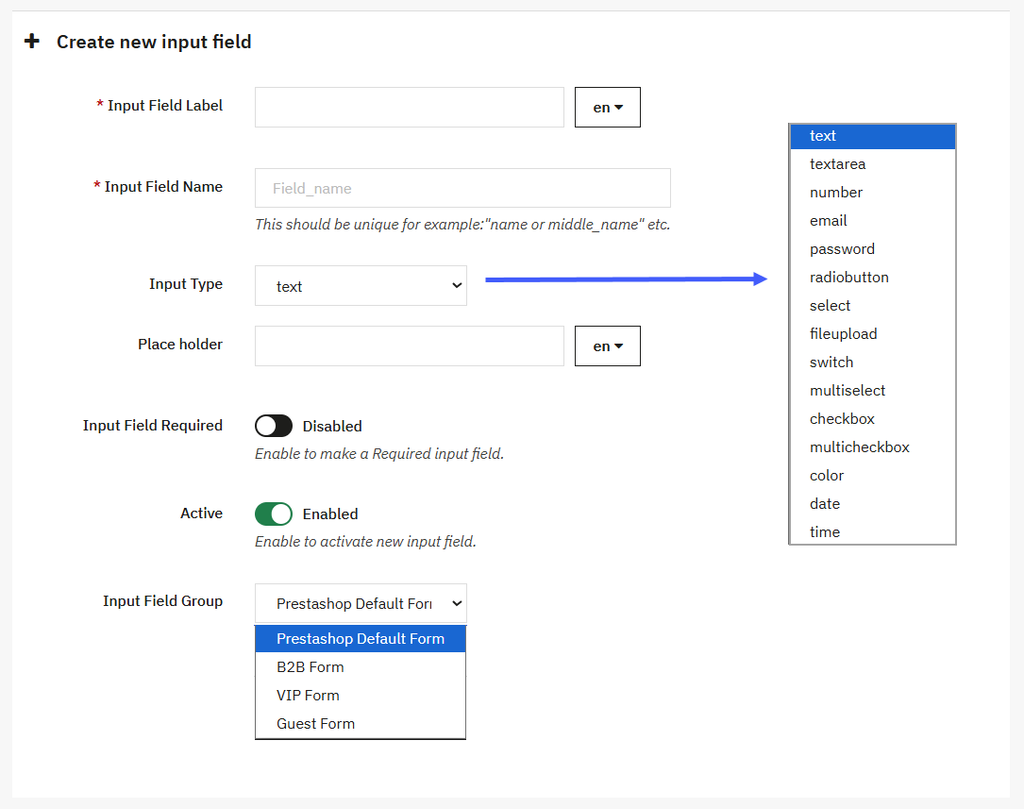
Create New Input Fields
Click on Add new button to create the following input fields:
- Input field label: Add the custom label for the input field.
- Input field Name: Enter the name of the field.
- Input type: Set the type of field.
- Placeholder: Add the text for the placeholder for better understanding.
- Input field required: Enable this to make the field required.
- Active: Enable this to active the input field.
- Input field Group: Select the input field group in a dropdown.
- Save: Click on the save button to apply them.
B2B Form Layout
Adjust the form layout by performing the following settings:
Customize Design
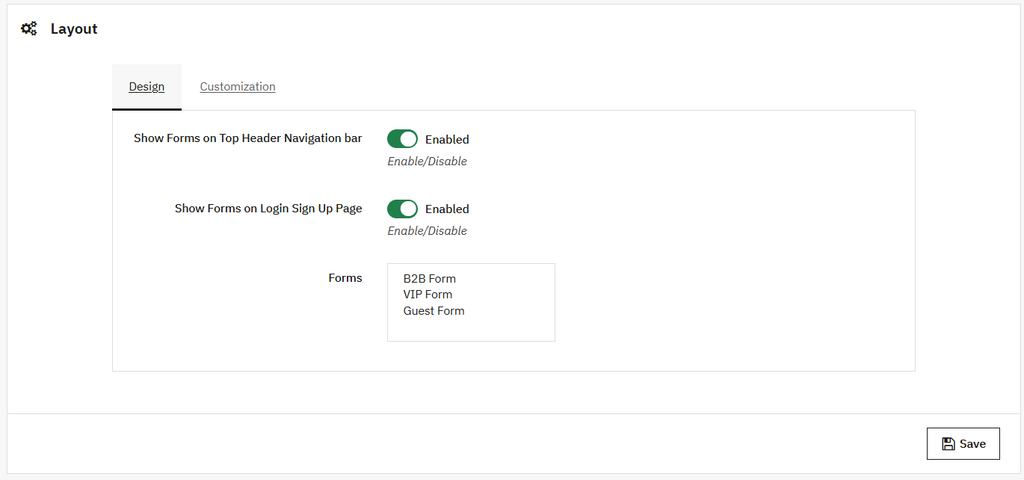
To design the form, you can:
- Show Form on Top Header Navigation bar: Enable this option to display the form in a navigation bar.
- Show Form on login/signup page: Enable this to display the registration form on the login or signup page.
- Forms: Add the name of the desired form.
Form Customization
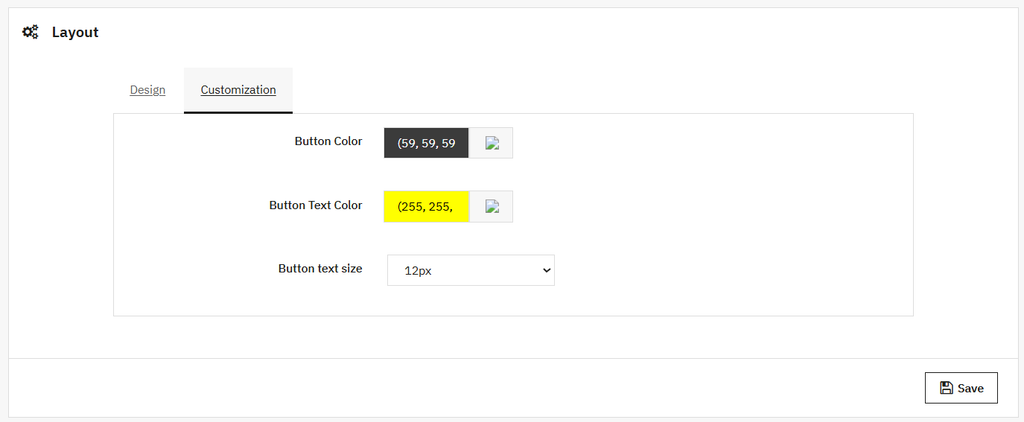
To customize the form, you can:
- Button color: Add the custom color for form buttons.
- Button Text color: Add the custom color for button text.
- Button text size: Adjust the size of button text.
B2B Customer Deatil Log
Maintain the logs of all B2B customers. You can view the details of:
All User (logs)
To customize the form, you can:
- B2B ID: Show the B2B ID.
- Customer ID: Show the customer ID.
- First Name: Display the first name of the customer.
- Email: Display the email of the customer.
- Status: Display the status of the customer.
Pending Request (logs)
Save the logs of all pending requests in a grid view. You cna view the details of:
- B2B ID: Show the B2B ID.
- Customer ID: Show the customer ID.
- First Name: Display the first name of the customer whose requests are pending.
- Email: Display the email of the pending request customers.
- Status: Display the status of the customer.