Custom Fields Log
Go to the side menu > click on the Custom fields option. Where you can easily view the
- Log of all created fields
- Add new (+) icon
- Bulk action

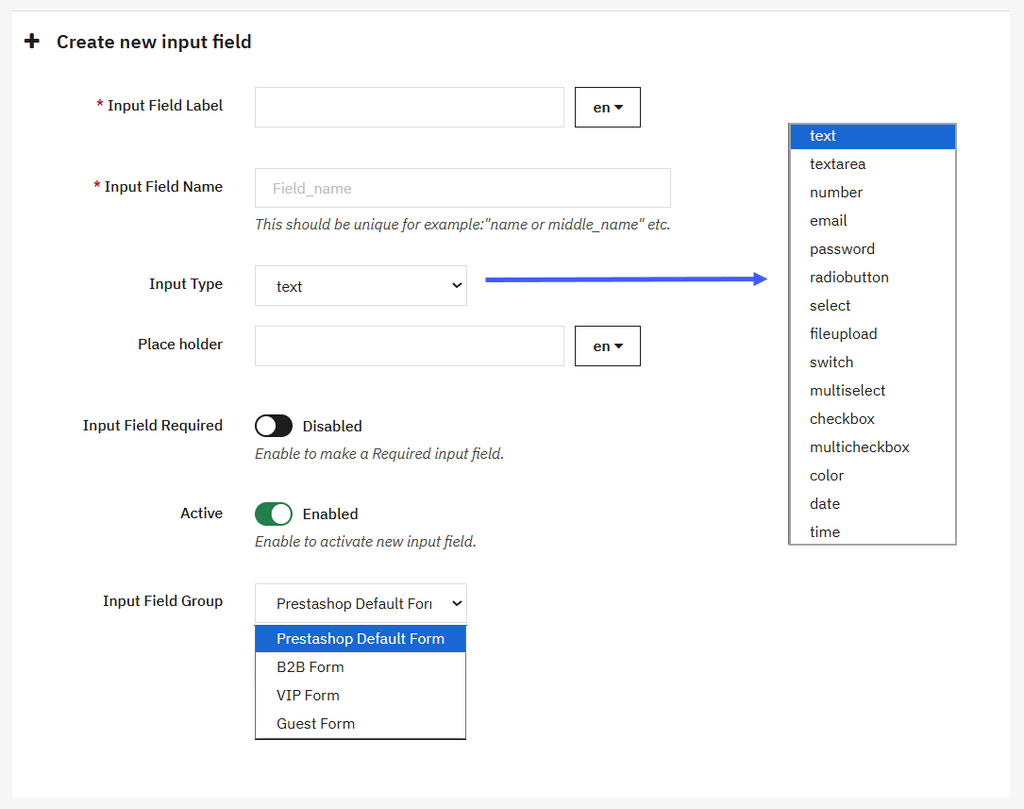
Creating New Custom Field
If you want to create a new custom field and click on the (+) icon, the system redirects you to the Create New input field view, where you can:
- Input field label: Enter the custom label for input fields.
- Input field name: Enter the name of the field , such as middle-name, etc.
- Input type: Set the type of fields in a dropdown, such as text field, numeric, checkbox, radio button, etc.
- Placeholder: Enter placeholder text, which is displayed inside the field.
- Input field required: Enable this option to make the field required or mandatory.
- Active: Enable this option to activate the new input field.
- Input field group: Set field group, such as B2B or B2C, from the dropdown menu.
- Dependent field: Enable this option if you want to make the field dependent on the other field.
- Save: Click on the save button to apply them.