
Click on the “Tax Exempt Setting” option and configure the following settings:
General Settings
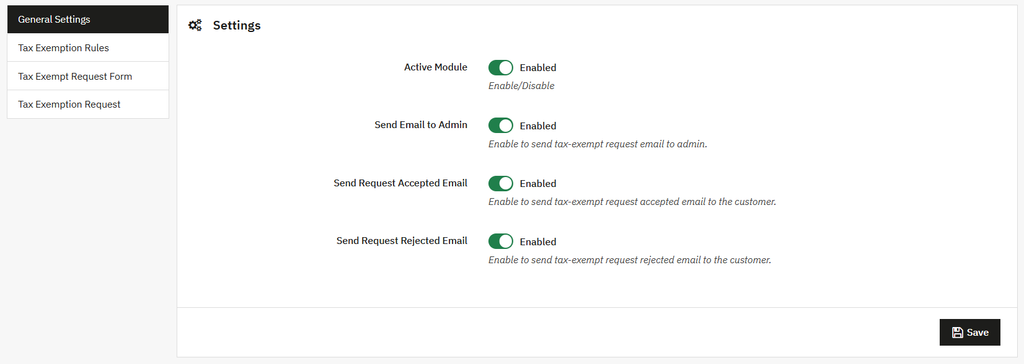
In the General setting, you can:
- Active Module: Active or Inactive the module as needed.
- Send Email to Admin: Enable this to send tax-exempt email to admin.
- Send Request Accept Email: Enable this to send the email when the tax-exempt request is accepted.
- Send Request Reject Email: Enable this to send the email when the tax-exempt request is rejected.
Tax Exempt Rules Log
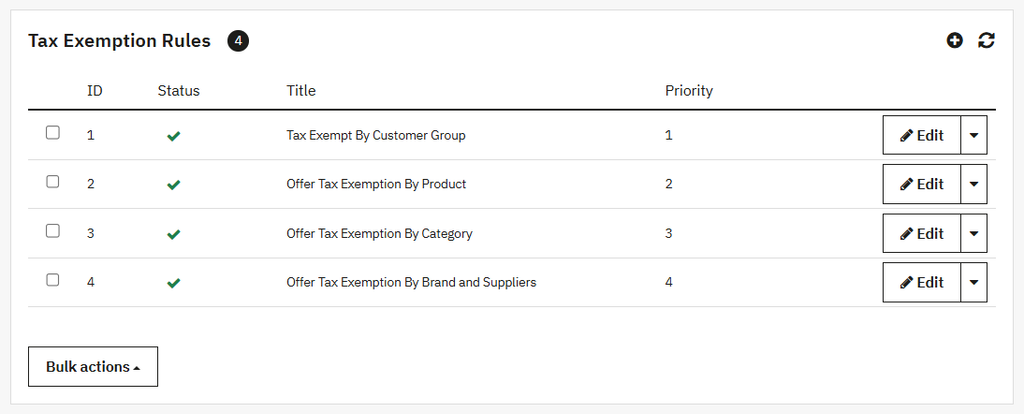
Click to open the rule tab, where you can view the list of all existing rules in a grid and also create a new rule.
Grid View:
In the Grid, you can view the details of:
- ID: Display the ID of the rule.
- Status: Display the status of the rule, such as approved, rejected, or pending, etc.
- Title: Display the title/name of the rule.
- Priority: Show the rule priority.
Creating New Tax Exempt Rule
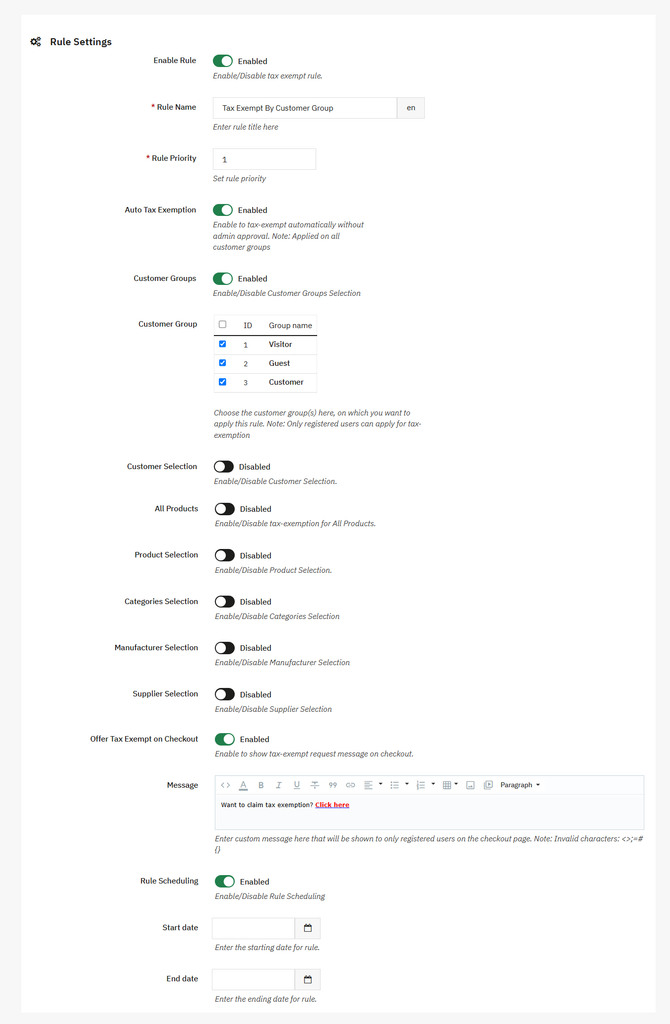
To create a new rule, you can:
- Enable Rule: Enable/Disable the tax-exempt rule.
- Rule Name: Enter the name of the rule.
- Rule Priority: Set the priority of the rule.
- Auto Tax-Exemption: Enable this option if you want to accept the tax rule automatically.
- Customer Group: Enable this to select the specific customer group for tax-exempt.
- Group: Choose the specific customer in a group who will be eligible for tax exemption.
- Customer selection: Enable the option to select the customer for tax exemption. You can:
- Search Customer: You can search for the customer and add them for tax exemption.
- All products: Enable this option if you want to apply the tax exemption rule for all products.
- Product Selection: Enable this to select the rule for a specific product. If enabled:
- Search Product: Search and add the specific product for tax exemption.
- Category Selection: Enable or disable this option as needed. If enabled:
- Categories: Select specific categories in a list for tax exemption.
- Supplier selection: Enable/Disable the Supplier section option. If enabled:
- Supplier: Choose a specific supplier for tax exemption.
- Manufacturer Selection: Enable the manufacturer option. Once enabled:
- Manufacturer: You can add the specific manufacturer for tax exemption.
- Offer tax exempt on checkout: Enable this to display the tax-exempt message on checkout. If enabled, you can:
- Message: Add the custom message that is shown only to the registered user.
- Rule Scheduling: Enable this to schedule the rule. To schedule the rule, you can:
- Rule Start Date: Add the start date of the rule.
- Rule End Date: Set the end date of the rule.
- Save: Click on save button to implement them.
Tax Exempt Request Form
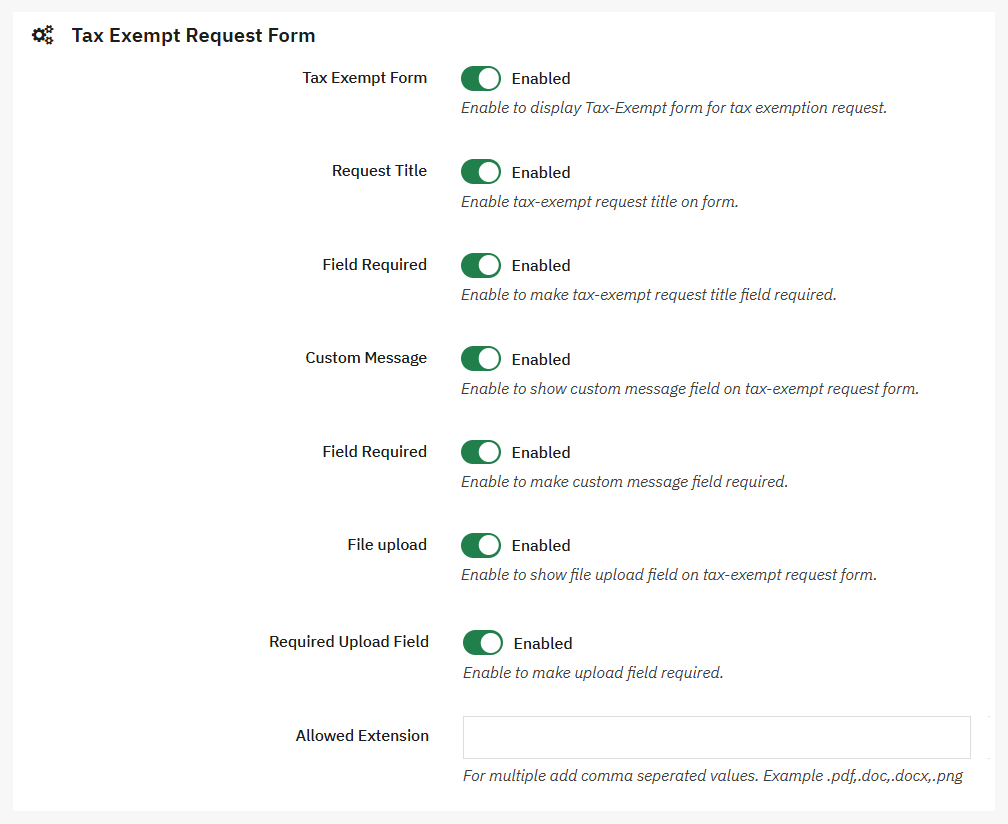
Open this option and perform the following settings:
- Text Exempt Form: Enable/Disable the text exempt form as needed.
- Request Title: Enable the title of the request. Once it is enabled, you can:
- Field Required: Enable this to make the title field mandatory.
- Custom Message: Enable this field to add the custom message. Once it is enabled, you can:
- Field Required: Enable this to make the title field mandatory.
- File upload: Enable the option to add the file upload option to the tax-exempt form. After enabling this field, you can:
- Required upload field: Enable this option to make this field mandatory.
- Allowed Extension: Allow to upload multiple doc, pdf, or images, etc.
Tax Exempt Requests
Click on the tax-exempt request option on the side menu. After opening this option, you can view the status of the request, such as:
- Approved Request
- Access Denied
- Pending Request